How to View Trail Camera Pictures on a Computer (Windows and Mac)
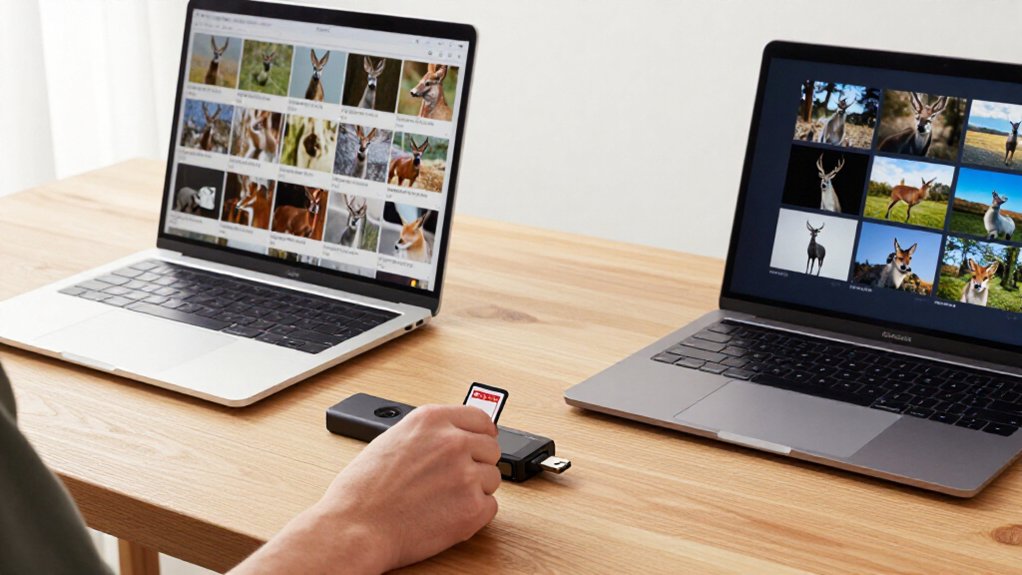
Power down your trail camera, wait for its lights to turn off, then release the SD card from its slot. Insert it into your computer’s SD slot or a USB card reader. On Windows, press Windows+E and open the card; on Mac, open Finder and select it under Locations.
Browse DCIM folders for JPG, AVI, or MP4 files. Check timestamps against camera’s clock, close files, and eject the card safely. Next, you’ll find troubleshooting steps.
Photos Display on Computer
To display trail-camera photos on your computer, remove the camera’s SD card and insert it into the computer’s SD card slot. Wait for the operating system to recognize the removable storage device. If no window opens automatically, open File Explorer in Windows or Finder on a Mac, then select the card from the available drives or locations list.
Open the folder containing the camera’s image files, typically identified by standard photo formats such as JPG or JPEG. Select a photo and open it with your preferred image viewer to inspect it at full size. Use thumbnail view to review multiple captures efficiently, then double-click individual files for detail. If your computer lacks an SD card slot, connect a compatible card reader, insert the card.
Locate the Camera’s SD Card
Before you can view the photos on a computer, remove the SD card from the trail camera safely. The card usually sits in a spring-loaded slot inside the camera housing, often near the battery compartment or control panel. Check the manual’s diagram if the slot isn’t immediately visible; placement varies by model.
- Open the housing carefully and identify the labeled SD-card slot.
- Confirm the card’s orientation before touching it.
- Press the exposed edge gently until the spring mechanism releases it.
- Catch the card as it extends, rather than letting it fall.
- Hold it only by its plastic edges, keeping metal contacts clean.
Avoid bending the card, touching its contact pads, or placing it on wet, dusty, or electrically charged surfaces. Store it securely afterward.
Step 1: Power Down the Camera
Power down the trail camera using its main power switch or control button before you remove the SD card. Do not open the card compartment or release the card while the camera is recording, detecting motion, saving an image, or displaying a status screen. Switching the unit off stops active write operations and reduces the risk of corrupted photo files, card-directory errors, or an unreadable SD card.
After moving the switch to Off, wait until the display and indicator LEDs stop. If your model has a power button, hold it only as long as its manual specifies, then confirm that the screen is blank. Once it is fully off, you can remove the SD card and prepare its pictures for transfer to your computer.
Step 2: Insert Card Into Reader
Remove the SD card from the powered-down trail camera, then insert it into your computer’s built-in SD card slot with the label facing the direction indicated by the slot. If your computer doesn’t have an SD card slot, use a compatible card reader. Insert the card into the reader using the same label orientation shown on its housing. Don’t force the card; align its notched edge correctly and press gently until it seats securely.
Connect the reader’s USB plug directly to an available computer port. Avoid loose adapters or damaged cables, which can interrupt access to the trail-camera files. Once connected, leave the card and reader undisturbed during file access. Verify the connection is firm before proceeding and keep the card dry and clean.
Step 3: Open File Explorer or Finder
Open File Explorer on Windows by clicking its taskbar icon or pressing Windows key + E; on a Mac, click the Finder face icon in the Dock. With the trail camera SD card already inserted in your computer or connected reader, wait a moment for the operating system to detect it. In Windows, select This PC in the navigation pane, then identify the removable drive by its label, capacity, or drive letter.
In Finder, check the Locations section of the sidebar and select the card’s name. If the card doesn’t appear, confirm the reader connection, reseat the card, and allow the device list to refresh. Don’t select your computer’s internal drive by mistake. Once you select the removable card, its contents become available immediately.
Step 4: Open the DCIM Folder
With the SD card selected, locate and double-click the DCIM folder, which typically contains the trail camera’s photos and videos. In Windows File Explorer or macOS Finder, this folder usually appears at the card’s top level, alongside any system or setup files.
Open it to inspect its contents. Many trail cameras create one or more subfolders within DCIM, often using numeric names or manufacturer-specific labels. Enter these folders until you find image and video files, such as JPG, JPEG, AVI, or MP4. If DCIM doesn’t appear at the SD card’s top level, review the folders shown there and open camera-media directories. Don’t rename, move, or delete folders while locating the files, since the camera may rely on its directory structure when it records media.
Step 5: Sort Photos by Capture Date
After locating the folder that contains your trail camera’s image files, change to a date-based view so you can review captures in chronological order. In Windows File Explorer, select View, then Details, and locate the Date taken column. Click its heading once to sort from oldest to newest; click it again to reverse the sequence.
On a Mac, open Finder’s View menu, choose as List, then click the Date Created heading. Use the heading’s sort control to set ascending or descending order. This view clarifies capture timing. If images don’t follow expected sequence, inspect timestamps carefully. Incorrect ordering usually indicates that the trail camera’s internal date or time was configured incorrectly when it recorded the photos. Correct its settings promptly before the next deployment.
Step 6: Safely Eject the SD Card
Before you disconnect the card reader, use your computer’s Eject or Safely Remove command to help prevent file corruption or data loss. On Windows, open File Explorer, locate the SD card, right-click it, and select Eject. Wait until Windows confirms that the device can be removed.
On a Mac, click the Eject icon beside the card in Finder, or drag the card’s icon to the Trash, which changes to an Eject symbol. Wait for the card to disappear from Finder.
If a copy operation remains active or your computer reports that the card is in use, don’t remove it yet. Let all transfers finish, close files open from the card, then eject it again. After the system safely ejects the card, unplug the reader and remove the SD card.
Confirm Timestamp Matches Camera Clock
Once the SD card is safely removed, verify that the photo timestamps align with the trail camera’s clock. Before comparing, confirm that the camera’s date, time, and time zone are set correctly. On your computer, select a recent image and inspect its timestamp in file details or a photo viewer. Compare it with the camera clock’s displayed value at the time of capture.
If the computer and camera use different time zones, account for the offset, since viewing software may display the file time in the computer’s local zone. Check several images. A consistent offset indicates the camera clock needs correction. Set the correct date, time, and time zone before the next deployment. This change affects future photos and won’t alter timestamps in existing files.
Unreadable Card: Run Disk Repair
If your computer can’t read the trail-camera SD card, connect it through a built-in card slot or a reliable SD card reader and run the operating system’s disk-repair utility. On Windows, open File Explorer, right-click the card, select Properties, then Tools and Check; follow repair prompts. On a Mac, open Disk Utility, select the card or its volume, and run First Aid.
| System | Tool | Action |
|---|---|---|
| Windows | File Explorer | Properties > Tools > Check |
| Mac | Disk Utility | Select card, then First Aid |
If you see a format request, cancel it immediately because formatting can erase your trail-camera pictures. When repair finishes, safely eject and reconnect the card, then test access. If files remain unreadable, don’t write, delete, or capture new images on the card until recovery begins.
Store Cards in Waterproof Cases
A waterproof, sealable SD-card case protects trail-camera cards from rain, spills, and humid air during transport and storage. Before inserting a card, make sure it is completely dry. Don’t seal moisture inside the case; trapped water can corrode contacts or contribute to read errors.
Assign each card to a labeled slot using camera location, deployment date, or card number, so you’ll know which footage to import when you return to your computer. Carry the case while you collect cards rather than placing removed cards in a pocket or pack, particularly during wet or humid weather. After loading or removing a card, press the case shut fully. Inspect gasket and latch, remove debris, and replace the case if its seal has cracks, wear, or damage.
Conclusion
How to View Trail Camera Pictures on a Computer (Windows and Mac)
Viewing trail camera pictures on your Windows PC or Mac stays simple when you handle the SD card carefully. Power down the camera, use a compatible reader, and copy files before editing or deleting them. Verify timestamps against the camera clock so you can trust each image’s sequence. If your computer can’t read the card, run Disk Repair or another appropriate utility. Always eject it safely, then return it to a labeled waterproof case promptly.