When to Put Out Mineral Licks for Deer: Best Months for Antler Growth

Put out deer mineral licks in February or March, after the rut and before spring forage accelerates. This timing supports the February to July use period and the peak April to June antler-growth window, when bucks need dietary calcium and phosphorus.
Choose a legal, well-drained site above seasonal flood lines, clear debris, and mix mineral into exposed soil before a slow rain. Check cameras and tracks after rain, then maintain it as use increases. You’ll find monitoring details below.
Spring Antler Support for Managers
For managers, late winter through early spring is the most strategic time to establish mineral sites, ideally beginning in February or March. You’re supporting deer as they recover from the rut and shift onto rapidly greening forage, which can elevate demand for sodium, potassium, calcium, and phosphorus. This timing precedes the principal antler-growth window: bucks typically initiate new antlers in April, and growth continues through June and beyond.
Yearlings may add roughly three-quarters inch weekly, while adults can add about 1½ inches. Prioritize calcium and phosphorus, because mature antlers contain about 19% calcium and 10% phosphorus. Dietary supply is essential during active growth; stored body minerals alone can’t meet the requirement. Keep sites replenished consistently from February through July, using well-drained locations.
Confirm Local Mineral Site Laws
Before you stock or refresh a mineral site, verify the rules that govern minerals, baiting, and attractants in your state, county, and specific property. Regulations can differ across boundaries and seasons, so treat agency guidance as part of responsible wildlife management.
- Check whether your jurisdiction classifies mineral mixes, blocks, rocks, or loose pellets as bait or attractants.
- Identify any permit requirements and legal windows that limit placement or maintenance.
- Obtain written permission before placing minerals on public land, shared easements, or property you don’t solely control.
- Record approved site locations and observations consistently from year to year.
This process reduces enforcement risk while supporting sound monitoring. Stable, legal locations let you compare visitation patterns without moving a confounding variable, and protect natural deer behavior.
March-to-August Mineral Timing
Begin mineral-site maintenance in late winter or early spring, typically February to March, when deer recover from the rut and newly greening, water-rich forage can increase sodium and potassium demand. During April to June, keep access consistent: yearling bucks may add about three-quarters inch weekly, while adults can add roughly 1 1/2 inches, increasing calcium and phosphorus needs. From June to mid-August, restock regularly; nursing does and moisture-dense forage elevate demand and sodium-deficiency risk.
| Period | Your action |
|---|---|
| April to June | Replenish routinely for antler growth. |
| June to mid-August | Maintain supply for lactation and sodium balance. |
Clear Soil, Then Add Minerals
Remove leaves and debris to expose bare soil, then level the ground in a well-drained area with established deer traffic. You’ll improve mineral contact by spreading the product evenly across the disturbed soil and lightly incorporating it.
This preparation helps keep minerals accessible while reducing runoff and supporting consistent lick use.
Remove Leaves And Debris
Once you’ve selected a well-drained, high-traffic location, rake away leaves, needles, and loose debris to expose clean mineral soil. This cleanup gives deer direct access to the site rather than a surface layer of litter, which can dilute or obstruct contact with added minerals. It also lets you identify existing hoof marks, pawed patches, and licking activity, useful indicators that deer already travel through the area.
Remove organic material gently and scatter it nearby, where it can continue contributing to nutrient cycling and moisture retention. Schedule this step in late winter or early spring, when frozen or saturated ground has eased enough to work and browse remains limited before green-up. Clean preparation supports a durable lick as spring movement increases without smothering the site.
Expose Bare Soil
With the surface litter cleared, use a shovel or garden hoe to loosen and expose a patch of bare mineral soil in the well-drained travel area. Choose a location with consistent deer movement, yet avoid runoff-prone ground, because well-aerated soil retains the site’s structure while reducing mineral loss.
Work the upper soil layer enough to create a receptive matrix for the product. Then blend loose mineral or granules directly into the exposed soil rather than leaving them as a surface layer. This increases contact with the mineral-soil mixture deer naturally lick and consume.
Prepare the patch just ahead of a slow rain, which helps settle particles. Once deer locate it, hang trail cameras promptly to document fresh visitation and use patterns at the site.
Level The Ground
Next, level the exposed patch with a shovel or garden hoe, removing roots, rocks, and uneven clods that could limit access to the mineralized soil. A smooth, bare surface lets deer locate and work the treated soil without obstacles, while disturbance improves contact between mineral particles and soil. Don’t simply dump product on top; mix it thoroughly into the loosened layer so deer consume a consistent mineral-soil blend as they lick and mouth the site.
Prepare the patch before spring demand rises in February or March, when nutritional recovery and antler growth intensify. Reuse the same maintained location each year and refresh its mineral supply after establishment. Stable placement and cleared soil reinforce return visits, letting you monitor use while limiting habitat disruption.
Choose Well-Drained Areas
Choose a well-drained location where deer can access exposed soil reliably, because mineral patches that remain muddy receive less consistent use and lose product to runoff. Select ground with enough elevation or natural drainage to shed rainfall without becoming saturated. Clear leaf litter, vegetation, and loose debris until clean mineral soil is visible. Then use a shovel or garden hoe to loosen the upper soil layer.
Working the dirt improves contact between the mineral material and soil particles, helping retain the amendment rather than leaving it vulnerable on the surface. Schedule installation just before a gentle, slow rain; moderate moisture helps move dissolved minerals into the disturbed soil while avoiding erosive flow. Once deer begin visiting, place a trail camera nearby to document use.
Spread Minerals Evenly
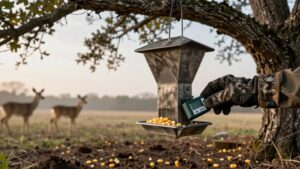
Start by clearing leaf litter, vegetation, and loose debris until bare mineral soil is exposed, then loosen the top few inches with a shovel or garden hoe. In a well-drained area that deer already travel, spread loose mineral evenly across the disturbed surface and work it into the soil.
Mixing granules rather than leaving them on top lets deer consume a mineral-soil blend and may increase use. Establish the lick in late winter or early spring, often beginning in February, when nutritional demand rises alongside antler development.
Keep applications within the prepared patch so mineral availability remains accessible and consistent. Reuse the same site each year; repeated location cues can help deer learn it. Once deer begin visiting, hang a trail camera immediately nearby.
Move Sites Above Flood Lines
Before placing minerals, identify the highest seasonal flood line and choose well-drained ground above it. You’ll limit runoff and sediment loss, keeping minerals incorporated in usable soil rather than a mud trap.
A dry, accessible site also supports consistent deer traffic and clearer trail-camera monitoring.
Identify Seasonal Flood Elevations
Map the highest seasonal waterline on your property, then place each mineral lick above the elevation likely to flood in late winter and early spring. This timing matters because deer increase mineral use from February through July, with recovery and early antler growth concentrating demand in February and March. Treat low benches, swales, and stream-adjacent ground as off-limits during that period.
Scout after winter thaw and heavy rain, noting debris lines, saturated vegetation, pooled water, and soil staining that mark peak inundation. Use topographic maps and repeated field observations to identify the highest credible waterline. Then select well-drained uplands with established deer traffic and verify visits with trail cameras after storms. If you can’t keep it dry, relocate higher near bedding or travel routes.
Protect Mineral From Runoff
Once you’ve identified the highest seasonal waterline, move each mineral lick onto well-drained ground above it, where rainfall drains away rather than carrying dissolved minerals downslope.
Select sites with steady deer traffic but little surface flow, avoiding depressions and runoff-collecting travel corridors. Late-winter or early-spring placement aligns with increasing use; a slow rain may aid discovery, but heavy spring storms mustn’t leach the mix. Keep the location consistent to preserve a reliable resource.
Monitor the soil after wet weather: refresh minerals only when wash-off visibly reduces the deposit. Trail cameras can document continued, year-round visits after deer locate the lick, helping you verify that elevated placement retains mineral availability despite rainfall and supports repeated use within the local deer population over time without frequent site disturbance.
Maintain Dry Site Access
Keep the mineral lick above the local flood line on firm, well-drained ground, so spring rain doesn’t dissolve the deposit, create slippery access, or temporarily cut deer off from it.
Place or refresh mineral on dry ground near cover, such as a tree or stump, where deer can approach securely after a slow rain. Choose locations that retain steady late-winter and early-spring traffic, when deer increase use before green-up supplies abundant browse. Check each site promptly after storms. If water pools, mud develops, or access narrows, relocate the deposit uphill rather than waiting for drainage.
A stable, dry location supports repeat visits because deer can learn predictable access. It also improves trail-camera detection and lets you evaluate use in seasonal records more accurately.
Fresh Tracks After Rain
Fresh tracks often appear soon after a light rain, especially from late winter into early spring, when deer seek supplemental minerals while browse remains limited before green-up.
Put mineral out just ahead of a slow rain, which wets the soil and may make the site easier for deer to detect. Select a well-drained location on an travel route; rainfall can increase attention, but persistent mud limits access and obscures track interpretation.
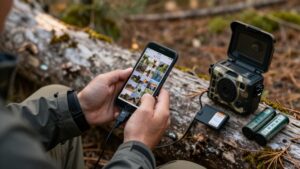
Once you find post-rain tracks, install trail cameras to document visits and identify timing of repeat use. Monitor traffic across rain events rather than treating one observation as a trend.
As use becomes consistent, top off mineral at the same site. Reliable access, light wetting, and seasonal forage scarcity together support recurring tracks.
Report Drooling, Stumbling Deer
Trail-camera monitoring should also flag abnormal behavior: drooling, stumbling, marked weakness, or several affected deer can indicate illness rather than mineral use. Don’t interpret these signs as normal responses to a lick or as part of antler growth. Although deer commonly use mineral sites from February through July, and bucks may grow antlers rapidly during April through June, neurologic impairment and excessive salivation require a different response.
Review camera images for cases, note dates, locations, numbers affected, and symptoms, and avoid handling or approaching animals. If you observe drooling, stumbling, or weakness, especially in more than one deer, contact your state or provincial wildlife agency promptly. Suspend site-focused observation if officials advise it. Early reporting helps biologists investigate disease events, limit disturbance, and protect deer populations.
Avoid Salt-Only Mineral Mixes
Choose a deer-specific mineral formulation with enough sodium to drive regular use, rather than relying on salt-only blocks or “salt-free” mineral blends. Deer often reject pure mineral mixtures because calcium, phosphorus, and trace elements taste bitter. Yet salt alone doesn’t provide the broader nutrients associated with antler formation and reproduction.
- Select a deer lick product containing sodium plus a balanced mineral package.
- Favor spring and summer formulas with adequate sodium, when lush, potassium-rich forage and high water intake can increase sodium shortfall.
- Use evidence to guide your choice: Tennessee research found higher-salt formulations drew more than four times as many daily visits as lower-salt products at baited sites.
- Place the formulation where deer can access it without concentrating use near sensitive streams or wetlands.
Log Trail-Camera Visit Patterns
Once you’ve selected a sodium-containing mineral formulation, hang a trail camera as soon as deer first leave tracks or other signs of use at the site. This captures the initial learned-location pattern rather than only established use. Log dates, time, weather, sex-age class, and repeat visits. You’ll often record the heaviest traffic from February through March, when post-rut deer face limited natural browse.
From June through mid-August, antler growth and lactation can coincide with more daytime visits and repeated use across consecutive days. Activity generally becomes less regular in fall, especially around hunting season. Maintain several sites consistently each year and compare cameras. High-traffic licks may concentrate does, fawns, and younger bucks, while mature bucks can favor quieter, less-interfered locations. These records clarify seasonal behavior.
Conclusion
To support deer responsibly, you should follow local regulations before establishing any mineral site. Begin in March and maintain sites through August, when forage quality and antler mineralization increase demand, while recognizing that natural browse supplies most nutrients. Clear soil, place mixes above flood lines, and use camera records to assess visitation. Don’t rely on salt alone. After rain, inspect tracks, and report drooling, stumbling, or other neurologic signs to wildlife officials promptly when observed.