Should You Use Time Lapse Over a Deer Feeder? Time Lapse vs Motion Trigger
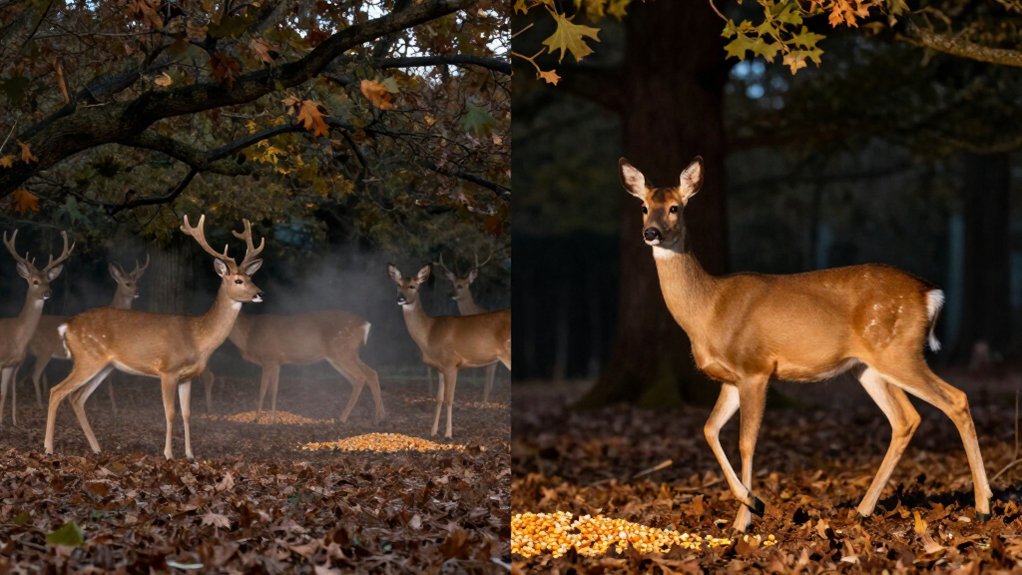
Use motion triggering over a deer feeder because it records short, event-based visits that time-lapse intervals can miss. Set your camera three to four feet high and angle it 45 degrees toward the feeder. Aim its PIR sensor across the approach path.
Review timestamps over several days to identify dawn and dusk peaks.
Reserve time-lapse for broad-area coverage or supplementation because it creates empty files and drains storage and batteries.
Next, you’ll see practical refinements.
Use Motion Trigger at Feeders
Motion/PIR trigger is usually the better choice at deer feeders because it records when an animal enters the detection zone rather than filling your card with empty scheduled time-lapse shots. This event-based method concentrates storage on visits, giving you usable evidence of animal presence and behavior.
Select photo+video when your camera supports it: stills preserve identifying detail, while short clips show interactions and feeding activity. To prevent lingering deer from producing redundant files, use single-photo mode with about a one-minute trigger delay. Deer often remain at a feeder for several minutes, so this setting limits review workload without sacrificing visit documentation.
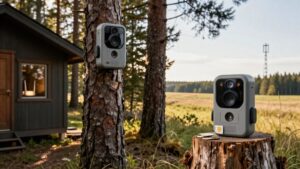
Mount the camera 3–4 feet above ground, angled roughly 45 degrees toward the feeder. Aim its PIR sensor along the expected approach path.
Identify Peak Feeding Hours
Over multiple days, review your camera’s timestamps to map when deer actually visit the feeder rather than relying on assumed activity periods. Record each visit by hour, then compare totals across several days to identify repeatable peaks rather than isolated events.
Deer often concentrate feeder use near dawn and dusk, but your records should test that pattern at your site.
If motion triggering is available, keep it active during those windows because brief, movement-based visits can occur between scheduled images. For time lapse, use a short enough interval to reduce gaps; a 30-minute schedule can miss an entire visit.
A combined motion-plus-time-lapse mode provides complementary evidence: scheduled frames reveal broader activity distribution, while motion captures establish more precise arrival times. Prioritize those peak windows.
Camera Angle and Feeder Distance
Position the camera about 3 to 4 feet above the ground and aim it roughly 45° toward the deer’s most likely approach path. This diagonal geometry keeps the feeder and a deer’s body within the sensor’s usable field, improving identifiable framing and detection opportunities.
Keep the feeder inside your model’s specified PIR range; some units reach about 100 feet.
| Setup | Recommended choice | Why |
|---|---|---|
| Height | 3 to 4 feet | Captures body clearly |
| View | 45° diagonal | Covers approach route |
| Distance | Within PIR range | Retains detection coverage |
| Mount | Secure stake | Prevents orientation drift |
If trees can’t provide a mount, use a secure stake and verify it remains fixed. Also orient the lens away from morning or evening sun; direct light can wash out images despite correct distance and otherwise sound camera placement.
Motion Sensitivity Versus False Triggers
PIR sensitivity can detect deer effectively, but swaying vegetation and other background changes can also create false triggers and waste storage. You can balance detection range by masking active background areas with Smart Zones and setting a longer trigger delay to limit near-duplicate feeder images.
If repeated sensitivity events remain a problem, time lapse records at fixed intervals and avoids PIR-trigger errors altogether.
Understanding PIR Sensitivity
Motion sensitivity determines how readily a PIR sensor interprets heat changes as movement. Raising sensitivity can improve deer detections, but it also makes the system more likely to register weak or non-target thermal changes. You shouldn’t treat a camera’s advertised detection range as a guarantee of reliable identification: at the outer edge of its zone, small temperature contrasts may be missed or misclassified.
Set sensitivity according to the feeder approach, not simply to the longest possible range. If your camera offers Smart Zones, constrain detection to the approach path rather than peripheral cover. Mount it around knee-to-waist height and aim it roughly 45° down the travel path. This alignment improves heat crossing through the sensor, reducing missed deer and unnecessary sensitivity-driven activations during normal use.
Common False Trigger Sources
Higher sensitivity can catch more deer, but it also increases false triggers from non-animal heat and motion. PIR sensors respond to changing infrared energy, so sudden sun or shadow across grass, wind-blown vegetation, and insects crossing the detection zone can activate the camera. If you set sensitivity too high, the sensor reacts to smaller thermal or movement events and may record many empty frames.
You can reduce this noise through placement and masking. Aim the camera at roughly a 45-degree angle along an animal travel path, rather than straight toward shifting weeds or another active background. Use Smart Zones to exclude open sky, reflective surfaces, and clutter near the lens. If false PIR activations persist, time-lapse captures on a schedule and eliminates sensitivity-based triggers.
Balancing Detection Range
Effective detection range depends less on maximizing sensitivity than on matching the camera’s detection field to the feeder approach. Aim the PIR across, rather than directly at, the expected travel path at roughly a 45-degree angle, and mount it at knee-to-waist height. This geometry increases the animal’s apparent cross-field motion, extending practical detection, often near 100 feet on Edge-series models, while limiting background activation. Use smart zones to exclude vegetation and distant movement, then test images for empty triggers.
A 0.30-second trigger can record legitimate visits, but speed can’t correct poor alignment or glare. If your camera supports it, motion-plus-time-lapse operation pairs event capture with periodic context, helping you audit whether sensitivity reflects feeder traffic rather than environmental noise under changing daily conditions over time.
When Time Lapse Helps
Time-lapse helps when you need a consistent record of feeder activity despite the variable performance of PIR motion detection. You get scheduled scene documentation at fixed intervals, such as every 15 minutes. This approach reduces missed observations when deer move briefly, present thermal contrast, or travel near the sensor’s detection boundary.
It also avoids capture patterns distorted by wind-driven grass, branches, or shifting sunlight and glare, which can produce PIR false triggers. The cost is efficiency: short intervals may create empty frames and consume more storage and battery capacity than event-driven capture. If uncertainty remains, use Motion + Time-lapse when your camera supports it. Motion events document visits, while captures provide coverage during low activity periods and reveal activity PIR may fail to detect.
Time-Lapse for Open Fields
In open fields, time-lapse gives you wider scene coverage through scheduled captures, such as one image every 15 minutes, rather than relying on a deer to trigger the sensor. You can compare consistent frames to track when feeding activity shifts across the day, but intervals that are too long can miss brief visits.
Because quiet periods produce many empty images, you’ll need enough storage or use motion+time-lapse during dawn and dusk.
Wider Field Coverage
Across an open field, time-lapse gives you broader situational coverage by recording the entire scene at fixed intervals, such as every 15 to 30 minutes, rather than waiting for movement within a PIR sensor’s detection zone. This approach samples habitat use beyond the sensor’s effective footprint, so you can observe deer entering, crossing, feeding, and leaving at different locations. It also prevents quiet but meaningful portions of the field from becoming complete data gaps simply because no animal crossed the PIR detection zone.
That wider visual record helps you assess broad patterns in food plots, including changes in deer distribution and use through daylight. However, interval images aren’t designed to document every brief visit. If your objective is confirming individual, short-duration feeder activity, motion triggering remains more suitable; use time-lapse to evaluate area-level behavior.
Consistent Scheduled Captures
Scheduled captures give you a standardized record of an open field or food plot, taking images at fixed intervals whether or not a deer triggers the PIR sensor. This design lets you compare the same scene under repeatable time points, rather than relying solely on movement within the detection zone. Select the interval according to the rate of visible change: 15-minute captures document short-term changes but consume substantially more storage, whereas 24-hour captures reduce volume while leaving longer observational gaps.
In open terrain, scheduled images also preserve evidence when an animal stands still or travels beyond the PIR window. Check your camera’s operating mode before deployment. Time-lapse-only settings commonly disable motion detection; motion-plus-time-lapse retains triggers while adding fixed captures, particularly during selected high-traffic periods.
Tracking Feeding Patterns
Time-lapse helps you track feeding patterns in open fields by recording the same plot at preset intervals, such as one image every 15 minutes. This design lets you compare deer presence, group size, and apparent use across morning, midday, evening, and successive days. Rather than asking whether motion occurred at a specific instant, you assess how the field looked at standardized observation times.
Use time-lapse-only mode, if available, to prevent variable traffic near the plot from mixing motion-triggered event photos into the series. For broad trends, a camera that supports all-day operation and a 24-hour interval can create one comparable daily observation. Match the interval to your question: shorter intervals improve temporal resolution, whereas long gaps can omit brief feeding visits occurring between captures.
Managing Storage Demands
Fixed-interval imaging can fill an SD card quickly in an open field because the camera records whether deer appear or not. Your interval is the primary storage control: frames taken every 15 minutes accumulate twice as fast as frames taken every 30 minutes.
Use longer intervals when vegetation, light, and deer activity change slowly, but recognize that wider gaps reduce your chance of documenting brief visits. If your camera supports Motion + Time-lapse, enable it to retain scheduled field coverage while adding event images when animals enter. Resolution also matters; 40MP files consume capacity faster and increase power demand, potentially straining batteries or solar charging.
For pattern monitoring without dense archives, schedule operation with one frame every 24 hours. Validate settings after deployment.
SD Card Capacity Limits
SD card capacity often becomes the limiting factor in feeder monitoring because interval capture records images whether deer appear or not. Your consumption depends primarily on interval length: recording every one to 15 minutes creates more files than motion triggering. Estimate demand by multiplying seconds per day divided by interval seconds by monitoring days, then multiplying that image count by the average file size at your selected resolution.
At high resolutions, including models offering roughly 40-megapixel images, each file occupies more space and reduces the number of images an SD card holds. Short intervals of seconds or a few minutes can fill capacity rapidly. You can extend deployment duration by selecting longer intervals or restricting time-lapse to defined daily windows. Motion triggering preserves capacity.
Battery Replacement Costs
Battery replacement costs depend on how often the camera wakes, captures, processes, and saves files. If your feeder area has little movement, scheduling one still image every 15 to 30 minutes, or even daily, can use less energy than frequent motion-triggered captures. That reduction can extend battery service life and lower replacement spending.
Resolution changes the calculation: higher-resolution time-lapse images require more processing and storage activity, which can shorten runtime. Motion + Time-Lapse also raises demand because the camera maintains scheduled captures while responding to PIR events.
Avoid enabling video unless it’s necessary; high-definition clips, particularly audio-enabled 1440p recording, consume substantially more power than photos. You can further reduce recurring costs with higher-capacity batteries or external solar packs and USB-C charging options when practical in field.
Overlooking Nighttime Flash Range
Nighttime performance depends on both capture timing and the camera’s effective flash range. Time-lapse records only at scheduled intervals, so a 15 to 30-minute gap can miss a brief feeder visit even when the deer stands in illuminated coverage. Motion triggering generally provides stronger nighttime evidence because PIR detection initiates capture as an animal enters the zone. Flash range remains a separate constraint: distance, angle, and wide framing can leave feeder-edge subjects dim, blurred, or unusable. You can reduce this error by testing your actual setup under comparable night conditions.
- Position the camera within its tested flash distance.
- Aim illumination directly across the feeder.
- Avoid overly wide compositions.
- Compare short motion-triggered and time-lapse trials.
- Inspect edge subjects for exposure and sharpness before making placement decisions.
Daylight-Only Time-Lapse Scheduling
Once you’ve verified nighttime coverage, limit time-lapse to daylight hours to avoid recording predictable low-value frames after dark. In Devices > Settings > Time-lapse Settings, define a morning-to-evening window, set Start and Stop to “All Day” within that window, then select a fixed capture interval. This design preserves comparable, time-stamped observations while reducing empty frames. Because illumination strongly influences detection quality, this schedule controls a major source of irrelevant nocturnal variation in your dataset.
- Use motion-trigger for animal-specific encounters; it records movement rather than scheduled scene conditions.
- Expect time-lapse-only to capture blanks when deer don’t visit.
- Match interval length to feeder traffic and analytical goals.
- Compare daytime sequences with motion images to separate activity from environmental change.
- Check storage consumption and timestamps before deploying the schedule.
Conclusion
You’ll get more reliable deer-feeder data with motion-triggered photos because each image records an animal’s approach, visit, and direction while conserving storage and battery power. Set the camera at an angle, test sensitivity, and verify nighttime flash coverage to reduce missed detections and false triggers.
Use time-lapse mainly for open fields or daylight activity surveys, where movement may occur beyond the sensor’s range. Check cards and batteries regularly, then adjust placement using peak feeding hours.
Deer Feeder Timer & Hopper Runtime Calculator
Enter your feeder timer settings and your own measured feed rate to get lb per feeding, lb per day, days between refills and a printable schedule.