How to Set a Deer Feeder Timer: Feed Times, Duration and Battery Tips
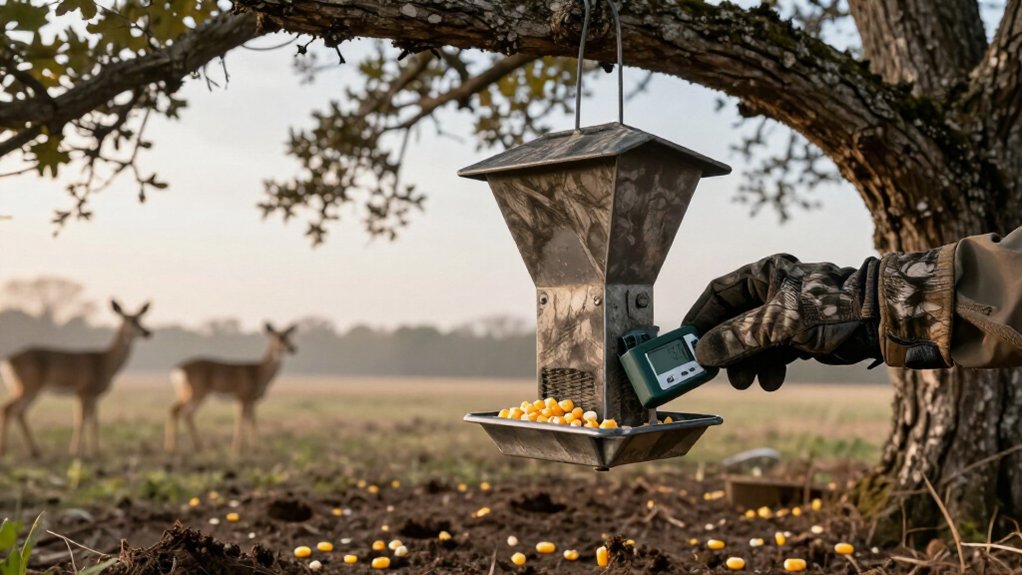
Install a fresh 6-volt battery, check connections, and set the clock to reliable local time. Program Timer 1 for 15 to 30 minutes after legal shooting light; use 6:00 a.m. only when lawful.
Start with a five-second spin, which typically spreads about 1 to 2 pounds, then measure output and adjust. Latch the weatherproof box, listen for the motor, and clear debris or bridged feed if it hums.
Keep corn dry and mold-free; steps below help prevent jams and waste.
6 AM Five-Second Feed Setup
Set a 6:00 a.m. feed only if legal shooting light has already begun; if not, move the timer 15 to 30 minutes later. This timing aligns feed distribution with lawful hunting hours and avoids conditioning deer to arrive before you can legally hunt.
Program a five-second spin as baseline. On many feeders, that duration drops about 1 to 2 pounds of feed, and 1.5 pounds is a practical planning estimate. Output varies by feeder, pellet size, spinner design, and feed level, so verify actual results. Check feed on the ground after one cycle. Adjust duration in small increments to prevent excess feed, limit waste, and reduce unnecessary wildlife concentration. When Daylight Saving Time ends, reset the schedule so your 6:00 a.m. cycle doesn’t activate an hour accidentally early.
Install a Fresh 6-Volt Battery
Install a fresh 6-volt battery before programming the timer, because a weak battery may power the display yet lack the output needed to turn a loaded spinner plate.
- Disconnect the battery, then fit a new 6-volt unit with the terminal orientation.
- Inspect connectors and wiring for corrosion or looseness; clean and tighten them so the timer and motor receive current.
- Mark the installation date on the battery. Keeping a spare during service visits helps prevent missed feed cycles and reduces changes in your herd-management routine.
- If operation remains inconsistent, use a voltmeter to verify battery voltage and power flow. Replace suspect leads or connections before relying on scheduled feeding.
Fresh power supports predictable portions, limits wasted feed, and helps you maintain observation and harvest-management patterns.
Step 1: Clear Debris From Spinner Plate
If feed stops dropping, inspect the spinner plate for packed feed, dirt, or other debris that can jam its rotation. Before disassembling anything, test the battery: a weak 12-volt unit may turn the plate when empty yet lack power under a full feed load. Disconnect power, empty the hopper area around the mechanism, and brush the plate clean with a small amount of oil and an old toothbrush. Remove caked pellets, dust, seed fragments, and rust-prone residue without letting excess oil contact feed.
Rotate the plate by hand to confirm it moves freely. If it still won’t turn, check the set-screw and tighten it securely. Run a brief test after reassembly. This prevents wasted feed and reduces wildlife exposure to spoiled grain around feeders.
Step 2: Set Clock to Current Time
Before you program feeding cycles, set the timer’s clock to the current local time so each run occurs when intended. Confirm the displayed time against a reliable phone, GPS, or radio-controlled clock, then correct any difference before relying on scheduled feed. Accurate timing helps you place feed predictably, reducing unnecessary waste and limiting unexpected activity around the site.
Check the clock during routine maintenance, especially after a battery change, power interruption, cold night, or heavy rain. If Daylight Saving Time ends, reset it promptly: a 6:45 a.m. setting can otherwise trigger at 5:45 a.m. local time. Choose a dependable timer that retains settings in wet, freezing conditions. Record the verified time in your maintenance log, and recheck it before seasonal feeding plans begin each year.
Step 3: Press PROG Until Timer 1
Start Timer 1 with a 5-second spin. Many feeders dispense roughly 1–2 pounds in five seconds, although output changes with your model, feed type, and spinner-plate gap.
Check ground coverage after a test cycle, then adjust duration if needed. Before leaving, confirm the displayed Timer 1 setting and duration. Install a battery so timer and motor run on schedule.
Step 4: Use Arrows to Select AM
With Timer 1’s duration set, use the arrow buttons to scroll to the morning time and select AM. This prevents a planned dawn feed from running at night, when it provides less useful observation value and may alter normal deer movement. Aim for a cycle about 15 to 30 minutes after legal shooting time begins, using your local regulations and the season’s sunrise conditions rather than a fixed clock time.
Inspect the screen’s AM/PM indicator carefully. A timer can retain or reset information differently after a battery change, so confirm that the displayed designation matches your intended morning schedule. Revisit the clock after each seasonal time change: a 6:45 AM setting can operate at 5:45 AM local time if you don’t update it. Accurate timing supports consistent feeding patterns and responsible site management.
Step 5: Save Timer 1 Settings
For hunting season, schedule this morning cycle about 15 to 30 minutes after legal shooting time begins, which keeps feeding aligned with lawful activity and avoids drawing deer in too early. Check the display immediately: it should show Timer 1, the intended time, AM, and runtime.
Recheck after cold nights or heavy rain; retained settings indicate the controller remains reliable. If the program vanishes or the feeder doesn’t run, test the 12V battery first. A weak battery may operate the screen yet lack enough power for the loaded spinner plate. Log it for later checks.
Step 6: Latch the Weatherproof Control-Box Cover
Close the weatherproof control-box cover as soon as you finish programming or servicing the feeder, then press the latch until it fully engages. Check that the cover sits flush against the box and that no gap remains around its edges. A partly open enclosure lets rain and humidity reach the timer, battery, and wiring, increasing failure risk and potentially interrupting planned feed delivery.
During routine maintenance, especially after heavy rain, remove leaves, dirt, and moisture from the box exterior and inspect the latch for damage. Also look for pest activity; rats can chew wiring and compromise dependable operation. If the cover won’t close securely or the latch is cracked or loose, repair or replace it before relying on the feeder. A sealed box protects
Listen for Spinner Motor
During a programmed feeding, listen for the spinner motor to confirm that the timer is activating the feeder and dispensing feed as scheduled. Stand nearby and note whether the motor starts at each programmed event. This quick check verifies timer output and helps prevent missed feed that can disrupt a measured feeding plan.
If it doesn’t run, test the 12V battery first; a weak battery may not turn a loaded spinner plate. When battery voltage is adequate, inspect the spinner plate for a jam and confirm its set-screw is tight. Still no operation? Use a voltmeter to trace power from the battery or solar panel to the motor. If power reaches it, inspect the timer and motor, and carry spare parts for low-waste repairs.
Motor Hums: Clear Bridged Feed
A humming motor without falling corn usually signals bridged feed above the spinner plate or a clogged spout. Switch off power before opening the feeder. Remove packed grain, then verify that corn kernels can move freely through the spout and plate. Damp pellets or mixed grain can swell and restrict flow, so keep feed dry to reduce waste and prevent repeated jams.
| Check | Action |
|---|---|
| Bridge | Clear feed above plate |
| Spout | Remove obstruction |
| Spinner | Secure set-screw |
After clearing the path, turn the spinner by hand and test the feeder briefly. If it won’t rotate, check battery charge before examining the timer and motor. Restoring consistent flow prevents concentrated piles, limits discarded feed, and helps you maintain predictable feeding without needless refills during each hunting season.
Inspect Corn for Mold Weekly
Inspect the corn at least weekly—and after heavy rain—for mold, moisture, and clumping. These checks help prevent spoiled feed from reaching deer, birds, and other wildlife. Look for kernels stuck together, a musty odor, fungal growth, or damp material along hopper walls and near the spout. Remove questionable corn promptly; don’t let it mix with a fresh load.
Keep the hopper lid sealed and refill only with clean, dry, aflatoxin-free corn. Moisture can make kernels swell, bridge inside the hopper, and clog the spinner plate, which changes your feed output. If rain intrusion or condensation appears, inspect the lid gasket, seams, and feeder placement. Store corn off the ground in a dry, covered container. Inspections protect animal health, reduce waste, and keep timed feeding reliable.
Conclusion
You’ll get more consistent deer activity when you program a 6 AM, five-second feed, use a fresh 6-volt battery, and keep the spinner plate clear. Set the clock accurately, confirm Timer 1, latch the weatherproof cover, and listen for motor operation. If it hums, remove bridged feed.
Check corn weekly for mold to protect herd health, reduce waste, and avoid concentrating animals around spoiled feed. Adjust timing only after tracking local deer use over several weeks carefully.