How to Prevent Trail Camera Theft: Lock Boxes, Cables and Smart Placement
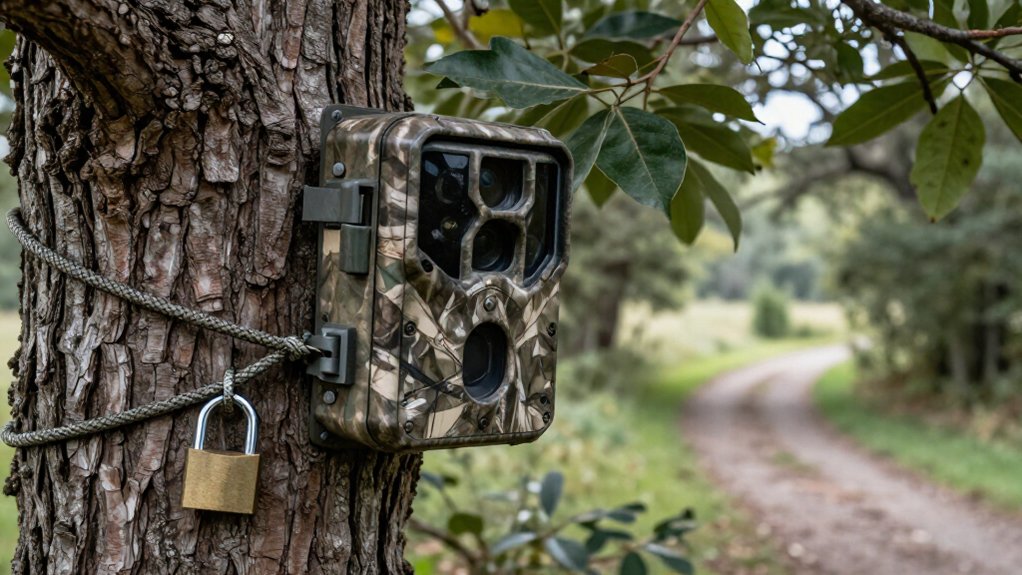
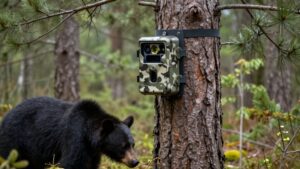
With landowner permission, spend about 30 minutes placing a trail camera at least 30 metres from trails, 10 feet high, and angled down. Use no-glow infrared, enable GPS, cellular tamper alerts, timestamp, and account ID.
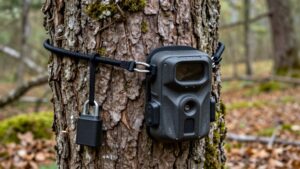
Enclose it in a model-specific steel lock box, then route an anti-cut Python cable through the box and tree with a hardened padlock. Add an Owner ID label, test uploads, and inspect cable fraying monthly. The steps below sharpen your setup.
Secure Camera, 30-Minute Setup
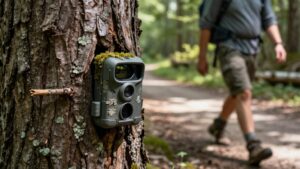
A secure trail-camera setup starts with permission from the landowner, then takes about 30 minutes to install properly. Choose a location at least 30 metres from the nearest track or trail, reducing casual discovery and limiting direct access. Before mounting, walk a 10 to 20 metre circle around the site and identify hidden side paths, game trails, or narrow bike lines that could lead someone straight to it.
Mount the camera roughly 10 feet high, out of normal sightlines, and angle it downward toward the target area. This position makes it harder to spot or reach while preserving useful coverage. Select no-glow or low-glow infrared illumination, never a visible white flash. If your budget allows, use GPS and cellular alerts, so you receive location and tamper information quickly.
Gather Lock Box and Cable
Choose a manufacturer-fitted steel lock box for your exact camera model, ensuring it leaves the lens, sensors, antenna, and mounting points unobstructed. Pair it with a heavy-duty, anti-cut Python-style cable lock. Together, steel and cable resist wildlife, wind, and opportunistic tampering while keeping the camera from being lifted out if someone opens the box.
- Model-specific steel lock box
- Heavy-duty anti-cut cable
- Lockable cable ends and keys
- Optional housing lock
- Spare key stored securely
Route the cable through the lock box and around the tree, not merely through the camera strap. Keep it snug enough to prevent movement, but don’t overtighten; tree growth can seize the cable or lock. If your camera accepts a housing lock, use it to protect the SD card.
Step 1: Clear Bark From Mounting Tree
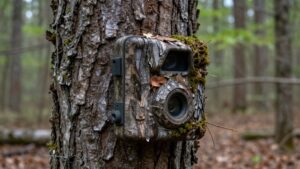
With the lock box and cable ready, prepare the mounting tree so they can sit tightly against the trunk. Inspect attachment points, then remove loose, peeling, or thick bark until you reach a solid surface. Clear only where the strap, cable, lock, and mount base will touch; don’t disturb bark around the camera’s sensor area or block its lens view.
For a cable or power-lock system, scrape a flat patch about the size of the mount base. This prevents the hardware from riding over ridges, slipping, or creating weak cutting-through points. Mount the camera, tighten connections, and wipe away sap, dust, and bark debris from the contact area. Clean, flush surfaces help the strap and lock maintain grip through outdoor weather, wind, and vibration.
Step 2: Set Timestamp and Owner ID
Enable the camera’s timestamp before deployment so each image records the exact date and time of activity, tampering, or removal. This evidence helps you establish a clear timeline if someone interferes with or takes the unit.
Add a waterproof Owner ID label with your name or organization and phone number, placing it where it remains visible during routine checks. If your model supports it, enable the owner or account ID in its app or cellular portal. Before installation, record the camera ID, model, serial number, Owner ID, and GPS coordinates or app location in your records.
Keep these details with purchase documentation. If authorities recover the camera, you’ll be ready to confirm ownership and connect it to its deployment site without relying on memory later.
Step 3: Thread Python Cable Through Box
Thread the Master Lock Python cable through the security box’s designated anchor points before wrapping it around the tree, creating a fixed loop that can’t slide or be bypassed. This routing joins the box and cable into one restraint, so a thief can’t pry the camera free without defeating that connection. Before tensioning the cable, inspect its route inside the housing. Make sure it doesn’t cover the camera’s sensors or IR window, and verify the lid closes fully.
Wrap the cable around the tree on the same loop path, then pull it snug until the housing rests firmly against the bark. Don’t overtighten it. For deployments longer than six months, leave slight clearance for seasonal growth, preventing the cable from binding into bark. Use this sequence at every location for consistent, secure access.
Step 4: Padlock the Security Box
Secure the box’s hasp with a weather-resistant, hardened-steel padlock after the Python cable is tensioned. Choose a lock made with anti-corrosion materials, so rain, mud, and freezing temperatures won’t seize its mechanism when you need to service the camera. Use a high-security model with a hardened, anti-cut shackle.
Match its shackle diameter and clearance to the box’s padlock-through opening: it must pass completely through the hasp and close tightly, without extra room for prying or forcing it loose. Position the lock so its shackle isn’t exposed from below or either side, where thieves can most easily attack reachable contact points. Before leaving, confirm it clicks shut and the keyway or dial remains usable. Record the padlock’s model and key or combination details, and keep a spare key off-site.
Step 5: Trim Branches Blocking Camera View
Clear small branches, grass, and brush directly in front of the lens before you leave the camera in place. Moving vegetation can trigger captures, drain power, and make the setup easier to notice. Stand at camera’s viewing angle and inspect a wider cone than the frame. Cut back twigs or fronds that could sway into the lens or infrared zone.
Keep cover natural. Don’t create a conspicuous bare opening or a cleared shooting lane that advertises the camera’s position. Also avoid mounting beneath limbs likely to grow into the shot line; early pruning prevents conspicuous return visits to readjust it.
After storms or sustained wind, check the view again. Loosened branches can drop into frame, obscure images, and create motion that increases detection risk.
Step 6: Remove Packaging and Pruned Branches
Once the camera is mounted, collect every strap wrapper, cardboard insert, plastic tie, and other packaging item from the installation area. These leftovers act as visual find-me cues, telling a passerby that equipment was recently installed nearby. Pocket them and carry them away rather than stuffing them beneath leaves or at tree’s base.
Remove only branches needed to keep lens and infrared field clear within a 0.5 to 1 m radius. Take pruned pieces with you; don’t leave them on the path, because fresh debris makes cover look disturbed. Before leaving, inspect the frame and camera face for cut twigs directly ahead. They can reflect IR and draw attention to the unit. Avoid over-clearing foliage; minimal trimming preserves camouflage and gives thieves fewer signs to investigate.
Test Cellular Image Transmission
Before you leave the site, test cellular transmission under the same outdoor conditions the camera will face. Place it at its intended location and confirm it sends one full-resolution image within the manufacturer’s expected upload window. Check displayed signal strength; weak LTE bars can delay or stop uploads.
Trigger the camera manually or use test mode, then verify the image reaches your app or cloud. Confirm its timestamp and camera ID or slot match your test. Repeat the process at the time you’ll normally collect data. Next, trigger it several times over 15–30 minutes. Ensure every image uploads, not only the first, and check for unexpected SD-to-cell fallback. If GPS is enabled, arm the unit and confirm the app shows the correct location afterward.
Fogged Lens: Add Desiccant Pack
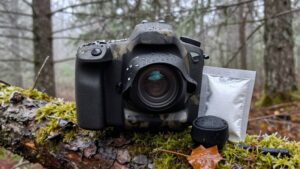
Reliable uploads won’t help if morning condensation fogs the lens, so place a small electronics-rated silica-gel desiccant pack inside the camera housing or lock box. Keep it away from the lens and IR window, where residue can compromise concealed evidence. Before sealing, run a dry-in test during humid weather and review next-morning images. In closed metal boxes or wet regions, add a second pack. This preserves usable images while keeping your installation discreet.
| Check | Action | Security result |
|---|---|---|
| Pack type | Use electronics-rated silica gel | Protects clear identification images |
| Placement | Keep it off lens surfaces | Avoids contamination of night images |
| Service | Recharge or replace every few weeks in wet seasons | Prevents saturation in restricted airflow |
| Verification | Review next-morning dry-in test images | Confirm condensation no longer obscures evidence |
Check Cable Fraying Monthly
Inspect your security cable monthly, including concealed sections by the tree and lock box, for broken strands, exposed steel, kinks, or flattened spots. Pay special attention to bend points around the tree and where the cable exits the lock box, since these high-stress areas often fail first. Check the entire run, including hidden or buried sections near the housing.
If you find even minor strand separation or several loose fibers, replace the cable immediately; fraying reduces its load rating and gives a thief an easier target. Afterward, test the setup: the camera and lock box should remain tight, with no cable rubbing or shifting in the wind. In wet or sandy locations, wipe the cable and clear grit from its strands. Grit accelerates cable abrasion.
Conclusion
With a lock box, Python cable, and smart placement, you’ll make your trail camera far less attractive to thieves. Clear the mounting area, hide the unit’s approach, and record your owner ID and timestamp before deployment. Test cellular alerts while you’re still nearby, then remove packaging and cut branches that advertise fresh work.
Add desiccant if fog develops, and inspect the cable monthly for fraying, looseness, or tampering. Small checks protect your evidence and investment.