How to Hide a Trail Camera From Humans So Thieves Walk Right Past
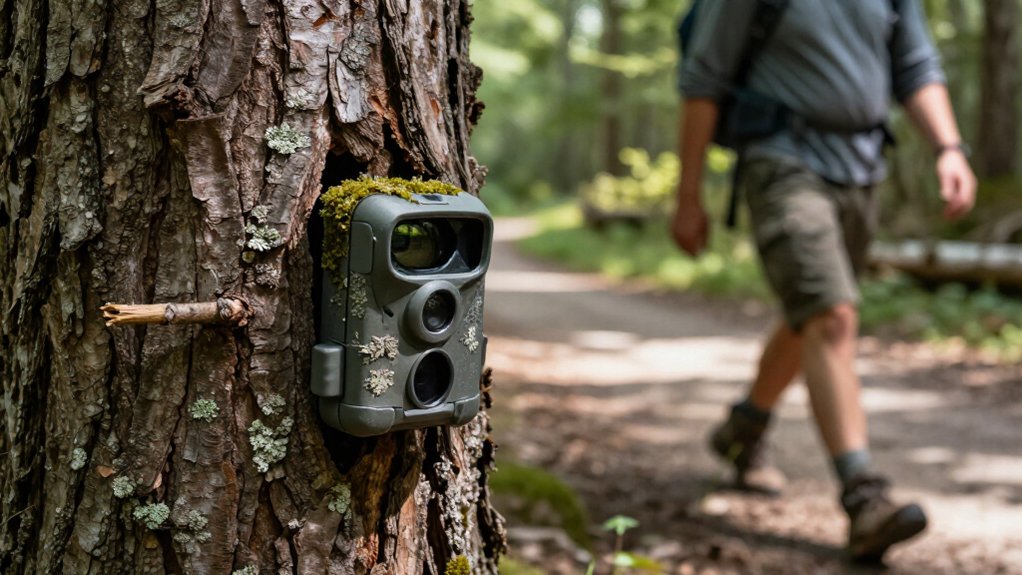
Mount a small black no-glow trail camera 10 to 12 feet high under an eave or behind a gutter, angled down over the target path. Match its housing to the exact bark, using a split trunk to break its outline while keeping the lens and PIR clear.
Avoid direct sun and moving grass, secure the mount against wind, and walk-test it day and night.
The steps below help you refine dependable, discreet coverage over time.
Camera Invisible at 10 Feet
Mount a small, black no-glow trail camera 10 to 12 feet above the ground and angle it downward over the area you need to monitor. This height keeps the unit outside normal eye-level scans, while the downward view still captures approaches, paths, gates, or entry points.
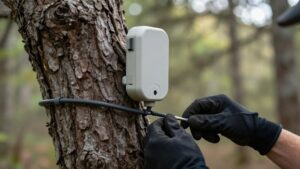
Place it under eaves or just behind a gutter, where boards and roof edges break up its outline without blocking the lens or sensor. Secure the mount firmly so wind, vibration, or rain runoff won’t shift coverage.
Then test it before relying on it: walk past during daylight and after dark from each likely approach. Check ordinary sightlines, not just your planned route. Review the footage to confirm the target zone remains visible and night recording produces no noticeable flash.
Match Bark to Camera Housing
Choose a housing finish that matches the dominant bark at the exact mounting spot, gray-brown and rough on an older oak, for example, rather than smooth tan on a young tree. Use the tree’s texture and color to erase the camera’s obvious side profile at normal scanning distance. Target the housing’s silhouette, but keep every optical and detection component clear.
- Pick bark-print housings that already resemble the trunk.
- Add small, bark-colored texture pieces only where contours need help.
- Never wrap the unit completely; trapped moisture and heat can cause problems.
- Check from several head-height angles after mounting.
Confirm the blend stays convincing while the lens, PIR sensor, and IR or flash windows remain fully unobstructed. Replace mismatched material before leaving the site for good concealment.
Step 1: Check Wind and Sun Angles
Before you secure the camera, study wind direction and sun angles from the paths people are most likely to use. Approach from those routes without cutting a new track; disturbed vegetation or repeated footprints can make the spot worth investigating. Let the wind carry your scent away from common approaches when possible, so your visits don’t create an obvious human presence.
Test the site in morning, midday, and late-day light. Keep the camera face, strap, and mount out of direct sun that can produce glare. Adjust its tilt and orientation so the IR/flash window doesn’t reflect toward passersby. Choose a backdrop with broken bark, leaves, and mixed shade, not bright open ground or sky. Recheck from likely viewpoints as shadows shift, and correct any visual flash.
Step 2: Format a High-Endurance SD Card
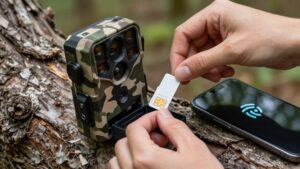
Install a reputable high-endurance SD card labeled for surveillance use, since frequent motion-triggered writes can wear out ordinary cards quickly. Choose a trusted brand and capacity matched to clip length, so storage fills predictably and avoids rapid overwrites. Before use, run the camera’s format command. Camera formatting uses expected file-system settings and helps prevent compatibility or write-speed failures during 0.1-second trigger captures.
Set recording to motion detection with short clips rather than continuous loops. You’ll preserve card life while retaining useful evidence of activity. After formatting, record several test clips, then review them on the camera or a secure reader. Confirm that video saves, plays back, and timestamps correctly. Replace any card showing errors, corruption, or delayed writes; hidden placement can’t compensate for lost captures.
Step 3: Mount It Eight Feet High
Mount the trail camera about 8 feet (2.4 meters) above ground, where most people won’t naturally look while passing through. Aim it slightly downward so it watches the intended approach or target area without sitting in a walker’s normal line of sight.
Use a compact, secure mounting method that holds the unit firmly and doesn’t leave dangling straps, bright hardware, or other clues below it. Once installed, inspect the camera in daylight from several distances and approach angles. Adjust its position if its outline contrasts with the background.
Return after dark and repeat the check: elevated placement can change how the silhouette and low-light behavior appear to people. Ensure you can safely service it without advertising its location during routine maintenance or card changes.
Step 4: Tuck Camera Behind Split Trunk
A split trunk gives you a natural screen that breaks up the camera’s outline from either side of the trail. Mount the unit within the fork so both trunk halves block a direct view, but keep the lens and PIR window completely clear. Aim through the opening toward the trail or feeding area, ensuring bark, twigs, and leaves don’t enter the detection zone.
Choose a small black no-glow camera that won’t contrast sharply with the bark. Angle it slightly inward to reduce its visible side profile. Route straps, webbing, and mounting hardware inside the fork or behind loose bark, keeping attachment points hidden. Inspect the setup from likely approach routes, including low, ground-level viewpoints. Adjust the position until the trunk conceals the camera from each direction while preserving an unobstructed view.
Step 5: Test Nighttime LED Visibility
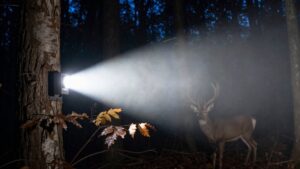
After hiding the camera’s body, check what it reveals after dark. Test it from several distances and angles around the intended location: head-on, 30 to 45° off center, and from the side. Walk those routes while the camera triggers, then look for any detectable IR or LED glow.
Even “no-glow” models can show a faint red or purple highlight, or a bright hotspot, from the wrong sightline. Check branches, rocks, and straps nearby for reflections that bounce light back toward a viewer. Aim the camera slightly downward and away from likely approach lines, keeping its face and close foliage out of the illuminated area. Re-test after every camouflage or placement adjustment; even a small shift beneath an eave or behind a board can change nighttime visibility.
Step 6: Lock Cable, Brush Footprints
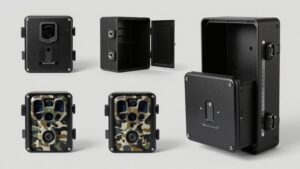
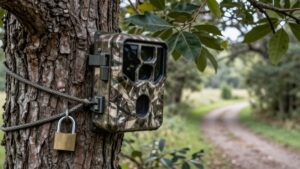
Secure the camera in a bolted steel lock box and run a steel cable through the mount, so a thief must cut metal or remove the hardware instead of simply grabbing the unit. Use a padlock and secure the enclosure with lag bolts so it can’t be twisted loose. Bring a cordless screwdriver and socket only for servicing, then remove them.
After installation, clear loose debris around the mount and brush away footprints or disturbed soil immediately. Avoid walking the same route repeatedly near the camera; a fresh human path can reveal it to casual passersby. Keep natural cover tight around the box and cable, hiding bright new metal without blocking the lens or PIR openings. Check the area before leaving, then exit differently.
Verify Trigger Range With Walk-Test
Before you camouflage the camera, run a walk-test from each likely approach angle and review the clips at the same time of day you expect activity. Walk the likely path gradually, starting near the unit and moving farther away, until motion no longer consistently records short clips.
Repeat in daylight and at dusk or night with your intended night-mode settings unchanged. Confirm that subjects appear clearly in frame and that IR or flash behavior doesn’t compromise detection. Test from waist height through above-head height, since PIR coverage shifts as motion enters its viewing volume. Note the directions and maximum distances that trigger reliably. If coverage misses a likely approach, re-angle the unit and repeat the test before fully concealing it.
Fix False Triggers From Grass
Keep wind-blown grass out of the PIR sensor’s primary detection zone, especially directly in front of the camera face. Tilt the unit downward toward the trail or waterhole, keeping the grass line below its main angle. Quietly trim blades within a few feet; don’t create an obvious cleared circle.
| Check | Action | Result |
|---|---|---|
| Aim | Tilt downward | Fewer grass triggers |
| Cover | Trim near face | Clear PIR view |
| Sensitivity | Lower setting | Less minor motion |
| Clips | Shorten length | Fewer wasted recordings |
Test in daylight and wind. Adjust height and angle until moving grass stays silent but a person crossing the target path still triggers reliably. This preserves storage and makes your concealed camera’s activity logs more useful when you review them later, after a discreet placement check.
Swap Batteries Before Winter
Swap the WOSPORTS G600PRO’s batteries early in fall, then confirm its solar panel is charging properly. Cold temperatures reduce battery capacity, while longer nights and increased power demand can weaken motion-trigger reliability. Replacing batteries before the seasonal shift preserves more successful detection cycles and keeps the camera working when wildlife activity matters.
Afterward, test it in daylight and low light, ensuring its 0.1S trigger speed still captures deer passing the trail. Check the mount, lens, and IR window before leaving; tighten anything loose and clear debris or condensation-prone obstructions. Don’t revisit the site unnecessarily through winter.
If maintenance is needed, limit it to a brief check every few weeks, use the same low-profile approach route, and avoid lingering. Fewer visits leave less scent and evidence.
Conclusion
Hide your trail camera by making it part of the landscape, not an obvious object. Match its housing to bark, mount it high, and avoid direct sun or wind-blown vegetation that can reveal or trigger it. Use a high-endurance card, fresh batteries, and a walk-test to confirm coverage before leaving.
Secure the unit with a lock cable, erase obvious tracks around it, and check it discreetly. You’ll reduce attention while keeping reliable evidence.