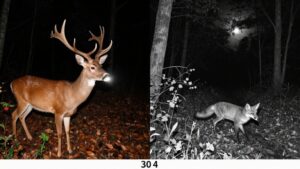
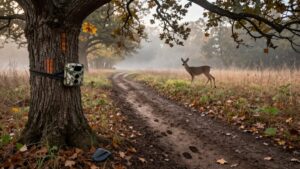
How Far Should a Trail Camera Be From a Deer Feeder for Clear Shots?
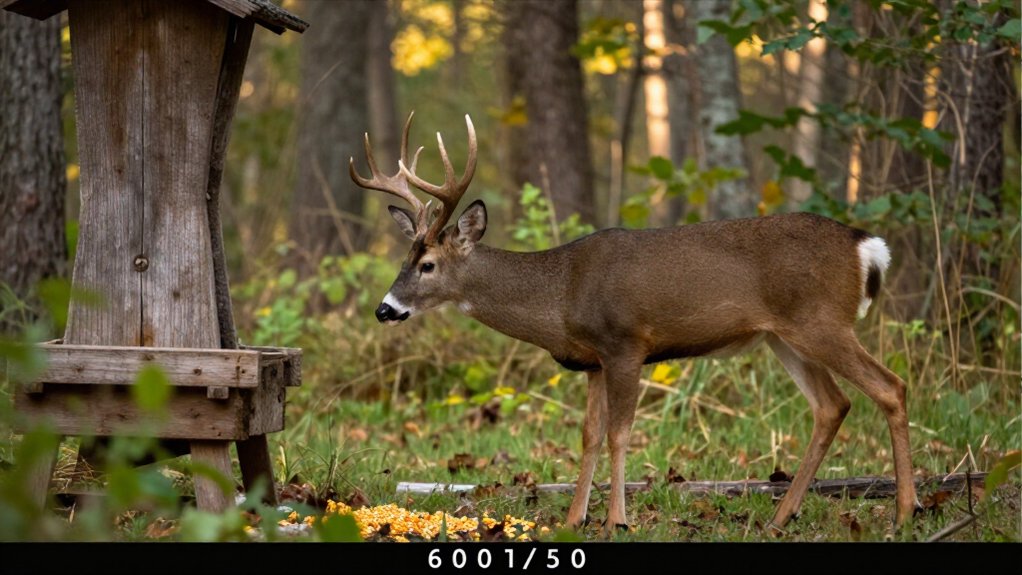
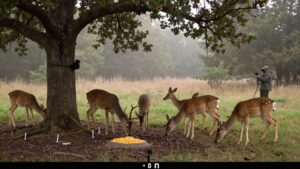
Start by placing your trail camera 10 to 15 yards from the feeder, then use test images to refine distance and angle. This spacing usually captures clear, full-body deer while covering the feeder, feed-scatter zone, and approach routes.
Mount it about 3 to 5 feet above the deer’s travel surface, with a slight downward tilt. Aim roughly 45 degrees along an approach trail, not directly across it. Conditions vary; the next steps help you fine-tune coverage and overall image quality.
Start 10–15 Yards Away
Start 10 to 15 Yards Away
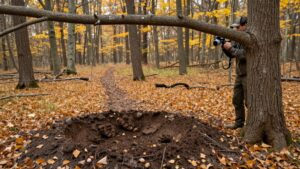
Start by placing your trail camera 10 to 15 yards from the deer feeder, a distance that usually captures both feeding behavior and nearby movement without crowding the frame. Mount it roughly 3 to 4 feet high and aim it toward the feeder. This elevation commonly aligns the lens with a deer’s body, helping you identify individuals, posture, and feeding duration while retaining surrounding habitat context.
Avoid a tight close-up: you’ll obtain more useful records when the image includes approach routes and multiple animals. Before leaving, test the framing under expected light conditions. If deer appear too small or the feeder obscures their bodies, adjust the camera’s angle or placement. Use single-photo mode with a one-minute trigger delay to limit redundant images during prolonged visits at each visit.
Account for Feeder Throw Radius
Because feed disperses beyond the feeder itself, set your camera to cover the full throw radius rather than only the space beneath the unit. Deer commonly forage along the outer scatter zone, where kernels remain accessible and the feeder doesn’t dominate deer activity. Frame both the feeder and its spread, leaving foreground and side space for animals entering the site.
| Check | Ecological purpose |
|---|---|
| Feeder visible | Confirms site context |
| Outer feed edge | Captures dispersed foraging |
| Entry space | Records approaching deer |
| Test image | Verifies complete coverage |
After mounting, review test images from the camera’s actual position. If feed reaches the frame boundary, move the camera back or widen its angle. This verification reduces missed detections and yields a more representative record of feeding-site use by deer.
Broadside Shots at Dusk
At dusk, position the camera far enough from the feeder to capture deer as they approach and feed, not merely as they pass beneath the unit. Rather than mounting it immediately beside feed, aim along a known approach or travel route. This geometry lengthens the time a deer remains within the frame and increases the likelihood of a lateral, broadside image.
Mount the camera about three to four feet high and angle it roughly 45 degrees toward the approach. Choose a fast trigger speed and short delay, so you capture clear body outlines as light declines. High-resolution images and longer video clips draw more power under low illumination, so test framing and battery performance before you leave the site unattended during the evening feeding period.
PIR Detection Zones by Model
PIR range and detection angle vary by model, so you should match feeder distance to the area your camera can reliably monitor. The Edge 2 Pro lists detection out to 100 feet, but that doesn’t guarantee clear deer images or define its full detection-zone dimensions. Aim along travel routes, use Smart Zones to mask moving vegetation, and test triggering and framing at your planned distance.
Model-Specific PIR Ranges
Moultrie rates the Edge 2 Pro’s PIR detection range at up to 100 feet, but that maximum distance doesn’t guarantee usable feeder images because deer at the outer zone may appear small and lack detail.
Treat this figure as a triggering limit, not placement guidance. You should locate the camera where it records feeder activity while retaining detail.
Vegetation, temperature contrast, and an animal’s travel path affect triggering. A cross-trail camera only five feet from passing deer provided little detection time; orienting it along the approach can give the sensor more time to trigger before deer reach the feeder.
Detection Angles Compared
Thus, you can’t infer that the Edge 2 Pro’s 100-foot detection range creates a wider or narrower sensing field than another model. PIR sensors respond to changing infrared energy, so vegetation movement, sun-warmed backgrounds, and an animal’s path can influence triggering.
Evaluate detection behavior at your feeder site. Aim the camera along a deer’s direction of travel, which gives the sensor more time to register movement and capture the animal. Avoid placing it close and directly across a trail: a five-foot cross-trail test allowed little detection time. In windy habitat, use Smart Zones to mask moving vegetation or unwanted areas and reduce false triggers.
Matching Distance To Coverage
Match camera distance to the area you need to monitor, not just the feeder: you want enough coverage for deer to enter, approach, feed, and leave within the frame. A close placement can trigger reliably yet record cropped bodies as animals circle, browse, or yield to one another.
When terrain permits, set the camera about 10 to 15 feet from the target area, framing the feeder plus likely approach routes. This spacing better uses the field of view while preserving identifiable body detail. PIR zones differ among models, so stated range isn’t a guarantee of useful coverage. For example, the Edge 2 Pro detects movement out to 100 feet, but deer near that limit may lack detail needed for assessment. Before deployment, walk through the intended zone
Camera Mounting Height Matters
Mount your trail camera 3 to 5 feet above the ground, with about 4 feet often giving you a clear view of deer and bucks’ antlers. Angle it slightly downward along the deer’s travel path, then adjust its height and tilt for slopes, foliage, and feeder obstructions. Test the frame before you leave, because an overly high or low mount can bias what your camera records.
Optimal Mounting Height
Camera height determines whether you record clear deer behavior or unusable images: set the unit about 3 to 5 feet above the ground, with roughly 4 feet often providing the best view of bucks and their antlers.
At four to five feet, you sample both smaller and larger animals without systematically clipping antlers or foreground. Mounts placed higher can overrepresent head tops; lower positions admit feet, leaf litter, and false-motion triggers. Tip the housing slightly downward, accounting for slope and feeder footprint.
| Mount height | Field coverage | Likely result |
|---|---|---|
| 3 feet | Broad ground view | More debris |
| 4–5 feet | Balanced body view | Reliable identification |
Before departing, walk through feeding zone and review test images and trigger timing. Then alter height or tilt until deer occupy the frame cleanly.
Aligning With Deer Level
Set the lens about 3–5 feet above the ground—often near 4 feet—so it aligns with deer body level and records full animals, including antlers, as they approach the feeder. This mounting zone matches the vertical space occupied by a deer’s trunk and head during normal feeding approaches, improving the probability that the sensor detects movement and the image includes diagnostic body features. You avoid clips dominated by ground, legs, or cropped head tops, while retaining antler visibility for buck identification.
Aim the camera slightly downward toward the feeding area rather than directly horizontal. This angle places the expected approach and feeding zone within the detection field and helps maintain full-body framing. Before leaving the unit, walk through the deer travel line and review test images.
Adjusting for Terrain
Terrain changes the effective mounting height, so use the deer’s actual travel surface, not the ground at the tree, as your reference. For most feeder sites, place the camera 3–5 feet above the deer’s expected footing; about 4 feet is a dependable starting height for recording bucks and their antlers.
On a downhill approach, lower or tilt the unit downward only enough to keep the animal centered. On an uphill path, raise it or reduce the downward tilt so it doesn’t frame backs and ears alone.
Aim roughly 45 degrees down the travel trail while keeping the feeder activity zone within the detection field. In dense foliage, raise it modestly to clear branches, never excessively. Test framing before leaving, then refine the height and tilt carefully.
Identify Dominant Buck Visits
To identify dominant buck visits, position the trail camera to record each deer’s full body, antlers, posture, and interactions near the feeder rather than merely documenting feeding activity. Mount it roughly 3 to 4 feet high, aim it 45 degrees along an approach, and place it 10 to 15 feet from the travel path. This geometry extends detection time and reveals antler structure, body size, and displacement behavior.
| Observation | Ecological cue |
|---|---|
| Head-low approach | Assertive posture |
| Others yield | Likely social dominance |
Use fast triggering and a three-shot burst for arrivals or departures, when contests and avoidance often occur. If feeding lasts minutes, select single-photo mode with a one-minute delay to document repeated visits without obscuring patterns in the image record. Compare timestamps to distinguish solitary occupancy from repeated displacement.
Check Local Baiting Regulations
Before placing a camera near a deer feeder, review state and local wildlife rules because baiting and feeding laws vary by jurisdiction. Regulations can classify a camera aimed at feed as part of a baiting arrangement, particularly during hunting seasons, even when you don’t intend to hunt over it. Confirm allowable camera-to-bait distances and determine whether standards change between public and private land.
Also verify feeder placement limits, seasonal closures, and bait-removal deadlines; these measures can reduce disease transmission, concentrated browsing, and altered deer movement. A legal feeder location may still require removing feed before you can use the site for hunting or monitoring. If rules don’t clearly address your setup, contact state wildlife agency or local conservation officer before deployment.
Avoid Facing West at Sunset
When deer are likely to visit near sunset, avoid aiming your trail camera west because low-angle sunlight can strike the lens directly, creating glare, haze, and washed-out images.
Western exposure is problematic in open fields, where the sun sits low and bright sky fills the frame. If your feeder lies west of the camera, reposition the camera or angle it toward a shaded north or east background. This reduces direct lens illumination and preserves clear views of approach routes.
- Golden light flares across lens
- Pale haze masks doe’s face
- Dark silhouettes replace coat detail
- Tree shade protects the sensor
Use vegetation, terrain, or canopy as a light screen without blocking travel lanes. Small changes improve contrast and identification reliability during crepuscular deer activity periods.
Test Your Setup Before Season
Test the setup before season by walking through the feeder area and reviewing the resulting images for framing, focus, and motion detection. Begin with the camera 10 to 15 feet from the feeder, then assess whether its field of view shows deer, so feeder isn’t the subject. Walk likely travel routes from several directions, including approaches and departures, to verify that the sensor detects movement early enough for clear images.
Examine test photos for blur, empty frames, clipped bodies, and loss of detail at the chosen distance. Adjust camera position, angle, or distance according to observed results rather than assumptions. This pre-season trial improves data quality while limiting disturbance. If feeding activity creates excessive images, select single-photo mode, set a one-minute trigger delay, and retest.
Conclusion
For clear feeder images, you’ll place your trail camera 10 to 15 yards away, then adjust for the feeder’s throw radius and your model’s PIR detection zone. Mount it at an appropriate height for broadside deer movement and avoid west-facing views that flare at sunset. Test photos at dusk before season, when deer activity often increases. You’ll identify repeated dominant-buck visits reliably while reducing false triggers. Finally, check baiting rules, which can protect wildlife health and legal compliance.