How to Set Up a Trail Camera on a Scrape for Mature Buck Photos
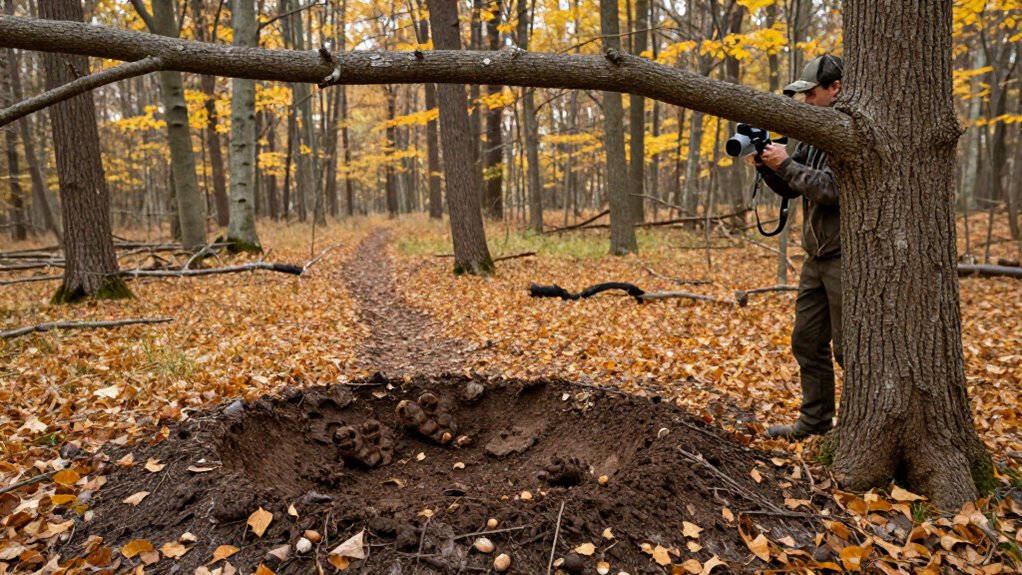
Build a realistic scrape beneath an active overhanging licking branch, exposing a two-foot soil circle and using fresh scent in a dripper. Set your camera about 10 yards away, chest-high, angled slightly downward, with the branch, pad, and approach route in frame. Clear only obstructing brush, use lithium batteries, and test trigger timing and nighttime exposure.
Add silica to limit condensation, minimize your scent, and check non-cellular units weekly. Placement and maintenance details follow.
Daylight Mature Buck Scrape Photos
To photograph mature bucks at a scrape during daylight, build a realistic social hub before introducing the camera. Create a bare, two-foot circle of soil beneath an overhanging licking branch, then use fresh scent attractant in a dripper. This structure mimics natural scrape communication, encouraging bucks to pause, scent-check, and investigate.
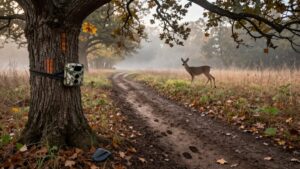
Set a cellular camera about 10 yards away, facing the likely approach route. Mount it six to 12 feet high on the tallest practical treesteps, with its body above a deer’s sightline. Aim slightly above nose level so entering animals do not block the lens and continue naturally into frame. Use 30-second delay, extending it toward one minute when triggers crowd images. Leave site undisturbed for weeks; records reveal direction, timing, and angles.
Use Fresh Lithium Batteries
Fresh lithium batteries give your trail camera steadier voltage than standard alkaline cells, especially during cold pre-rut mornings when buck activity can peak around scrapes.
Replace batteries immediately before mounting, and after extended storage. Lithium chemistry maintains usable voltage as temperatures fall, supporting triggers during brief daytime and crepuscular visits. At active mock scrapes, this stability reduces shutdown risk when bucks return repeatedly. If compatible, select low-self-discharge lithium AA or AAA cells, particularly for cellular cameras. Then confirm charge and test detection before you leave.
- Install a matched, fresh battery set.
- Check the battery indicator reads strong.
- Trigger one photo or video nearby.
- Verify the image saves correctly.
- Minimize visits; disturbance can alter deer behavior and local movement patterns around the scrape site.
Step 1: Clear Brush Near Scrape
Clear a 2 to 3 foot radius of low brush and leaf litter around the scrape to give the camera an unobstructed view of where a buck paws, urinates, and works the licking branch. Remove stems only when they interrupt the view or create foreground clutter. At dawn and dusk, wet leaves and stems can reflect infrared illumination, producing glare, false triggers, or obscured frames.
Open the camera’s field of view toward the scrape and its primary approach route, which lets you document full-body entries and departures for direction-of-travel interpretation. Don’t strip the site bare. Mature bucks often respond to security cover, so retain surrounding vegetation beyond the shooting window. A narrow, deliberate clearing preserves natural concealment while reducing image noise, shadows, and blocked body parts.
Step 2: Locate Active Licking Branch
Start with an overhanging vine, grapevine, or flexible branch that deer already use, or identify one above a natural travel route between bedding cover and feeding areas.
Look for polished bark, broken tips, fresh saliva, and disturbed soil beneath it; these signs indicate repeated scent marking. An active branch concentrates chemical communication: deer rub forehead glands, lick surfaces, and deposit saliva at a predictable point. Choose one on an established trail, old scrape, or field edge, where movement naturally funnels deer. It should hang within comfortable reach, creating a defined station.
If none exists, secure a flexible natural branch overhead and use a scent dripper to establish a scent-transfer point. Align it above exposed soil, so bucks can lick, paw, and mark efficiently.
Step 3: Mount Camera Chest-High, Angled Down
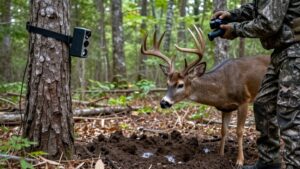
Mount the camera chest-high, roughly 6 to 12 feet above ground, on a stable tree or stand, then angle the lens slightly downward toward the scrape pad. This elevated, downward perspective keeps the camera body above a traveling deer’s typical line of sight, which can reduce conspicuousness and record a more natural approach. Set it about 10 yards from the scrape, provided vegetation and terrain leave the pad within the direct field of view from the buck’s travel line. The downward angle should include the licking branch, scrape soil, and the buck’s head and shoulders.
That framing documents facial features and behaviors such as licking, scent investigation, and urination rather than producing ground-heavy images. Once mounted, verify coverage; stop adjusting. Repeat visits add scent and pressure.
Step 4: Aim North to Prevent Glare
After you confirm the elevated framing, aim the camera due north whenever the site allows. This orientation reduces direct exposure to low morning and evening sun, which can wash out a buck’s face and obscure identifying features. Set the unit about 10 yards from the mock scrape, on its side, so the approach trail crosses the open frame while the sensor remains north-facing.
The angle also limits visible-light and infrared reflection from bare soil and the licking branch, helping night images retain balanced illumination. Northward alignment stabilizes exposure as solar angles change, rather than forcing the camera to face east or west. Review images from the first full day, including dawn and dusk intervals. Rotate camera if needed to prevent further glare or overexposure.
Step 5: Test Trigger Speed at Scrape
A fast trigger setting is essential at a mock scrape because mature bucks may enter, investigate, and leave within seconds. Set the camera to its higher speed or lowest trigger-time photo mode, then make several sample runs through the approach corridor at three to five yards. Confirm capture of approach, licking-branch pause, and departure. Slow response can miss brief facing, licking, or urination behavior.
Check whether a 30-second delay creates gaps between frames that obscure travel direction useful for stand placement. If still images miss initial movement, test video to document behavior and direction. After you lock the camera roughly 10 yards from the scrape and align its sensor with the trail, repeat the test; minor height or angle changes can alter detection reliability.
Step 6: Lock Housing, Remove Boot Prints
Once testing confirms reliable detection, lock the camera housing to a stable post, fence post, or small tree 6 to 12 feet above ground, aimed at the scrape approach lane. A rigid mount prevents wind, animal contact, and rut activity from changing the frame, which preserves comparable observations of deer use over time. Height also reduces the chance that deer will investigate the housing directly while still capturing their approach.
Install and lock the camera before you conduct any scent or ground work. Then leave on your access route, erase boot impressions, and replace displaced leaves or grass within the picture zone. Restoring cover reduces disturbance and helps maintain site conditions. After setup, avoid revisits for weeks. Limited activity lets movement patterns develop; mature bucks return.
Review Nighttime Test Images
That night, review the first infrared images to verify that the flash exposes the scrape zone without washing out the deer and that the camera triggers within moments of an animal’s approach. Examine several consecutive captures. You’ll need evenly exposed deer and entry and exit trails, because travel direction and visitation help distinguish mature-buck use.
Confirm the lens records deer passing in front of the scrape, where clear head and shoulder details support identification, rather than animals at its edge. Look for prompt detection at first approach and no blank intervals between triggers. If illumination is excessive, detection is inconsistent, or framing misses approach routes, change camera height or angle and retest immediately. Rely on the setup for stand planning only after events produce evidence.
Cloudy Lens: Condensation; Use Desiccant
Clear nighttime images can still fail by morning when humid air condenses on the lens. Cloud cover and humid scrape bottoms amplify temperature swings, allowing vapor to cloud optics. Shelter your camera from direct rain with a small, breathable weather cover, and place a commercial silica desiccant pack near, not against, the lens inside its housing. Angle the camera slightly off the scrape or licking branch when vapor drifts across that line.
| Condition | Your response |
|---|---|
| First day at scrape | Inspect lens for fogging |
| Pack feels saturated | Replace with fresh silica |
If fog appears, bring the camera and desiccant indoors, warm and dry them, then reinstall fresh silica. Repeat checks regularly: moist lowland vegetation and soil maintain high local humidity around scrape sites at dawn.
Monitor Scrape Activity Weekly
Monitor a non-cellular scrape camera about once per week to limit repeated human scent and disturbance near a buck’s travel route. Frequent entry can alter movement. During each check, minimize your footprint and review images or video for the direction each mature buck uses. Those observations help you position a stand downwind of the dominant approach.
Place the camera 10 yards from the scrape, aimed along the approach rather than only at the scrape itself. Use a consistent 30-second delay; extend it toward one minute when the lens faces the scrape directly. This setting records brief visits while reducing redundant captures. If you need intelligence, choose a cellular camera. Notifications let you track activity without daily travel, preserving the local behavior you’re trying to understand.
Conclusion
To document mature bucks at scrapes, you’ll improve data quality by pairing fresh batteries, a clear detection zone, and a camera aimed at the active licking branch. Chest-high placement and a downward angle reduce false triggers and limit disturbance.
Verify nighttime exposure, control lens moisture with desiccant, and leave no obvious human scent or tracks. Weekly checks let you track seasonal visitation while minimizing pressure on deer and preserving the scrape’s natural behavior over time.