How to Make a DIY Trail Camera Mount From Cheap Hardware
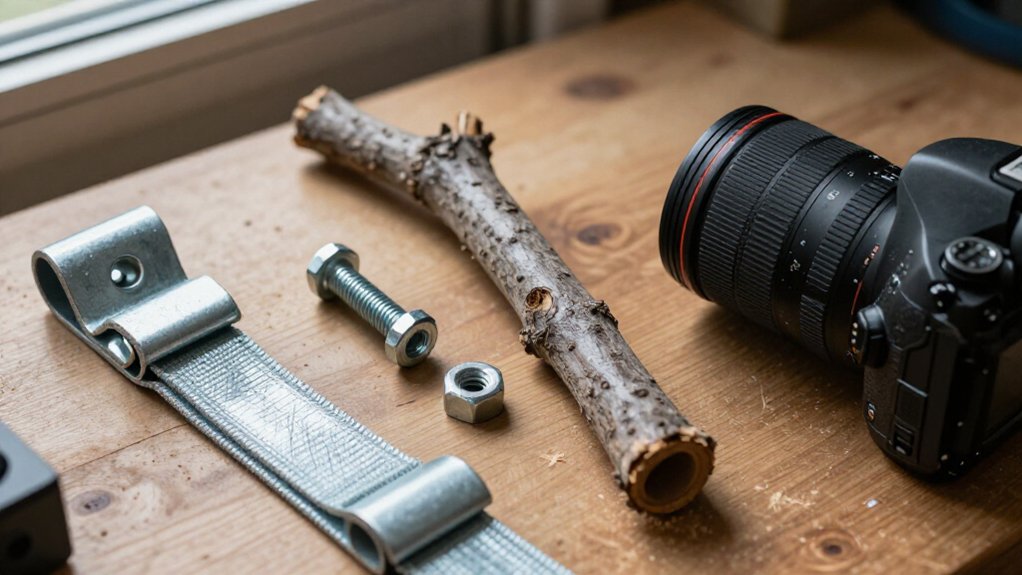
Build an adjustable trail-camera mount with two 1/4-inch eye bolts, a 3/8-inch bolt, washers, nuts, and a wing nut. Stack eye bolts between washers on center bolt, tightening it enough to let them pivot. Fasten bracket to a T-post with U-bolts at your chosen height, cap sharp threads, then screw on and aim camera. Clear grass from its detection zone, retighten nuts if it sags, and inspect for rust after rain. Further tips refine placement.
Adjustable T-Post Camera Mount
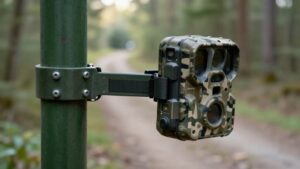
An adjustable T-post mount gives you a sturdy, low-cost way to aim a trail camera exactly where wildlife travels. Check your camera’s mounting point and body clearance before buying parts; dimensions vary. You’ll need two 1/4-by-2½-inch eye bolts, a 3/8-inch hex bolt and nut, three 3/8-inch washers, and two 1/4-inch hex nuts. Stack a washer, one eye bolt, another washer, the second eye bolt, and the final washer on the 3/8-inch bolt.
Secure it with the nut, leaving enough movement for a pivot. Install a hex nut on the lower eye bolt for adjustment. Insert the assembly through a T-post hole at chosen height. Drill the hole wider if threads scrape. Add a hex nut behind the post to lock it securely. Parts cost $5 to $6.
Gather U-Bolts and Wing Nuts
Start by gathering two 1/4-by-2½-inch eye bolts, a 1/4-inch wing nut, and two 1/4-inch hex nuts for the camera attachment. Choose eye-bolt length for your camera: a short one often suits a rear tripod socket, while a longer bolt can reach a bottom socket. Stainless hardware fights rust through wet seasons.
- Feel confident when you snug the 1/4-inch wing nut by hand, then lock the angle with hex nuts.
- Use a 3/8-inch hex bolt, matching nut, and three washers to create a firm main joint.
- If you’re building for a stake, replace the tree-mount eye screw with an eye bolt sized for its hole.
- You’ll appreciate tool-free adjustments when a buck appears at dusk and your setup needs a quick correction in the field.
Step 1: Mark T-Post Mounting Height
Choose the camera height before you tighten any hardware, using the T-post’s holes to line up the mount where it’ll watch the trail cleanly. Walk the site first and check the camera’s view from the animal’s likely approach. For a standard trail setup, set the mount at your preferred level and mark the matching stake holes. Higher placement can help the camera blend into the woods; above roughly seven feet, passersby may overlook it more easily.
One field-tested option is about 10 feet high, tucked beneath a branch and aimed downward. That angle can cover the trail while keeping the unit less obvious. If a hole is too tight, carefully drill it out so your hardware fits freely without stripping threads. Recheck your mark.
Step 2: Attach U-Bolts to T-Post
With the height marked, fit U-bolts that wrap snugly around the T-post and align with your mount’s attachment points. Choose hardware sized for the post’s narrow profile; loose U-bolts can let the setup creep when wind, rain, or a curious animal brushes past. Set each U-bolt at the marked level with its threaded ends facing outward, where you’ll still reach them after installation.
Slip washers over the threads and add the nuts. Tighten each side a little at a time, keeping pressure even so the mount doesn’t twist or slip. Pause to check for wobble, then adjust its direction toward the trail before giving the nuts their final firm turns. Recheck the hardware after a day of weather and changing temperatures outdoors.
Step 3: Bolt Camera Bracket to Plate
Build the adjustable camera bracket by stacking a 3/8-inch washer, a 1/4 × 2½-inch eye bolt, another washer, the second eye bolt, and a third washer onto a 3/8-inch hex bolt. Thread a 3/8-inch hex nut onto the bolt and snug it until the eye bolts stay put yet still pivot for aiming. Install a 1/4-inch wing nut on the top eye bolt, so you can make field adjustments without tools.
Add a 1/4-inch hex nut to the bottom eye bolt. For a stake-mounted plate, line up the lower eye bolt with the stake hole at your chosen height. Enlarge that hole if it crowds the threads; this prevents damage during installation. Slip the bolt through the stake and add a 1/4-inch hex nut behind it. Tighten hardware firmly; confirm secure alignment.
Step 4: Thread Camera Onto Bracket
Check where your camera’s tripod socket sits before threading it onto the upper eye bolt. A rear socket can require a shorter eye screw than a bottom-mounted socket, so compare the camera’s body with the bracket before you commit. Turn the camera clockwise by hand until its tripod threads engage smoothly.
Then use the wing nut to make small, tool-free adjustments in the bracket. Hold the camera steady and snug it down securely, but don’t force the threads or crank them too tight. If the camera won’t sit cleanly against the bracket, loosen the hardware, reposition the eye bolt, and confirm compatibility before taking the mount outside. Test the connection at home, where you can spot binding or wobble before it meets wet weather.
Step 5: Aim Toward Game Trail
Aim the camera directly along the game trail rather than across it, then use the wing nut to fine-tune the angle until the trail runs through the center of the view. This alignment gives deer more time in frame and helps you read how animals use the route. Set the mounting height and downward tilt so the ground and trail stay clear; roughly 10 feet high beneath a branch offers a wider perspective.
Tighten the wing nut once you’ve found the line, but don’t overtighten it. Before you leave, trigger a test image and check for cover, glare, and empty sky. If tracks shift, loosen the nut and reposition the camera. A stake mount can hold two cameras for opposite-direction coverage along the trail.
Step 6: Cap Sharp U-Bolt Threads
Cover every exposed U-bolt thread with a snug thread protector or cap before heading into the woods. Bare threaded ends catch sleeves, scrape knuckles, and can snag straps when you’re carrying the mount through brush. Match each protector to the bolt’s thread diameter, then press or twist it on until it stays put during normal handling and camera adjustments.
Purpose-made vinyl or plastic thread caps work well because they cushion the sharp metal without changing how the bracket fits against the tree. If you can’t find them, use a tough, close-fitting protective cover that won’t slip, bind the hardware, or block movement. Before each check, inspect every cap for cracks, looseness, and wear. Replace damaged caps after weather, sun exposure, or moves between sites.
Confirm No Obstructing Grass
With the hardware protected, view the scene through the camera’s position and look for grass, weeds, or low branches crossing the lens or motion-detection zone. A single stem can blur photos, while wind-tossed blades may trigger empty captures all day.
In fields and food plots, picture the grass at its tallest, not just how it looks today. Set the camera high enough and angle it downward when nearby growth threatens the bottom of the frame. Check the detection area as well as the image; vegetation can trip the sensor before an animal enters view.
Pull or clip away any grass blocking the lens line of sight, and remove loose stems that could blow back overnight. Then recheck from the camera’s perspective before leaving site.
Sagging Mount: Loose Nuts—Retighten
If your mount begins to droop after wind, rain, or a bump from wildlife, inspect the 3/8-inch hex nut that clamps the eye bolts and snug it down. Then tighten the 1/4-inch nuts securing both eye bolts, including the nut behind the garden stake on the lower bolt. Keep the washers between the eye bolts; they create the firm clamp that prevents a lean.
| Check | What you do | Field result |
|---|---|---|
| Center hex nut | Snug it firmly | Camera stops drooping |
| Eye-bolt nuts | Tighten both, including rear | Angle stays locked |
| Washers | Keep them centered | Clamp stays solid |
Reset the camera toward the trail, then press the mount lightly to test it. If it holds its angle, you’re ready. Wing nuts make field adjustments quicker.
Inspect for Rust After Rain
After a rain, inspect the eye bolts, hex bolt, nuts, and washers for early rust, especially at joints and contact points where water tends to linger. Bring the mount down or steady it against the stake, then check beneath washers and inside eye-bolt bends. A little orange staining can become seized hardware after repeated wet nights, making camera adjustments harder and weakening the connection.
Wipe off moisture and dirt, and note any pitting, flakes, or rough threads. If rust has started, replace the affected piece before you reinstall the mount. Stainless-steel eye bolts, bolts, nuts, and washers resist weather far better; one practical estimate puts the hardware at about $6 per mount, plus the garden stake. This check keeps camera aimed on wildlife trails.
Conclusion
You’ve now got a simple, adjustable trail camera mount that costs little and works hard in the field. Set it at the height your target trail demands, keep grass and branches out of the frame, and tighten the wing nuts whenever the post shifts. After wet weather, check the hardware for rust and replace worn parts early. With a solid mount and a clear view, you’ll capture more natural wildlife movement without disturbing the woods.