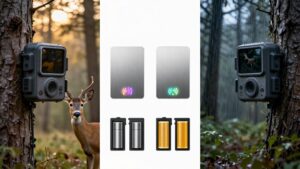
White Flash vs Infrared Trail Camera: Color Night Photos or Stealth?
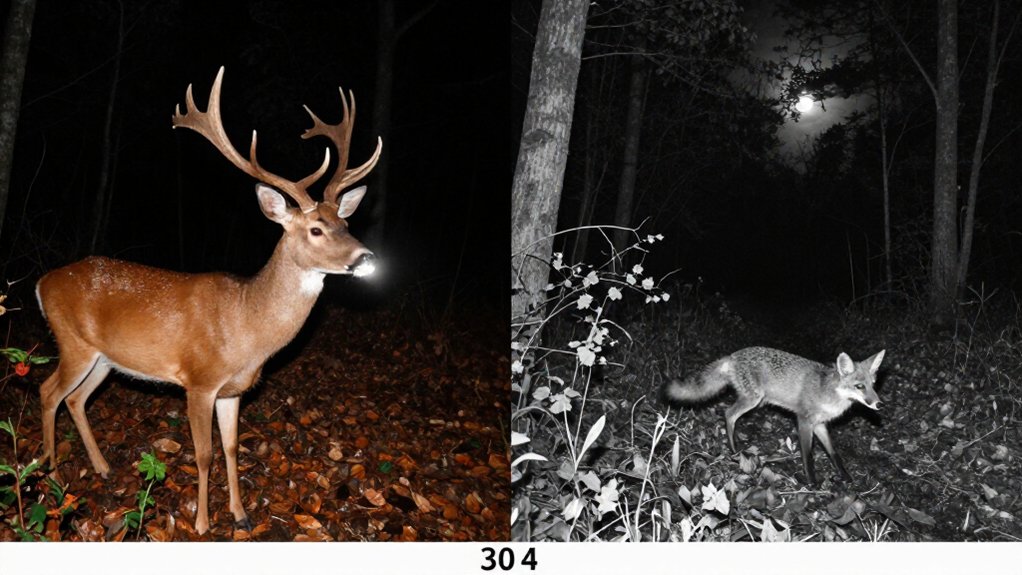
Choose white flash if you need color night evidence: it can reveal coat markings, injuries, clothing, vehicle paint, and habitat detail near 60 feet with good focus and placement.
Choose infrared when stealth and lower disturbance matter more. An 850 nm camera gives brighter monochrome images but shows a faint red glow; 940 nm no-glow hides illumination better, often with less range.
Your mounting, shutter speed, and local rules shape results. Setup details follow below.
Color vs. Invisible Infrared
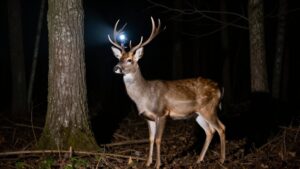
White-flash trail cameras record full-color nighttime images, often illuminating subjects beyond 100 feet with strong detail, but their visible burst can startle animals and reveal the camera’s location. You gain color evidence for species identification, coat condition, and habitat use, making white-flash useful where disturbance and theft risks are low. Yet each burst can alter behavior during sensitive nocturnal observations. For conservation surveys, place cameras where visibility is acceptable and review whether images justify that intrusion.
| Method | Night record | Field implication |
|---|---|---|
| White flash | Full color, >100 feet | Visible; may disturb wildlife |
| Infrared | Black-and-white | Discreet monitoring |
| Best use | Identification | Low-risk sites |
| Survey choice | Match site conditions | Protect natural behavior |
You should document placement, minimize repeated exposure, and prioritize data collection that doesn’t compromise wildlife welfare.
White LEDS Vs 940NM Infrared
White LEDs give you full-color nighttime images with strong detail and illumination that can exceed 100 feet, while 940 nm infrared LEDs produce nearly invisible “no-glow” light for discreet monitoring.
You can select white LEDs when your monitoring requires accurate color records of coat patterns, injuries, antlers, or habitat-use cues. However, their visible burst may alter animal behavior, startle sensitive species, and reveal your camera’s location to people.
This approach helps you document wildlife while recognizing that artificial light can influence natural movement, feeding, and vigilance across your study area each night without unnecessary repeated exposure. Choose 940 nm infrared when minimizing disturbance and keeping surveillance unobtrusive matter most.
In darkness, it records monochrome images that can appear dimmer or grainier than white-flash photographs.
60-Foot Night Color Clarity
At roughly 60 feet, a white-flash trail camera provides the clearest nighttime color record, helping you distinguish coat markings, injury coloration, antler characteristics, and surrounding vegetation. This visibility can strengthen observations when you need to document an individual’s condition or compare habitat use across seasons. However, the flash can startle animals and make your equipment conspicuous, potentially altering behavior or inviting theft.
If minimizing disturbance is a priority, infrared offers a less intrusive alternative, though it records night scenes in monochrome. At this distance, 850 nm infrared typically delivers brighter, more detailed images than 940 nm no-glow units, which may appear dimmer or grainier. You should select white flash for color-dependent identification and infrared for monitoring where animal welfare and camera concealment outweigh color evidence.
Mounting Height and Trigger Setup
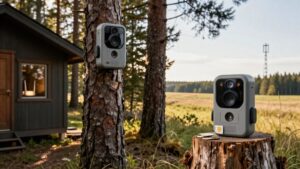
Mount the camera about 3 to 4 feet above the ground for most wildlife trails, then adjust its height for the species, terrain slope, and expected travel line. On level ground, aim it slightly downward and keep the animal’s route inside the detection zone, not against distant background. Remove grass, branches, and other material near the lens and PIR sensor; they can cause false triggers or block the flash.
Before deployment, you walk through the detection area at the target animal’s expected distance to verify framing and response. Choose a trigger delay and photo or video mode that matches traffic levels. Frequent movement fills memory cards and drains batteries, so balanced settings preserve usable observations while reducing unnecessary disturbance and maintenance demands across longer monitoring periods.
White Flash Near Residential Areas
Near residences, a white-flash trail camera can attract notice because its visible nighttime burst produces full-color images but may startle wildlife or draw attention from people nearby. You can reduce disturbance by selecting and placing equipment according to observed animal movement and property boundaries. Consider these practices:
- Aim the flash away from windows, walkways, and neighboring yards.
- Record whether repeated flashes alter feeding, travel, or vigilance behavior.
- Use 850 nm infrared when a faint red glow is acceptable.
- Choose 940 nm no-glow infrared when discretion matters most.
- Expect 940 nm units to sacrifice some nighttime brightness and range.
This approach supports nonintrusive monitoring and helps you document animals without unnecessarily changing their behavior or creating avoidable concern among nearby residents after dark each night.
AA Battery Replacement Costs
AA replacement costs depend chiefly on trigger frequency, nighttime recording duration, flash system, and local conditions. White-flash units draw power for visible illumination, whereas infrared models run IR LEDs; actual endurance still varies with each model and its settings.
If you select a no-glow 940 nm camera, it may consume slightly more energy than an 850 nm unit, increasing replacement frequency in some deployments. Frequent night video, brief trigger intervals, and cold weather accelerate battery depletion. To estimate recurring costs, compare the maker’s battery-life rating with your expected number of captures and local AA prices. Check cameras during routine wildlife monitoring, recording battery changes alongside activity levels and temperature. That simple log helps you limit unnecessary visits, maintain continuous observation, and plan budgets.
Rain Reflections Can Ruin Images
Battery planning also needs to account for image loss during wet weather. Rain can turn otherwise useful wildlife records into uncertain observations. Droplets on the lens, or foliage close to it, reflect the flash back toward the sensor. White flash makes these artifacts especially obvious, illuminating raindrops and wet surfaces as haze, bright spots, or washed-out areas.
Infrared units aren’t immune; they may show bright streaks or blobs in monochrome frames.
- Mount your camera beneath a small cover.
- Angle it away from nearby leaves and branches.
- Keep the sensor and flash unobstructed.
- Inspect the lens and flash window after rain.
- Remove water, mud, and condensation promptly.
These precautions preserve identifiable animals and more reliable monitoring data, helping you avoid misinterpreting obscured images.
Motion Blur and Recovery Time
For fast-moving wildlife, you’ll reduce motion blur by choosing a camera with a published fast shutter speed. At night, 850 nm infrared illumination can support clearer video and shorter exposures than dimmer 940 nm no-glow output. You should also compare recovery times between triggers, since they vary by model and settings rather than flash type alone.
Shutter Speed And Blur
Motion clarity at night depends chiefly on shutter speed: a fast exposure can freeze a running deer or flying bat, while a slower one may leave soft edges or visible streaks. White flash can reveal color and fine coat patterns, yet its visible burst doesn’t itself guarantee a short exposure. Infrared units create monochrome records; 850 nm low-glow illumination may support clearer motion than 940 nm no-glow illumination under very dark canopy.
- Check published shutter-speed values before deployment.
- Place cameras where animals cross predictable paths.
- Aim across, rather than along, travel routes.
- Use nearby vegetation sparingly to prevent obstructed subjects.
- Review blurred frames to refine placement and protect wildlife corridors.
You’ll document behavior reliably when exposure settings match animal speed and available nighttime light.
Recovery Time Between Triggers
Recovery time measures how quickly a trail camera can record again after a trigger, and a fast-moving animal may leave the frame before a slow unit resets. This interval differs from shutter speed: a fast shutter freezes movement within one image, whereas rapid recovery records successive visits. White flash and infrared illumination don’t inherently set recovery performance.
You should compare stated specifications and test each camera using your planned photo or video settings. Longer clips, image processing, and slow SD card writing can extend the gap. For monitoring wildlife corridors or documenting behavior, choose short recovery time, fast shutter speed, and a sufficiently fast, compatible memory card. That combination helps you follow repeated movements, reduce missed encounters, and produce clearer evidence for habitat use and conservation decisions.
Driveway Trespasser Identification
For driveway identification, you can use white flash to record full-color clothing and vehicle details at night, though its visible burst may reveal the camera. An 850 nm infrared unit offers brighter covert imaging with a faint red glow, while 940 nm no-glow improves discretion but can reduce distant detail. Position the camera along the likely approach, minimize disturbance to people and wildlife, and check local recording laws.
White Flash Identification Detail
When a driveway trespasser enters after dark, a white-flash trail camera records the scene in full color, helping you distinguish clothing colors, vehicle features, and other visible identifiers. You can assess images for:
- Jacket hue and fabric pattern
- License plate color, make, and body damage
- Shoe style, carried items, and facial context
- Vehicle paint, decals, and cargo configuration
- Time-linked movements across your driveway
Flash coverage can exceed 100 feet, yet identification depends on focus, camera placement, and subject distance. Position units to avoid vegetation glare and aim across, rather than along, travel paths. Carefully preserve original files while avoiding habitat disturbance to nocturnal wildlife. Visible illumination can alert a person and reveal the camera, so use it where color evidence outweighs visibility on site.
Infrared Stealth Tradeoffs
Infrared cameras reduce the chance that a driveway trespasser notices monitoring, but that concealment can limit nighttime identification detail. You can use 850 nm infrared when you need relatively bright, detailed monochrome images: its faint red glow may remain visible, yet it often records more information than a no-glow unit. A 940 nm camera minimizes visible illumination and helps you observe human activity with less disturbance, an advantage where discreet monitoring protects normal wildlife behavior.
However, its shorter effective range and lower light output can produce darker, grainier frames, reducing your ability to distinguish facial features, clothing, or plate characters. Choose 940 nm no-glow when avoiding detection outweighs evidence quality. Choose white flash when color-based identification is essential, but its burst may alert subjects.
Placement And Legal Considerations
Place the camera on your property and aim it across the driveway entrance, where it can document faces and vehicle details without intruding on neighboring homes or private areas. A measured field test helps you balance identification, discretion, and wildlife disturbance.
- Mount it high to deter tampering, then verify facial detail and plates at entry.
- Choose white flash for color evidence; its burst can reveal the camera.
- Use 850 nm infrared for subdued glow, or 940 nm for greater concealment but dimmer frames.
- Check local surveillance, audio, and privacy rules before installation.
- Preserve original timestamped footage if you report an incident.
Limit coverage to needed access routes, reducing unnecessary observation of people, pets, and habitat. Review footage promptly and document conditions around each event.
Check Local Flash Regulations
Before deploying a trail camera, check the wildlife, hunting, and land-use rules that apply to your site. Regulations can differ by jurisdiction, season, camera purpose, and habitat sensitivity. Confirm whether officials restrict visible white flash, infrared illumination, or wildlife recording at specific times or locations. These limits can reduce disturbance during breeding, migration, or nocturnal activity.
Ask the responsible wildlife agency or land manager about public-land permits, protected-area conditions, and rules for research or security monitoring. Don’t assume a no-glow 940 nm infrared unit is exempt because people rarely see its flash. Its illumination and recording function may still fall under local restrictions. If guidance is unclear, contact the responsible authority before you install or operate the camera. Document their guidance and follow it.
Conclusion
Choose white flash when you need color evidence at roughly 60 feet and can mount the camera high, aim it carefully, and accept visible illumination. Choose 940 nm infrared when you prioritize stealth near homes, wildlife, or trespass routes. You should test rain reflections, motion blur, trigger timing, and recovery speed before deployment. Protect animals and neighbors by limiting disturbance, avoiding unnecessary flashes, and checking regulations. Your setup should balance identification quality with low-impact monitoring.