Trail Camera Sensitivity: High or Low? How to Pick for Your Spot
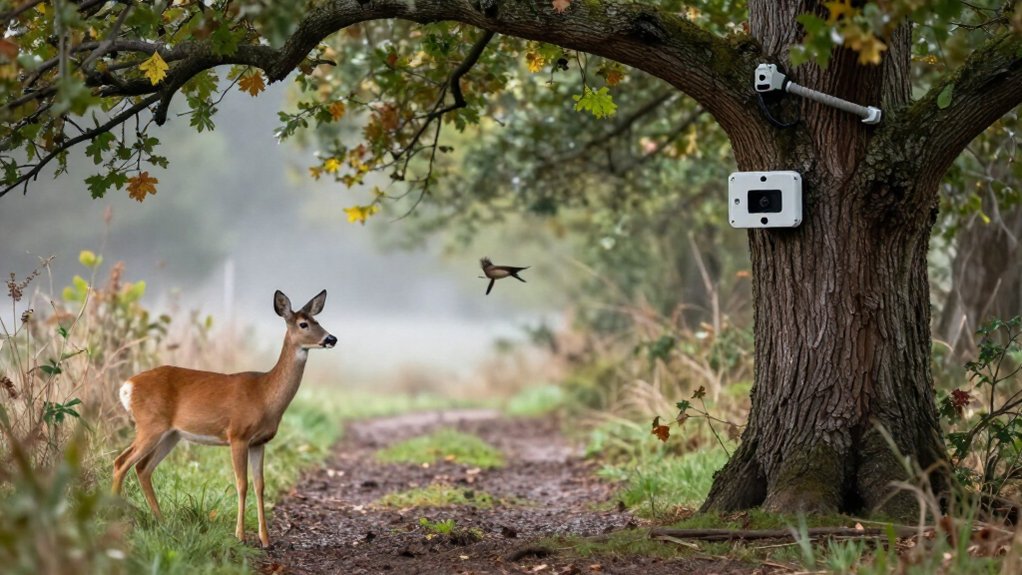
Start your trail camera at Medium (about 5 on a 1 to 9 scale), then review animal detections and empty captures.
Use Low near trails, feeders, or windy grass where vegetation and temperature shifts create false PIR triggers.
Choose High for small, distant, or fast animals in stable, open terrain, accepting more false captures and battery use.
Test at 20 feet, change one level at a time, and use the next steps to refine placement reliably.
Start at Medium Sensitivity
Start with medium sensitivity because it provides a practical balance between detecting wildlife and limiting false triggers. This baseline lets you evaluate how your camera responds to movement at the site without immediately maximizing empty captures or missed detections.
In dense foliage, medium sensitivity reduces responses to swaying grass, branches, and similar background motion. In open terrain, you can test medium-to-high sensitivity when animals may appear farther away or enter from off-axis angles. Review your first photos or videos systematically: count empty captures, note missed animals, and compare detection positions.
Then adjust one level at a time. Repeat tests in daylight and after dark, because activity patterns and detection conditions can differ. This approach helps you identify settings supported by observations rather than assumptions.
Assess Ambient Temperature Swings
Monitor how the site’s temperature changes across the day, because PIR sensors respond to shifts in infrared radiation rather than to motion alone. Rapid warming or cooling can destabilize the thermal background, raising the likelihood of false captures. Where fluctuations are frequent, begin at low or medium sensitivity, then inspect image sequences and adjust one setting at a time.
Test the camera in daylight and after dark; solar heating, radiative cooling, and nighttime air movement can produce different detection conditions. If shifting temperatures occur alongside wind-driven grass or foliage, clear vegetation from the detection zone and consider reducing sensitivity. Higher sensitivity can improve detection, but it also increases susceptibility to temperature-related triggers. Use your results, rather than a daytime check, to choose the setting.
Match Sensitivity to Target Size
After accounting for temperature-driven false triggers, match PIR sensitivity to the size and distance of the animals you expect. Small bodies produce weaker detectable thermal-motion signals than deer, at longer range. On WiseEye cameras, use the default setting of 5 as a benchmark, then test whether your target reliably triggers the camera. Record detections alongside empty captures during comparable periods.
| Target | Typical placement | WiseEye starting setting |
|---|---|---|
| Chipmunks or rodents | Distant trail edge | 5 to 9 |
| Hedgehogs | Moderate distance | 5 to 9 |
| Deer | Nearby feeding area | 1 to 5 |
| Large mammals | Nearby travel route | 1 to 5 |
For nearby deer and large mammals, begin at 1 to 5. Their stronger thermal signature and movement create a clearer signal, limiting minor-motion responses. Field-test each placement: increasing sensitivity can improve small-animal detection, but uses more battery and memory.
High vs. Low PIR Settings
Choose high PIR sensitivity when you need to detect small, distant, or fast-moving wildlife in open terrain, but expect more false triggers from wind, sunlight, and temperature shifts. Use low sensitivity in dense vegetation when larger, nearby animals are your priority, recognizing that it can miss smaller or cooler distant targets. If site conditions are uncertain, start at medium sensitivity, review captures, and adjust based on missed detections and unwanted images.
When High Sensitivity Wins
High PIR sensitivity is most effective when your target animals are small, distant, or fast-moving, because it expands the camera’s ability to register subtle heat-and-motion changes that lower settings may miss. Use it in open terrain, where a longer detection range lets you monitor approach routes beyond the camera’s immediate foreground.
For birds, rodents, and other quick mammals, combine high sensitivity with the fastest trigger speed available; this reduces the interval in which an animal can cross the detection zone without producing an image. It can also improve results for hedgehogs, whose insulated bodies and spines may weaken the thermal contrast a PIR sensor needs. Site selection remains important: place the camera where vegetation is sparse and stable. Wind-blown vegetation can cause false triggers.
When Low Sensitivity Wins
Low PIR sensitivity works best in dense woods and other cluttered sites, where wind-driven grass, branches, or falling leaves can repeatedly trigger the camera. By narrowing the detection threshold, you make the sensor prioritize infrared changes from nearby animals over minor background movement. This approach suits feeder stations and food sources: animals often remain within the detection zone, so long-range coverage adds little value.
On cameras with a 1 to 9 scale, begin around settings 1 to 5, then evaluate sequences and refine placement. Lower settings also reduce activations, which conserves battery power, limits memory use, and shortens time. The tradeoff is reduced detection range, so use this setting when target area is compact and you expect subjects to pass regularly at close range to the camera.
False Triggers And Misses
PIR sensitivity requires a tradeoff between false triggers and missed detections: higher settings extend detection to smaller, faster, or more distant animals, while also responding more readily to wind-blown vegetation, falling leaves, and shifting temperatures. At low sensitivity, the camera ignores more minor motion, which can conserve battery power and memory capacity. The cost is reduced detection probability for small or distant animals, particularly when cool temperatures weaken the infrared contrast between animal and background.
For nearby targets, levels 1–5 often reduce unwanted captures; levels 5–9 better register subtle or distant movement, with 5 providing a practical baseline. Review initial images for empty frames and apparent gaps in activity. If you see repeated blanks, lower the setting; if expected animals don’t appear, raise it.
Match Settings To Conditions
Match sensitivity to the detection environment rather than treating one setting as universally best. Use high PIR sensitivity when you need to detect small, distant, or fast-moving animals. Its larger detection response improves coverage, but it also reacts more readily to moving leaves, changing sunlight, and temperature shifts.
In dense cover or near feeders, select low sensitivity to limit nuisance captures and conserve battery and storage. Accept the trade-off: the camera may miss smaller animals or subjects farther from the sensor. In mixed woods, begin at medium, inspect your first image set, and adjust according to trigger quality.
Open terrain often supports medium-to-high sensitivity because animals can approach across broader lanes. Test settings during daylight and at night; thermal backgrounds and animal movement patterns change between periods.
Low Sensitivity for Windy Grasslands
In windy grasslands, start with low PIR sensitivity to limit wind-driven triggers from swaying grass and conserve battery and storage. Clear nearby vegetation and position the camera toward a less exposed detection zone to reduce grass-movement alerts. If testing shows that small or distant animals are missed in day or night conditions, raise sensitivity to medium and compare the resulting images.
Limit Wind-Driven Triggers
Because wind-blown grass can repeatedly cross a camera’s detection field, start with low PIR sensitivity in exposed grasslands to limit false triggers. PIR sensors respond to changing infrared patterns, so frequent vegetation motion can produce repeated activations even when no target animal is present.
A lower setting filters marginal changes, reducing unneeded captures and preserving battery capacity and memory-card space. After installation, test the setup by walking through the intended detection zone at the distance wildlife will use. Review resulting images to verify that the camera records a clear, timely detection.
If animals are absent from tests or field results, increase sensitivity one step at a time, then compare trigger rates with confirmed wildlife captures. This incremental approach identifies the lowest setting that maintains reliable detection in windy conditions.
Reduce Grass Movement Alerts
Set PIR sensitivity to low when you place a trail camera in windy grasslands, where moving grass can create repeated infrared changes within the detection field. This setting filters many non-animal triggers caused by wind-blown stems, leaves, and shifting vegetation. As a result, you’ll collect fewer empty images and conserve battery capacity and memory-card space.
Improve performance further by clearing grass and other plants from the camera’s view when practical; even a well-tuned PIR sensor can respond to nearby moving vegetation. Then review initial images under daytime and nighttime conditions, because temperature and light conditions can alter false-trigger rates. If your footage misses small or distant animals, increase sensitivity one step at a time. Gradual adjustments let you measure whether detections justify false alerts.
Adjust Detection Range
Low PIR sensitivity shortens the effective detection range and helps prevent swaying grass from producing repeated false triggers in windy grasslands. This setting raises the threshold for infrared change, so the camera is less likely to react to small temperature contrasts created by moving vegetation at longer distances. You’ll also reduce unnecessary image capture, which can preserve battery capacity and storage space during sustained wind.
Begin at the low setting, then evaluate detections across daytime and nighttime periods; solar heating, cooling, and animal movement patterns can alter performance. If your review shows that small animals or animals near the edge of the monitored area are missed, increase sensitivity one step at a time. Compare trigger frequency, subject distance, and image usefulness after each adjustment.
Optimize Camera Placement
Placement determines whether low PIR sensitivity filters wind-driven motion without causing missed animal detections. In windy grasslands, mount the camera where you can clear grass, weeds, and branches from its field of view. Moving vegetation produces repeated infrared changes that can trigger the sensor, wasting battery capacity and filling storage with empty images.
Aim directly at the trail, feeding area, or crossing you expect animals to use, and align the detection zone closely with the imaging frame. This limits off-frame motion events. Avoid east- or west-facing positions: low-angle sunlight, shifting shadows, and glare can create false triggers or wash out photos.
After installation, walk through the intended zone at typical animal distance and inspect the test images. Keep sensitivity low if detection is reliable; increase it only when tests or animal sign indicate missed subjects in real conditions.
Verify Mounting Thread Compatibility
Before installation, compare the camera’s mounting-thread size with the tripod, bracket, or other mount; don’t assume a standard size applies. A mismatch can prevent attachment, alter the camera’s angle, or create instability that compromises detection results. If the threads differ, select a compatible adapter; never force the camera onto the mount, because torque can damage the connection.
After assembly, verify that the mount holds the camera firmly while maintaining its aim toward the intended detection zone. Then test it in the location. Check whether wind, vibration, or handling shifts the camera and confirm that movement within the target area triggers reliable detection. This field check links mounting stability to consistent sensitivity performance.
Compare Warranty Lengths and Terms
Compare each manufacturer’s written warranty rather than assuming trail cameras receive equivalent protection. Treat warranty documents as purchase evidence: identify the coverage duration and its start date. Record whether the term begins at purchase, shipment, registration, or activation.
Then test the scope of protection. Determine which defects, components, labor, repairs, or replacements warranty covers, and list exclusions, including batteries, accessories, misuse, weather damage, or shipping. Verify your obligations: you may need a receipt, serial number, registration, authorization, and return shipment. Calculate out-of-pocket costs, including freight and replacement charges. If you’re buying for business or ordering customized units, obtain confirmation that coverage applies to the camera and modified features. This comparison quantifies post-purchase risk before selecting a model.
Reject Fixed-Sensitivity Models
Reject fixed-sensitivity trail cameras because a single detection threshold can miss small or distant animals at one site while producing false triggers from moving vegetation at another. You need adjustable PIR sensitivity, which lets you match detection response to target size, expected range, and background motion. This control reduces measurement error across habitats rather than forcing one compromise setting.
- Choose Low when wind moves grass or branches; it limits non-animal activations and preserves battery capacity and storage.
- Use Mid for moderate background activity and typical-sized wildlife.
- Select High for smaller animals or longer detection distances, accepting greater false-trigger risk.
- Prefer five-level models when your sites vary substantially.
Review early image patterns under actual conditions; daylight, nighttime temperatures, and vegetation movement can alter performance materially.
Test Detection at 20 Feet
Place the camera about 20 feet from the target area and walk across its field of view to verify reliable motion detection under site conditions. Clear branches and grass before testing, because wind-driven vegetation can confound the sensor’s response. Then compare settings systematically:
- Walk at normal speed through the target zone.
- Repeat with smaller or more distant movements at medium sensitivity.
- Repeat at high sensitivity, noting any extra captures from vegetation.
- If nearby motion triggers images, lower sensitivity and retest.
Review the resulting images rather than relying only on indicator lights. Confirm that each pass appears within the intended frame and that off-target activity remains limited. If coverage is incomplete, adjust the camera’s aim or sensitivity, then repeat the test until detections are reliable.
Conclusion
Choose trail camera sensitivity by testing rather than guessing. Start at medium, then measure false triggers and missed detections across temperature changes, wind, and target distances. Increase sensitivity for small animals or cold, stable conditions; reduce it where moving grass, heat, or sun create motion noise. Confirm the camera detects your target at 20 feet, fits your mount, and offers adjustable settings and solid warranty coverage. You’ll get cleaner data and longer battery life overall.