How to View Trail Camera Pictures on iPhone With a Card Reader or App
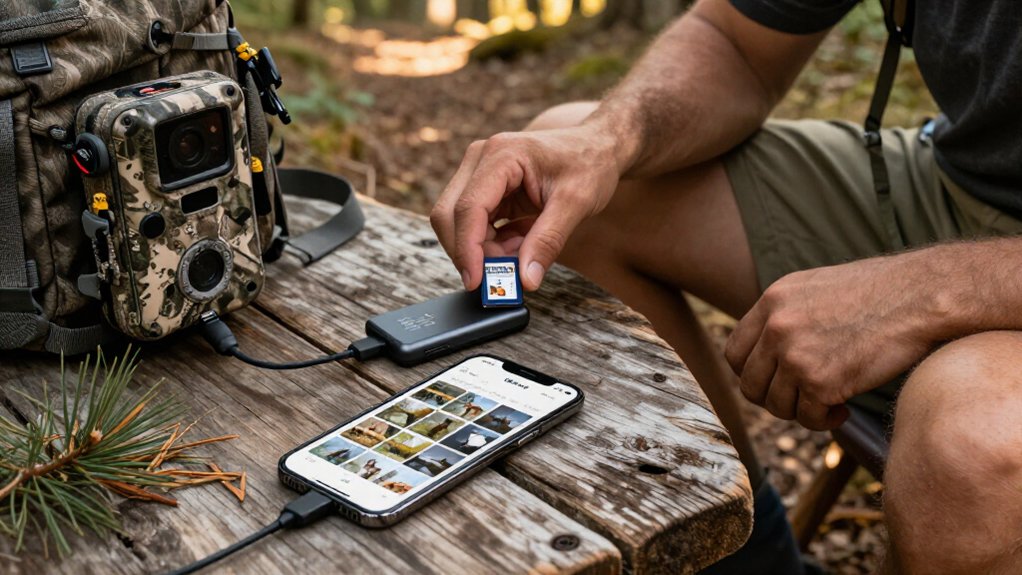
Match your reader to your iPhone: USB-C for iPhone 15 or later, Lightning for iPhone 14 or earlier.
Power off the trail camera, remove its SD or microSD card, insert it firmly, and open Files > Browse to select and save needed photos.
Eject the card before unplugging.
For Wi-Fi cameras, install the compatible app, join the camera network, then download TF-card files.
Check timestamps, permissions, and clean contacts if media won’t mount.
More help follows.
Import Trail Photos to iPhone
If your trail camera supports Wi‑Fi and has a companion app, join the camera’s Wi‑Fi network, launch the app, select TF-card files, and download them before viewing. Expect deliberate transfers: Trail Cam lists a 1.5 MB/s peak at close range, and field testing puts range near 15 to 20 feet.
Match Reader to iPhone Port
Match the card reader to your iPhone’s physical port before you buy: iPhone 15 and later models use USB‑C, while iPhone 14 and earlier use Lightning. A reader’s connector must match the device; adapters add another failure point when you’re checking cards in the field.
- Choose a USB‑C card reader for an iPhone 15 or newer.
- Use a Lightning reader with an iPhone 14, older iPhones, or Lightning-equipped iPads.
- Don’t expect a Lightning reader to fit or operate with USB‑C iPhones or iPads.
- Select a USB‑C reader for newer USB‑C iPads; USB‑C readers won’t connect to Lightning ports.
Before ordering, inspect the port directly rather than relying on the model’s age. This quick check prevents incompatible gear from reaching your pack for the next outing.
Step 1: Power Off the Trail Camera
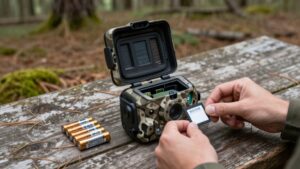
With the right reader in hand, shut down the trail camera before you touch its SD or microSD card. Turning the camera off first stops it from writing files while you remove the card, which helps prevent corrupted photos, videos, and directory data.
If your camera uses Wi-Fi, disconnect it correctly: use the camera’s remote to switch Wi-Fi off before you exit the camera control screen. Then power the unit down and wait until its display and status lights go dark. Open the card door, remove the SD or microSD card, and seat it in the compatible reader or camera slot.
When you’re finished, return the card securely, close the door, and power the camera back on. Confirm it starts normally before leaving it.
Step 2: Install the BoneView App
Download the free Trail Cam app by GD Digital Limited from the App Store before connecting a compatible Wi‑Fi trail camera to your iPhone. Confirm your iPhone runs iOS 9.0 or later, then check your camera manual to verify Trail Cam compatibility.
For an H885, use its remote to enable Wi‑Fi, open iPhone Settings, join the H885 network, and launch the app. You can browse TF-card thumbnails and choose files to download, play, delete, or share. Download each photo or video first; the app doesn’t display full media directly from the camera.
Test pairing before a field deployment. The 1.5-star rating from 22 reviews includes connection-failure and lockup reports. Keep the camera nearby, verify Wi‑Fi stays on, and restart either device if pairing stalls.
Step 3: Insert the SD Card
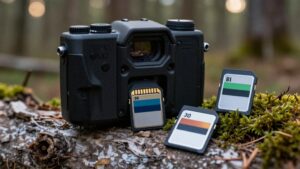
For a direct card-reading workflow, power off the trail camera before removing its SD or microSD card. Locate the card compartment and remove the card carefully, avoiding bent contacts or dirt on the terminals. Check the label first: SD, SDHC, and SDXC cards use the full-size slot, while microSD, microSDHC, and microSDXC cards need the smaller matching slot.
Align the card’s contacts with the reader’s metal contacts and slide it in gently until it seats fully. Don’t force it; resistance usually means the card is backward or in the wrong slot. If you’re using BoneView’s USB-C iPhone/iPad reader, seat the card before connecting the reader to an iPhone 15 or later. Keep the card installed until you’re ready to open Files and browse contents.
Step 4: Save Trail Photos to Camera Roll
BoneView readers don’t automatically import every file, so save only the keepers you need. On iPhone 15+ or a USB-C iPad, this workflow applies when you use a BoneView USB-C reader. Work from the card’s actual photo folder, rather than an in-app preview, for reliable results.
If Save Image isn’t available, choose Save to Files instead and store a copy locally. Supported SD, SDHC, SDXC, and microSD cards up to 256GB work. In the Trail Cam app, download each item first, then use its save or share command to transfer it to Photos directly.
Step 5: Confirm iOS App Permissions
Before browsing or downloading trail-camera media, confirm that iOS has granted the reader or companion app the access it needs. After connecting an SD or microSD reader to an iPhone 15 or newer, or a USB-C iPad, open Files and respond to any access prompt so Files can read the card. For a camera companion app, approve its requests for local photo and video access before viewing or downloading files.
On iOS 9 and later, media may need this authorization to download and play because it isn’t automatically imported into phone storage. If thumbnails stay blank, downloads fail, or the app shows no media, open Settings > Privacy & Security, select the app, enable the relevant permissions, then reconnect with the card and try again.
Step 6: Eject SD Card Before Unplugging
Safely unmount the SD card after you’ve finished viewing or saving trail-camera files. With a BoneView USB-C SD/microSD reader on an iPhone 15 or later, keep the reader connected until every save or download finishes in Files. Open Files, tap Browse, and select the card to confirm no transfer is still running. Then use iOS’s eject option for the external card. This tells iOS to stop reading from or writing to the storage.
Wait until the card disappears from Files, or iOS confirms it has been unmounted, before unplugging the corded reader. Don’t pull it after closing an image. You’re working directly from the card; the reader doesn’t use Wi-Fi, cellular, or automatic phone imports. Ejecting first reduces chance of interrupted writes and corrupted files.
Verify Timestamps in Photos
Open the trail camera folder in Files and check each image or video’s date and time in its file details. These values come directly from the memory card; your reader doesn’t automatically import files into iPhone storage. Compare the displayed time with the camera’s clock setting in its menu, because neither Files nor an app corrects a bad camera clock.
When you use the Trail Cam Wi-Fi app, compare thumbnail times with the recorded time fields and confirm they agree. Battery swaps and clock resets commonly cause errors. If a timestamp is wrong, set the camera’s time of day first. Then capture or review several newer photos, reconnect the card or app, and confirm the corrected timestamps before relying on sequence for scouting decisions.
Resolve BoneView Connection Errors
If your trail photos don’t appear or BoneView stays on “Verifying connection…,” first confirm that the reader matches your iPhone: USB‑C BoneView models work with iPhone 15 or later and USB‑C iPads, while Lightning models fit iPhone 14 and earlier. A Lightning reader won’t work on a Lightning-free iPhone. Fully reseat both the card and reader; this battery-free unit needs a firm wired connection to initialize. Then open Files, tap Browse, select the card, and inspect media there; BoneView doesn’t auto-import.
| Check | Field fix |
|---|---|
| Card type | Use SD, SDHC, SDXC, microSD, microSDHC, or microSDXC. |
| Capacity | Keep capacity at 256 GB or below. |
| Still failing | Avoid third-party apps; email [email protected] within 30 days. |
No cellular or Wi-Fi connection is required for compatible trail-camera files during field checks.
Clean Reader Contacts Monthly
Clean the BoneView BV-2001 reader’s connector pins and the SD or microSD card contacts about once a month with a dry, lint-free microfiber cloth to prevent “Verifying connection…” stalls and random disconnects.
Keep fingers off every metal contact; skin oils create an insulating film that causes intermittent reads. Store both the reader and card away from humid conditions between uses, because moisture and residue can disrupt the connection check. If you spot dust or oxidation, use a water-only, slightly damp cotton swab and clean gently. Let the reader and card dry completely before reconnecting. Reinsert the SD or microSD firmly, then open Files on your iPhone. Tap Browse and select the card to confirm it mounts reliably and the contacts make solid electrical contact.
Conclusion
You’ve got a field workflow when you match your card reader to your iPhone port, power down the trail camera, and insert the SD card into the BoneView reader. Open the app, import images, and verify timestamps before deleting anything.
Always eject the card in iOS before unplugging the reader to prevent corruption. If connections fail, reseat the card and restart the app. Clean reader contacts monthly, and you’ll keep transfers fast and dependable.