How to Set Up a Trail Camera on a Mineral Lick to Inventory Your Bucks
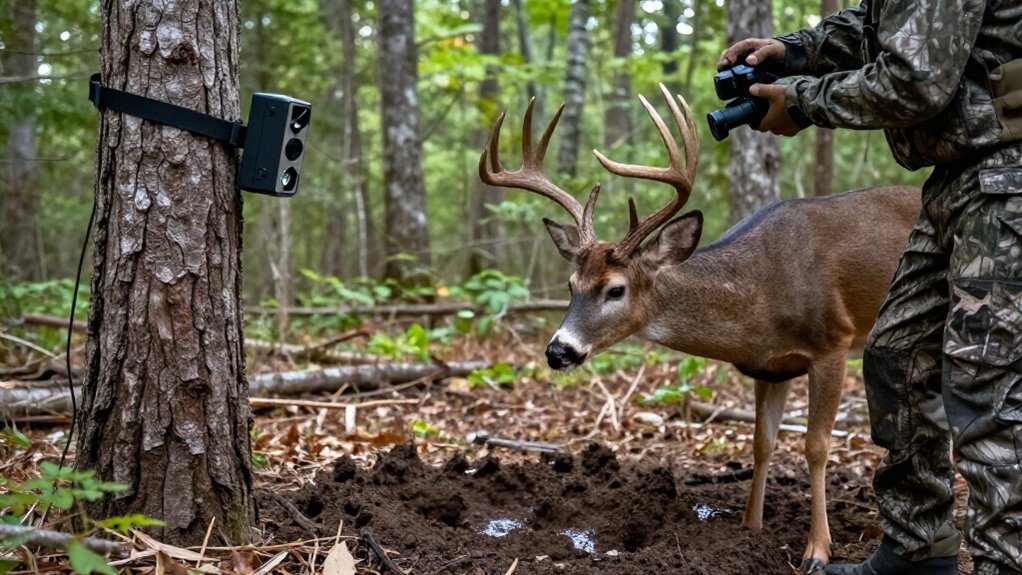
First, verify that mineral sites are legal in your jurisdiction and season. Place one legal lick near forage or water, clear only obstructing vegetation, and mount a locked camera within 10 feet.
Aim across primary approach, frame the two-foot site, and use three-photo bursts. Test coverage at sunrise, midday, and sunset.
Log each buck’s timestamps, antlers, body traits, and return intervals, then check cards at midday. The steps below refine placement and reduce false triggers.
Velvet Buck Photo Inventory
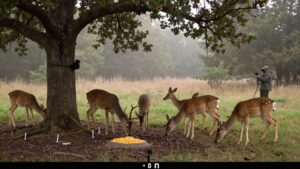
Begin your velvet-buck inventory around the Fourth of July, when trail-camera photos can document early antler development and establish a baseline for local buck numbers. Place one camera within 10 feet of each mineral site, aiming across the approach route and recording date, time, and antler traits. By June, many bucks carry eight or 10 points, while most tine and beam growth finishes by late July.
Review images in late August and classify each buck by estimated age, body size, point count, beam length, and repeat visits. Use these records as a proof-of-life inventory: they’ll reveal returning or promising animals and quantify your summer population. Don’t treat these photographs as November predictions; seasonal food, cover, and breeding behavior can shift a buck’s later range.
Verify Mineral Lick Legality
Before you establish a mineral site, verify state and local rules, as legality can vary by season, location, and mineral product. Consult current agency regulations before deploying mineral products or cameras. Record the jurisdiction, date, and rule source so your inventory protocol remains auditable.
Use this compliance checklist:
- Confirm whether mineral sites are permitted on your hunting property.
- Compare restrictions across seasons, zones, and public versus private land.
- Identify product-specific definitions, including loose minerals, blocks, and attractants.
- Stop the project if regulations prohibit mineral licks.
After confirmation, plan one site per 80 to 100 acres; where local guidance supports it, use one per 50 to 100 acres. Position your trail camera about 10 feet from the site, then log visitation data by date, time, and each buck identity.
Step 1: Clear Brush Around Mineral Lick
Clear grass, leaf litter, and brush from the mineral-lick area to give deer direct access to the site and preserve an unobstructed camera view. Select a location near dependable summer forage, a field edge, forest opening, or water, where deer already concentrate movement. Confirm that a suitable tree stands within 10 feet of the proposed lick; this distance keeps the site inside effective camera range without forcing you to alter surrounding cover excessively.
At a loose-mineral site, use a spade to loosen soil in a roughly 2-foot-diameter circle. Mix half of the mineral thoroughly into the disturbed soil, creating a consistent substrate deer can work. Then distribute the remaining mineral evenly across the surface. Remove only vegetation blocking access or visibility; leave nearby cover.
Step 2: Set Camera Height and Angle
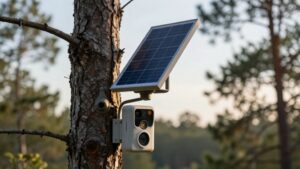
Mount the trail camera on the selected tree within 10 feet of the mineral site, aiming it directly at the mineral block or prepared soil circle. Set the mounting height so the lens records deer at the lick without clipping their backs or leaving excessive empty ground in frame. Use a moderately wide angle that contains the entire mineral area and enough surrounding space to document deer entering and using it.
Tilt the unit only as needed to center the block or circle; your images should show animals digging or licking, not facing away from the site. Before leaving, run a framing test at the mineral location and review the image. Confirm the site remains fully visible and deer-sized subjects appear clearly identifiable.
Step 3: Aim Across the Primary Approach
With height and framing set, orient the camera across the deer’s primary approach to the mineral lick rather than straight down the travel line. Place it within 10 feet of the site and select the route deer use most consistently, whether it’s a woods trail, field edge, or path from water. This perpendicular view increases the likelihood of recording each animal’s side profile as it enters and uses the lick.
Keep both the mineral site and the approach zone inside the frame so you can attribute visits to the location and assess body size, antler characteristics, and individual identity. Before leaving, verify the detection corridor from the camera’s perspective. Trim grass, brush, and low branches that obstruct the approach or image at any point.
Step 4: Enable Three-Photo Burst Mode
Set the camera to capture a three-photo burst for every motion trigger at the mineral lick. This setting records a short sequence as each buck pauses to dig or lick, increasing the chance that you’ll obtain clear views of its antlers, body, and distinguishing markings. Keep the unit within 10 feet of the lick so each frame retains useful detail for comparison.
Review the three-image sets as single observations rather than isolated photos. Multiple angles or head positions can reveal antler structure and body proportions more reliably, helping you identify individual bucks and assign practical size and age classes. During summer inventory, use these repeated burst records to track visitation and build a more complete property-level buck inventory over time, each season consistently for analysis.
Step 5: Test Trigger Range Before Leaving
Before leaving the site, walk through the expected deer approach and licking positions to trigger a test image. This field check verifies sensor detection at distances and angles bucks use. Keep the camera within 10 feet of the mineral lick, then review the image.
Confirm the lick is visible and centered. If you created a 2-foot mineral-soil circle, make sure the photo includes its boundary without wasting coverage on ground beyond the lick. Also verify that your test pass produced a recorded image, not merely a trigger indicator.
If the frame misses part of the circle, shows excessive foreground, or fails to capture your pass, adjust the camera’s aim and repeat the test. Leave only after the recorded result documents the complete target zone.
Step 6: Lock Housing, Pack Out Trimmings
Once the test image confirms full coverage of the mineral lick and approach, place the camera in a lockable housing and secure it to the tree. A housing reduces the risk that theft, casual handling, or weather-related disturbance interrupts your sampling period. Keep the unit mounted within 10 feet of the lick, where deer using the site remain large enough in frame for reliable identification. Tighten the housing and attachment hardware so the camera won’t shift its angle between visits.
Before you leave, remove only branches, weeds, and stems that obstruct the lens or trigger zone. Limit vegetation cutting to the minimum needed for an unobstructed view; excessive trimming changes cover and increases site disturbance. Pack clippings out; leftovers create visual and scent disturbance.
Review Timestamped Buck Photos
After the camera has sampled the lick for several weeks, review timestamped images from early July onward to document antler growth and identify bucks that appear quickly in the summer pattern. Create a record for each recognizable buck, logging image date, time, antler characteristics, body size, and estimated age class. Compare repeated photographs throughout July and August to separate individuals, measure antler progression, and calculate return intervals.
Fixing Sun-Glare False Triggers
Sun glare can produce empty trail-camera triggers by heating or flaring the sensor’s field of view, so orient the camera north or south whenever site conditions allow. Avoid east-west views, which expose the lens to low sunrise and sunset angles. Keep reflective mineral-soaked soil, standing water, and bright open ground outside the frame. Use a trunk or dense vegetation as a sun shield, without blocking the lick.
| Check | Corrective action |
|---|---|
| Camera bearing | North or south |
| Foreground | Remove reflective surfaces |
| Sensor zone | Trim moving vegetation |
Test images at sunrise, midday, and sunset before deployment. Record empty-trigger counts by time block; reposition the unit if glare clusters in one interval. Trim leaves that cross the sensor: shifting shadows and sunlit foliage can mimic animal motion. This protocol isolates optical and thermal false-trigger sources while preserving consistent buck-inventory data during repeated field tests at the lick.
Midday Card Check Schedule
Schedule mineral-lick camera checks around midday, when deer activity at the site is typically lower, to reduce the chance that your visit alters use patterns. Treat each visit as a potential disturbance variable: approach quietly, retrieve the card, replace it if capacity or battery requires, and leave immediately. Don’t linger to inspect sign or adjust the setup unless your data show a clear need.
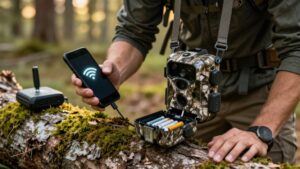
Limit physical checks because repeated scent, sound, and trail pressure can bias visitation rates and photo counts. A cellular camera lets you monitor image flow remotely and reduces site entries. When you review late-August images, record antler characteristics, estimated age classes, timestamps, and individual buck detections. Compare those observations across intervals to assess inventory quality while maintaining minimal disturbance overall.
Conclusion
By standardizing your mineral-lick camera setup, you turn summer sightings into a usable buck inventory. You’ve confirmed legality, cleared the detection zone, aligned the camera across travel, and secured the site without leaving debris. Now, compare timestamped images by individual antler traits, visit frequency, approach direction, and daylight activity. Check cards at low-impact midday intervals, then correct glare-driven triggers or missed detections. This repeatable protocol gives you cleaner data and more confident preseason decisions afield.