How to Fix a WiFi Trail Camera That Won’t Connect to Your Phone
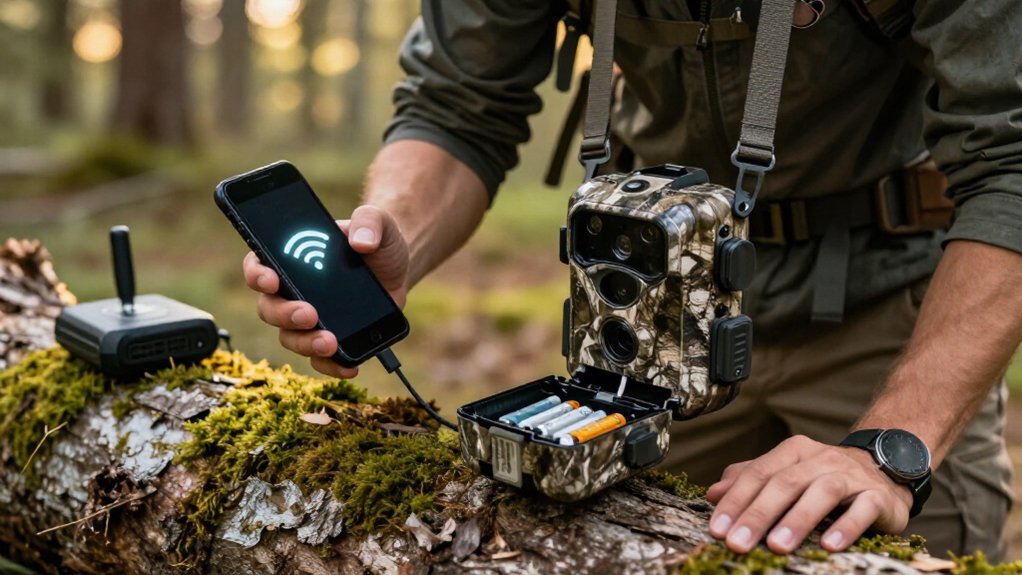
Start by charging the trail camera with fresh batteries above 20%, then place it in Setup mode and confirm Wi-Fi is enabled.
Turn off mobile data and any VPN, enable Bluetooth, Wi-Fi, and Location permissions, and reconnect through the app’s Bluetooth-then-hotspot flow.
Join the camera’s 2.4 GHz hotspot, not your home network, using the exact case-sensitive password.
If it still fails, restart both devices, forget saved camera Wi-Fi, reduce interference, and check firmware; below are fixes.
Restore App-to-Camera WiFi Pairing
If it loads, disconnect and reconnect in the app. Keep the camera in Setup: ON or Monitor can end WiFi after the default timeout, and H5 won’t pair while recording or triggered. If discovery fails, restart high-broadcasting 2.4 GHz devices temporarily.
Charge Batteries, Disable Mobile Data
Next, check power and phone network behavior. Low battery voltage and the wrong phone settings both stop pairing, so rule them out before you troubleshoot further.
- Charge or replace the batteries. Keep them above 20%, because unstable voltage can prevent Wi-Fi from starting.
- Skip NiMH rechargeables. Eight 1.2V cells deliver lower voltage, and they often cause unstable performance. Use fresh batteries instead.
- Turn the camera ON. Confirm Wi-Fi’s enabled in the camera menu.
- Disable Mobile Data. Your app won’t try cellular instead of the camera’s 2.4GHz Wi-Fi link.
- Reconnect. Reopen the GardePro app and repeat the Bluetooth-then-Wi-Fi pairing flow.
Then work through the list in order, and test the app after each change so you can identify exactly which fix resolved the connection failure.
Step 1: Clear Nearby Signal Obstacles
Clear the space between your phone and the trail camera before you test again. Move devices into an open area, away from walls, metal doors, glass, dense trees, and reflective surfaces. These blockers can sharply reduce Bluetooth and 2.4 GHz WiFi range.
Keep the camera clear of constantly transmitting 2.4 GHz equipment, including routers, microwaves, and similar electronics. If a nearby router appears to congest the channel, temporarily switch it off while reconnecting. Position the phone with an open line to the camera. Start close, then test farther away.
For reference, Gen 1’s Bluetooth reaches about 33 feet and WiFi about 45 feet; Gen 2 and Gen 3 models may reach up to 165 feet in open conditions, but obstacles shorten distance. Retest pairing.
Step 2: Install the Camera Companion App
Download the latest GardePro Mobile App on your smartphone before attempting WiFi setup or file transfers. The app is required to configure the camera and access its photos or videos.
After installation, open the app and confirm it has the necessary permissions. Enable Bluetooth so your phone can discover the camera during the first stage of pairing. Turn on WiFi as well, since the camera uses a 2.4GHz WiFi connection after Bluetooth discovery completes. Allow the app to use your phone’s Location permission, which helps it determine the camera’s distance, and approve Bluetooth access when prompted.
If the camera doesn’t appear, check these permissions again rather than repeatedly restarting the process. Also verify that the camera is in WiFi setup mode. Monitor or ON mode may cause it to disconnect automatically before pairing finishes.
Step 3: Join the Camera’s Hotspot
With the camera in Setup mode, use the GardePro app to join its WiFi hotspot after Bluetooth has discovered and paired with it. Don’t switch the camera to ON or monitor mode: its WiFi shuts off automatically there. Keep your phone close while connecting, preferably within 45 feet for Gen 1 cameras or 165 feet for Gen 2 and Gen 3 models.
Walls, metal, and glass can sharply reduce that range, so test in an open area first. Use your phone’s 2.4 GHz WiFi band for the most dependable live view and file transfers. If the hotspot won’t appear or connection drops, disable any VPN. Then confirm that Bluetooth and Location permissions are enabled for the app, as both are required for stable pairing.
Step 4: Enter the Camera’s WiFi Password
Once your phone detects the camera’s hotspot, select that camera Wi‑Fi network, not your home router, and enter the password exactly as shown. Passwords are case-sensitive, so match every uppercase and lowercase letter, number, and symbol. Don’t add spaces before or after the entry. An incorrect credential is the most common reason a trail camera hotspot won’t authenticate, even when the signal is strong.
Check that the SSID displayed on your phone matches the camera’s hotspot name. If you changed the camera password, switched router settings, or connected previously with old credentials, forget the saved entry and type the current password again in the GardePro app. Some models use Bluetooth for initial discovery, but Bluetooth pairing doesn’t bypass Wi‑Fi authentication. Verify the password before investigating interference.
Step 5: Restart Camera and Phone
Restart the trail camera first, then restart your phone to clear a stalled Wi‑Fi or Bluetooth session. Power the camera off, wait a few seconds, and turn it back on. Confirm it is fully powered and responsive rather than stuck in a Wi‑Fi or monitor state. If you used ON/Monitor mode, move the switch to Setup; monitor mode may end the wireless session after its default timeout.
Next, restart your phone. After it boots, turn Bluetooth and Wi‑Fi off, then back on. Keep Bluetooth enabled, because the app must discover and connect to the camera through Bluetooth before it can begin the 2.4 GHz Wi‑Fi transfer. Open the app, disconnect any active camera attempt, and start the connection sequence again. This prevents handoff failures.
Step 6: Forget Saved Camera Network
Forget the camera’s saved Wi-Fi network in your phone’s Wi-Fi settings to remove an outdated or mismatched connection profile. This prevents your phone from automatically applying old credentials or settings. Next, turn off any VPN and confirm that Wi-Fi and Bluetooth are both enabled.
Open the GardePro app and restart device discovery. Complete Bluetooth pairing first; the camera’s 2.4 GHz Wi-Fi connection can’t work until that step succeeds. If you previously configured the camera, choose its correct network and enter the password again exactly as shown. Passwords are case-sensitive, and spaces count.
If pairing still fails, temporarily reduce nearby router activity or select another nearby 2.4 GHz channel. Then forget the camera network once more and repeat discovery. These steps eliminate stored-profile conflicts and interference.
View the Live Camera Feed
To view the live camera feed, keep your GardePro camera connected and in Setup mode, not ON/Monitor mode, which shuts off Wi-Fi after a short period. Confirm that 2.4 GHz Wi-Fi is enabled; the camera uses it for live viewing and transfers. If the app can’t open the feed, begin with Bluetooth pairing and discovery, then complete the Wi-Fi connection.
Stay within your model’s open range: about 45 feet (13 m) for Gen 1 or up to 165 feet (50 m) for Gen 2 and Gen 3. Walls, trees, and terrain reduce range. Finally, check whether the camera is recording or has been triggered. On models such as the H5, Wi-Fi won’t activate during recording, so wait for it to stop before trying again.
Troubleshoot 2.4 GHz Band Conflicts
Because GardePro trail cameras use the crowded 2.4 GHz band, interference can make pairing fail or cause the connection to drop. First, confirm both devices use 2.4 GHz; a 5 GHz-only network won’t work. During setup, move your phone close to the camera. Gen 2/3 models reach 165 feet (50 m) in open areas, while Gen 1 reaches 45 feet (13 m).
| Symptom | Diagnostic action |
|---|---|
| Pairing drops | Power down nearby 2.4 GHz devices temporarily. |
| Repeated failures | Set router channel manually, not Auto. |
| Weak signal | Reduce distance, then retry pairing. |
After each change, try connecting again. If camera connects only after other devices are off, leave them separated during setup. Check for sources such as wireless speakers, smart plugs, or routers; these can crowd the channel.
Update Camera Firmware Regularly
Keep your camera firmware current through the official GardePro/Strike Force Wireless app or website, since outdated firmware can trigger Wi-Fi setup or authentication failures even when both radios are on. Updates can strengthen the Bluetooth-to-2.4GHz Wi-Fi handoff that these cameras use. After installing one, confirm Wi-Fi is enabled in the camera menu, then use the latest version of the mobile app.
If it still fails, reformat the SD card in the camera, capture test images, and retry. This rules out storage-related system problems. Finally, test in an open area within your model’s documented pairing range: Gen 1 supports Bluetooth to 33 feet and Wi-Fi to 45 feet; Gen 2 and Gen 3 reach up to 165 feet. Firmware updates won’t overcome distance or interference.
Conclusion
If your WiFi trail camera still won’t connect, work through the pairing steps in order: charge the batteries, turn off mobile data, remove signal barriers, and install the correct app. Join the camera’s hotspot, then forget and reconnect if your phone saved a bad session. Check for 2.4 GHz conflicts before opening live view.
Finally, update firmware and test again nearby. This method helps you isolate the cause without guessing and restore reliable phone control quickly.