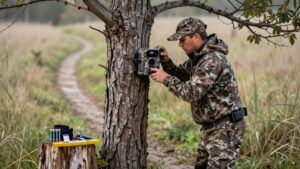
How to Connect a 12V Battery to a Trail Camera for Months of Power
First, verify your trail camera accepts 12V DC and match its required connector, polarity, cable, and fuse rating.
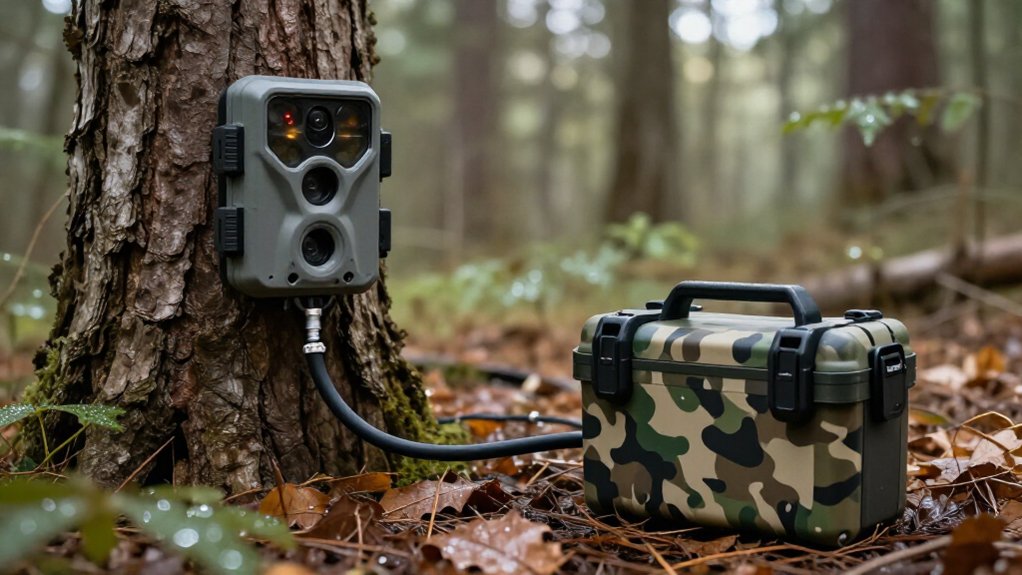
Put battery in a weatherproof enclosure, mount it above standing water, and label installation date.
With power disconnected, connect positive to positive and negative to negative, then fit weather-resistant inline fuse near battery.
Test photos and cellular uploads under load, seal cable entry, and inspect connections regularly.
Next, you’ll see how to estimate runtime and diagnose low-battery alerts.
Months-Long 12V Trail Camera Runtime
A 12V external battery can keep a compatible trail camera running for months when you match the battery, power cord, and battery box to the camera’s specified input requirements. Choose a higher amp-hour capacity for longer runtime; lithium, particularly LiFePO4, performs well in cold conditions, though it’s costlier.
Cellular coverage matters: a 12V 10Ah LiFePO4 pack ran roughly 1½ months at a poor-signal site but about five months where service was stronger. Reduce demand by selecting lower image resolution, restricting video clips to 5–10 seconds, increasing trigger intervals, and batching cellular photo transmissions rather than sending each image immediately. Record installation and recharge dates, inspect the enclosure and cable for moisture or damage, and recharge the battery with suitable equipment. Add solar where sunlight permits.
Verify Camera’s 12V Input Compatibility
Before you connect any external battery, check the trail camera’s manual or manufacturer specifications to confirm that it accepts 12V DC input. Don’t assume an external-power port makes every 12V battery safe or usable; match the stated voltage, current limits, and connection requirements. Verify these points:
- Confirm the connector type and required cable; most non-Cuddeback cameras use a cord and battery box with a 12V battery.
- Check polarity markings at both the camera jack and plug; reversed polarity can damage electronics.
- Identify brand-specific exceptions: Cuddeback external packs use 9V connections, not standard 12V systems.
Use rechargeable batteries only when the camera supports them. Some rechargeable cells supply less voltage than the camera expects, causing unreliable operation or shutdowns during cold weather or image capture.
Step 1: Choose a Weatherproof Battery Enclosure
Once you’ve confirmed the camera’s 12V requirements, place the battery in a weather-resistant enclosure sized for the battery, cable, and connector without pinching the wiring. Choose a box with a durable, closable lid that seals out rain, mud, insects, and windblown debris. Leave enough internal clearance so the cable doesn’t bend sharply or strain at its entry point.
Route the camera’s 12V power cord through a snug opening or correctly sized cable gland; it should grip the jacket firmly and limit water entry. Mount the enclosure securely above standing-water level, using hardware appropriate for the tree, post, or structure. Conceal it when practical to reduce theft risk, while preserving safe maintenance access. At each service, inspect seals and cable entry for moisture or damage.
Step 2: Match Polarity Before Connecting Leads
Verify polarity before making any electrical connection: connect the battery’s positive (+) terminal to the camera’s positive (+) input and the negative (-) terminal to the negative (-) input. Read the molded markings on the battery terminals and on the camera power connector before you attach anything. Don’t rely solely on wire colors; manufacturers may use different conventions.
Select the 12V cable and connector specified for your camera brand and model, because external power ports differ. If marking is unclear, disconnect the battery, stop, and verify the connector documentation. Reversed polarity can damage the camera or its power circuitry. After confirming orientation, secure each lead. Make sure exposed conductors are insulated and the positive and negative leads can’t contact each other, preventing a short circuit.
Step 3: Install an Inline Fuse
Add an inline fuse to the positive (red) lead between the 12V battery and the trail camera to protect the cable and camera from excessive current. Mount the fuse holder as close as practical to the battery’s positive terminal, so it protects the entire downstream wire run. Disconnect the battery before cutting, terminating, or replacing the fuse. Select a weather-resistant holder sized for the wire and fuse type; use the camera manufacturer’s specified fuse rating and cable requirements; don’t guess or install a larger fuse.
Make each crimp or terminal mechanically secure, then insulate it against moisture and accidental contact. Before restoring power, inspect the holder seal and connections, and confirm the fuse element is intact. A blown fuse indicates a fault; investigate it first.
Step 4: Plug DC Barrel Connector in
Check the camera manual before connecting power: it must support a 12V external battery, and the DC barrel connector must match the specified plug size and polarity.
Inspect the connector and external-power jack before connection. Remove moisture, dust, and debris; never insert a wet or contaminated plug. Align the barrel connector with the jack, then push it straight in until it seats firmly. Don’t force it at all, twist it aggressively, or use an adapter that changes voltage or polarity.
Route the cord with enough slack to prevent strain, pinching, or accidental unplugging, and confirm it doesn’t obstruct the camera door, gasket, or mounting hardware. Use only the camera’s specified 12V input. Some models, including certain Cuddeback units, require proprietary 9V battery-pack connections instead.
Step 5: Test Trigger and Uploads
Once the 12V battery is connected, trigger a test photo to confirm the camera powers up, wakes properly, and captures an image. Review the photo on the camera or app to verify correct operation.
If your model uses cellular service, confirm that the test image uploads successfully from the exact mounting location. Weak signal can block transmission and increase power consumption while the camera searches for a network. Check signal status and allow enough time for the upload to complete.
If uploading fails, inspect the battery connection and confirm the camera’s cellular and upload settings. Retest before leaving the unit unattended. Record the test result, mounting location, battery type, capacity, and connection details. These notes let you compare later performance and identify unexpected changes.
Step 6: Seal Cable Entry With Silicone
Seal the point where the 12V power cord enters the battery box with outdoor-rated silicone to prevent rain and moisture from reaching the battery compartment. Clean and dry the cable opening before application. Apply a continuous bead around the opening and cable, pressing it into any gaps. Do not cover the connector; you must retain access for disconnection and service.
Leave cord slack so movement, tension, or temperature-related expansion cannot pull the cable against the cured seal. Follow the silicone manufacturer’s cure-time instructions exactly, and keep the box protected from rain until curing is complete. Inspect the entry seal during camera visits, particularly after temperature swings. Replace or repair silicone that shows cracks, peeling edges, separation, or gaps, because these defects allow water inside.
Confirm 12V Voltage Under Load
After the silicone has fully cured, verify that your trail camera supports a 12V external battery and measure battery voltage while the camera operates. Consult the manual before attaching the battery. Set a multimeter to DC volts and check at the battery terminals or camera connector during operation. Trigger a photo, activate night illumination, and send an image to test peak demand.
A voltage can look acceptable yet collapse during these loads. If the measured voltage falls below the maker’s operating minimum, disconnect the battery and recharge or replace it. Use a charged battery with sufficient capacity. If the camera unexpectedly goes offline, repeat the loaded-voltage test at connection points. Don’t continue operating near the minimum; low voltage can cause shutdowns and unreliable captures outdoors.
Low-Battery Alert Despite 12V
A low-battery alert doesn’t always mean your 12V external battery has failed or discharged. Weak cellular service can force your camera to retry connections, raising current draw until it reports low power or goes offline. First, measure battery voltage and inspect terminals, cable insulation, and connectors before replacement.
| Check | What you find | Action |
|---|---|---|
| Voltage | Normal resting voltage | Test under load |
| Terminals | Corrosion or looseness | Disconnect, clean, tighten |
| Signal | Weak or unstable service | Relocate or add solar |
| Battery | No swelling or damage | Continue monitored use |
A WiseEye DC-2 with a 12V 10Ah LiFePO4 pack ran roughly 1½ months in poor service, versus five months with better coverage. Its retrieved battery remained sound. Treat alerts as communications-load diagnosis; solar can offset demand for a Cuddeback Tracks.
Label Battery Installation Date
Documentation starts with a durable, clearly visible label on the 12V battery or its weatherproof box. Before you connect any leads, write the installation date in an unambiguous YYYY-MM-DD format, such as 2026-10-05. This record establishes when the power system entered service and prevents month/day errors during inspections. Use a weather-resistant, indelible label and marker. Press it firmly onto a clean, dry surface where you can read it without disturbing wiring, terminals, or enclosure seals.
When you retrieve the battery for charging, replacement, or inspection, add the end date. Calculate the elapsed interval to estimate runtime under that camera’s settings, temperature, and activity level. Keep the label dry, legible, and securely attached; replace it immediately if moisture, fading, or lifting obscures the dates.
Conclusion
To power your trail camera for months, verify that its external input accepts regulated 12V DC, then match connector size and polarity before energizing the circuit. House the battery in a weatherproof enclosure, use correctly sized wire, and install an inline fuse close to the positive terminal. Seal cable entries, test voltage under load, and enable low-battery alerts. Label the installation date and inspect connections regularly. Disconnect power before performing any maintenance on site.