How to Position a Solar Panel for a Trail Camera: Angle, Direction and Height
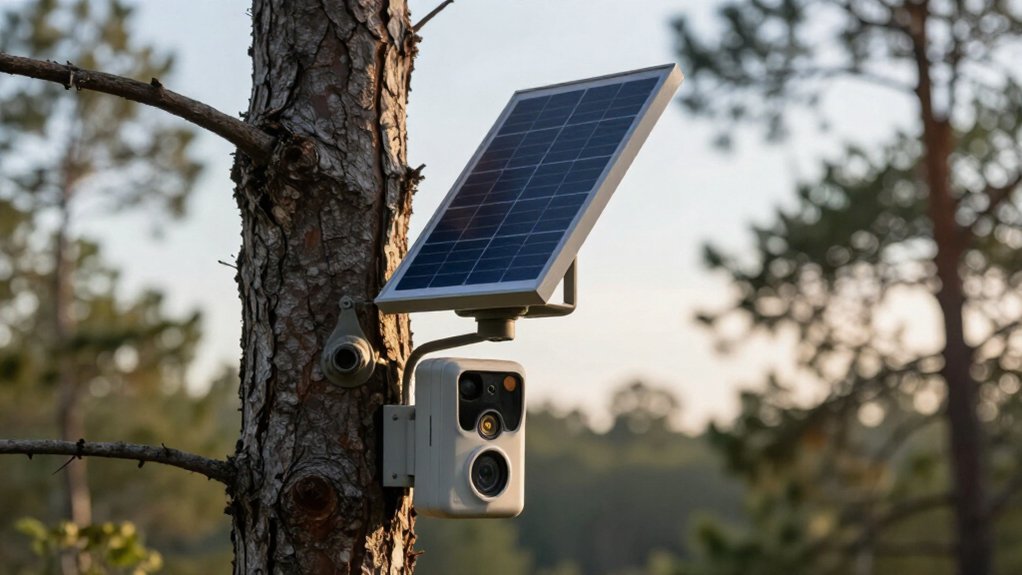
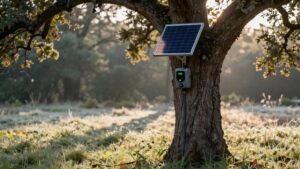
Mount your trail-camera solar panel at a height giving it at least six hours of uninterrupted direct sun, clear of moving branch, roof, and fence shadows.
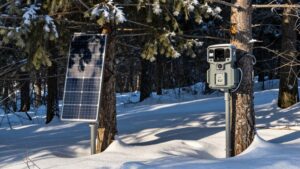
Use a compass to face it due south in the Northern Hemisphere or due north in the Southern Hemisphere, then set tilt near local latitude, typically 30 to 45°.
Secure the bracket with a wrench and check charging at solar noon.
You’ll find further steps for checks and maintenance all season.
Target Six Hours of Sun
Aim for at least six hours of direct sunlight on the solar panel each day. This exposure target gives the charging system enough usable energy to support battery health; brief or largely indirect light often doesn’t. Before mounting, inspect the proposed location from morning through afternoon.
Record when direct sun reaches the panel and verify that the window remains uninterrupted. Check for moving shade cast by limbs, roof edges, fences, and nearby structures; even partial obstruction can materially reduce charge yield and gradually deplete the battery. Set the panel at a 30 to 45° tilt to improve daily energy capture. If the site can’t provide roughly six reliable sun-hours, reposition the panel rather than expecting indirect light to sustain continuous operation reliably over extended field deployments.
Bring a Compass and Wrench
Once you’ve identified a location with reliable direct sun, use a compass to set the panel’s true working direction: due south in the Northern Hemisphere or due north below the equator. Don’t merely point it toward the sun; compass alignment provides repeatable exposure as seasons change. Set the bracket, then use a wrench to lock its hardware firmly. A loose joint can shift the tilt and lower charging output.
- Aim due south north of the equator.
- Aim due north south of the equator.
- Choose a 30 to 45° tilt for typical annual performance.
- Confirm the bracket cannot slip after tightening.
Use a steeper setting when winter sunlight is limited and a flatter setting for summer optimization. Before tightening, verify camera and hardware won’t shadow the panel.
Step 1: Clear Overhanging Branches
Clear overhanging branches that can cast moving shade across the panel during peak sun hours. Even bright-looking sites can produce long partial-shade periods when leaves and limbs create shifting patterns as the sun moves.
Trim foliage so the panel surface has unobstructed line-of-sight to the sky through midday, not merely brief bursts of direct sun. Verify exposure from the mounting position, because shadows on individual cells can materially reduce output.
After trimming, inspect the site at several midday intervals to confirm that no remaining branch crosses the panel’s solar path. Recheck periodically, especially after seasonal growth thickens the canopy and reintroduces shade.
If you can’t remove every branch, reposition the panel where direct sunlight remains most consistent across seasons. Avoid flexible foliage that swings into the panel’s exposure zone.
Step 2: Precharge the Camera Battery
Fully charge the camera’s rechargeable battery pack to 100% before deployment, because the solar panel typically maintains or gradually replenishes charge rather than rapidly recovering a depleted battery. Starting at full capacity gives you the full power reserve and reduces the chance that initial demand exceeds solar input.
Before leaving the camera unattended, run it for several days and compare its battery trend with indirect-light conditions. This test establishes whether the panel replaces daily consumption. During early remote operation, configure photo capture rather than video when possible; photos generally impose less energy demand. If the battery level declines during cloudy weather or periods of heavy wildlife activity, temporarily disable motion capture. Stopping trigger-related draw lets the panel recover energy once charging returns to equilibrium.
Step 3: Aim Toward the Equator
Aim the solar panel toward the equator to maximize direct solar exposure: south in the Northern Hemisphere and north in the Southern Hemisphere. This orientation increases the panel’s access to direct, usable sunlight rather than diffuse sky brightness. Position the mount so the panel has an unobstructed view of the equator-facing sky.
Check rooflines, tree trunks, branches, and seasonal foliage, because even narrow shadows can reduce charging output disproportionately. When the camera sits close to the panel, prioritize energy collection: don’t let the camera body, housing, or bracket cast a shadow across the cells. After installation, inspect the setup at several times during the day. Confirm direct light reaches the equator-facing panel and that the camera remains clear of its solar path throughout daylight.
Step 4: Set Panel Tilt to Latitude
Once the panel faces the equator, set its tilt near your local latitude to improve year-round solar collection. At 35° latitude, begin with a 35° tilt; this falls within the common 30 to 45° working range. This geometry keeps the panel more nearly perpendicular to incoming sunlight across the year, improving usable energy production.
Adjust from that baseline when seasonal conditions matter. A steeper angle captures the lower winter sun more effectively; a shallower angle favors higher summer sun. However, prioritize unobstructed exposure over a theoretically exact angle: blocked sunlight limits charging regardless of tilt. After mounting, monitor charging through the day and over several days, then fine-tune the bracket based on actual periods of direct sunlight and battery recovery at the camera under normal field use.
Step 5: Move Past Afternoon Shade
Check the panel location at several times after noon, because eaves, branches, fences, and nearby structures can cast long late-day shadows that sharply reduce usable charging time. A panel shaded through much of the afternoon may merely maintain the trail camera battery rather than replace consumed energy, especially under cloud cover. Prioritize sites with uninterrupted direct sun until sunset.
Look for consistent shadows that begin late and remain in place; these suppress output more than brief, moving shade. Reassess the location after spring and summer foliage develops, since deciduous oak or beech can alter the afternoon solar window. Before installation, run a multi-day test under the exposure pattern. Track battery status and charging behavior in the camera app to verify recovery rather than maintenance.
Step 6: Tighten Bolts, Remove Cable Trimmings
After confirming a distinct afternoon solar window, set the panel at its 30 to 45° angle and tighten every mounting bolt and bracket firmly. This prevents gradual movement that could alter alignment or cast new shade.
Route the cable with enough slack for normal movement, then secure it along the post or eave. Avoid pinch points, unsupported spans, and constant tension.
Remove excess trimmings and offhand loops; they can collect water and debris or touch the panel face and connectors. Recheck panel leads and camera power connections after fastening. Ensure no conductor is kinked or partly disconnected. Watch the installation through a full day of sun angles to ensure the mount itself doesn’t create shade and that all hardware remains fixed under normal wind-induced loading conditions.
Verify Charging Current at Noon
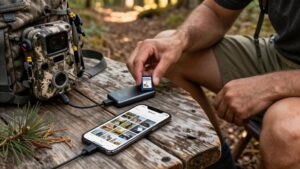
At local solar noon, verify through the camera app or its LED indicators that the solar panel is actively charging the battery rather than merely exposed to daylight.
Midday irradiance is highest, so current provides a performance reference. If the app reports charging current, record the noon value. Low or near-zero current signals shade from a roof edge, leaves, or branches, or an incorrect panel direction or tilt. A battery that maintains its level or rises slowly at noon usually receives sufficient direct sun. If its level remains stagnant under these conditions, anticipate limited runtime.
Repeat this measurement on different days and in other seasons. Growing foliage and new obstructions can reduce noon current after installation, even when the original placement tested adequately properly.
Troubleshoot Overnight Battery Drain
If the battery drops sharply overnight despite a noon charging indication, diagnose the system’s daytime energy balance first. A noon reading proves only momentary input; it doesn’t confirm enough daily watt-hours to restore the pack. Verify direct sun reaches the panel throughout the usable day, not merely bright ambient light. Trace branch, eave, and roof-edge shadows at several times; intermittent shade can create a deficit that ends in an empty pack overnight.
| Check | Finding | What you feel |
|---|---|---|
| Orientation | Face south; north below equator | Confidence |
| Tilt | Set 30 to 45° | Relief |
| Initial charge | Deploy at 100% | Control |
A flat or excessively vertical panel reduces harvest. After correcting placement, fully charge the battery, then compare evening and morning levels over two clear days to confirm normal recovery thereafter.
Wipe Pollen Off Monthly
Wipe the panel monthly with a soft, dry microfiber cloth to remove pollen film before it restricts light reaching the cells. If needed, use a lightly damp cloth, then dry the surface to prevent residue from collecting. Pollen can create a nearly invisible layer that lowers irradiance at the photovoltaic cells, slowing battery recovery despite apparently bright conditions.
During cleaning, inspect the frame edges and mounting area; pollen commonly accumulates there and escapes quick checks. If charging slows or runtime shortens, clean the panel before adjusting camera settings or repositioning it. Don’t use abrasive pads or harsh chemicals: they can scratch the protective coating and permanently reduce light transmission.
This routine preserves predictable charging performance throughout high-pollen seasons and minimizes avoidable diagnostic work later.
Conclusion
Position your trail-camera panel to capture at least six unobstructed sun hours, aiming it toward the equator at a seasonally appropriate tilt. Use a compass, secure hardware with a wrench, and mount high enough to avoid shade, animals, and debris.
Clear branches, precharge the battery, and confirm noon charging current. Remove cable trimmings, investigate abnormal overnight drain, and clean pollen monthly. You’ll maintain reliable battery voltage and uninterrupted camera operation through changing weather conditions.