How to Choose a Trail Camera: Trigger Speed, Flash Type and Power Decoded
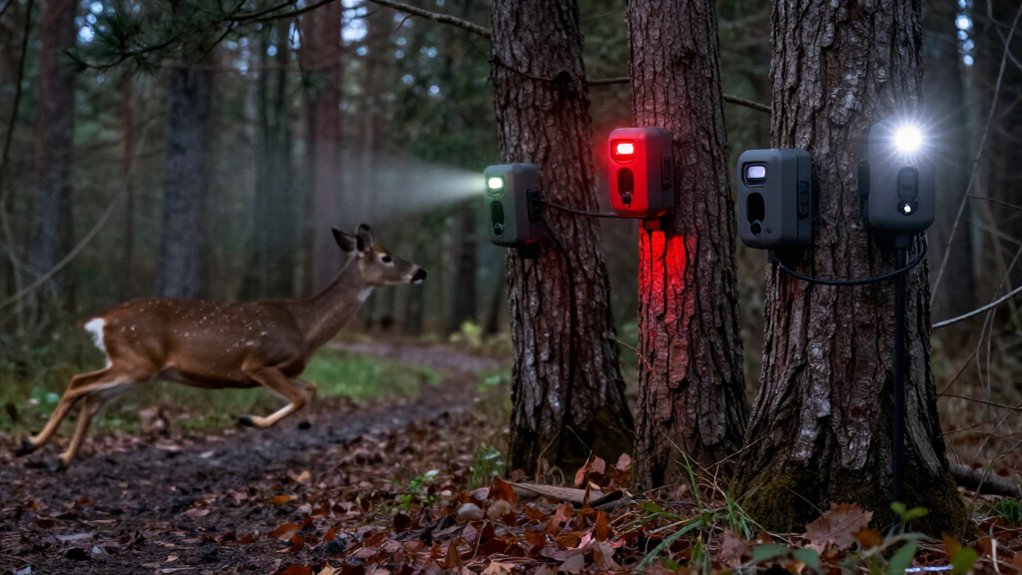
Choose a trail camera with a roughly 0.2-second still-photo trigger so you don’t miss moving animals. Use no-glow infrared for skittish wildlife, low-glow for more range, or white flash for color night images.
Match detection range and sensitivity to terrain, and verify cellular signal before choosing a connected model.
Prefer standard AA batteries, confirm SD-card compatibility, and look for IP66 protection.
Then check warranty terms and replacement costs; the details help you choose with confidence.
Choose No-Glow for Skittish Wildlife
Choose a no-glow trail camera when you need to minimize the chance that a visible flash will alert skittish wildlife. No-glow infrared LEDs emit light that’s invisible to people and animals, helping you monitor cautious game without the red glow produced by low-glow units. At night, these cameras record black-and-white images rather than color, so evaluate placement and aim for clear identification.
Expect a trade-off: no-glow models may lose roughly 30% of flash brightness and infrared range versus low-glow cameras. Your nighttime photos can consequently appear darker, especially at longer distances or in dense cover. Flash choice alone won’t guarantee discreet monitoring; animals may notice camera scent, operating noise, or movement. Use clean handling, secure mounting, and a carefully concealed location to reduce disturbance.
Identify Cellular Coverage Needs
Cellular trail cameras send photos to your phone, making them a practical option for remote properties, infrequently visited sites, or setups where minimizing human presence matters.
Before buying, verify service at the camera location, not nearby. Hills, timber, and local networks can interrupt transmission. Confirm the camera supports the strongest available carrier and test signal if possible. You’ll need a data plan, so include recurring subscription charges in your operating budget.
If service is unreliable, or you can visit the site routinely, choose a standard camera that records to an SD card. It avoids monthly fees while preserving images and video for later retrieval. Where coverage works, cellular delivery reduces card-checking trips, limiting wildlife disturbance and the human scent you leave around the setup.
Match Detection Range to Terrain
Match the camera’s detection range to the terrain where animals will travel. For general wildlife tracking, choose about 60 to 80 feet; many cameras detect motion near 60 feet. Open fields demand longer reach because animals may travel farther from the unit. Wooded trails favor shorter coverage: vegetation limits sightlines and keeps movement close.
| Terrain | Setup |
|---|---|
| Open field | Prioritize longer detection reach. |
| Wooded trail | Use shorter, controlled coverage. |
Also check detection-zone length and width. Sensors cast a widening, V-shaped pattern, so coverage may not fill the camera’s entire view. Set sensitivity to match terrain and flash range. Lower it around moving foliage or water to reduce false triggers, while preserving reliable animal captures. Test placement before leaving the camera unattended for days.
Low-Glow vs. White-Flash
Choose low-glow infrared when you need a less conspicuous faint red flash and black-and-white nighttime images. Select white-flash when you prioritize brighter, clearer color images and longer illumination, but expect a highly visible burst. Because wildlife responses vary, place the camera according to how much disturbance you can tolerate.
Flash Visibility Compared
Flash visibility directly affects both nighttime image quality and how noticeable your camera is in the field. Low-glow units emit a faint red infrared glow, making them the discreet choice for trails, feeding areas, and locations where you want to minimize disturbance. Their illumination is less likely to draw attention from people or alter animal behavior, although some animals may still notice and react to the glow.
White-flash cameras fire a bright, visible burst. This stronger light generally reaches farther than low-glow infrared, which can help you cover open lanes or distant bait sites. The tradeoff is obvious: the flash makes the camera easier to spot and may prompt wildlife to avoid, investigate, or change behavior around it. Choose low-glow for added concealment.
Night Image Color
Beyond visibility, the flash type determines whether your nighttime captures show color or monochrome detail. White-flash cameras fire a bright, visible burst, producing full-color night photos and often reaching farther than infrared illumination. Choose this format when coat color, antler characteristics, vehicle markings, or other color-dependent evidence matters to your evaluation.
Low-glow cameras use faint, usually red infrared emitters and record black-and-white images after dark. Their infrared output generally delivers cleaner, more detailed results than no-glow systems, although the red glow can remain visible at the camera. Select low-glow when color isn’t necessary and you want a less conspicuous illumination method. In practice, prioritize white flash for maximum illumination and usable color; prioritize low-glow for dependable monochrome identification, solid infrared image quality.
Wildlife Disturbance Levels
Wildlife response should guide your flash selection as much as image quality does. Low-glow cameras emit a faint red flash that is less conspicuous than white flash, but it doesn’t make your setup invisible. Animals may notice, investigate, avoid, or react repeatedly; responses vary by species and individual. Low-glow units produce black-and-white night images.
White-flash cameras emit a bright, visible burst that can alert or disturb wildlife. They typically illuminate farther than infrared models and capture color at night, but greater visibility can change animal behavior. If reducing camera awareness matters most, choose low-glow and inspect your images for reactions. If color and extended illumination outweigh that concern, white-flash is the trade-off. You’ll need to accept a higher likelihood of wildlife noticing the camera.
Best Use Cases
Match the camera’s illumination to your monitoring goal and the site’s tolerance for visible light. Choose low-glow infrared for discreet nighttime monitoring when a faint red flash is acceptable. It records black-and-white images, but usually delivers better nighttime image quality and longer range than no-glow infrared. Use it for game trails, feeding areas, or property edges where you need stronger identification detail without a bright burst.
Select white flash when color night images and farther illumination outweigh concealment. It suits observation sites, security locations, or managed areas where visible light won’t create problems. Avoid it for stealthy deer scouting, because it can disturb or alert animals. Test placement at each site: wildlife responses vary, and scent or camera noise can also reveal your setup.
Prioritize 0.2-Second Trigger Speed
Choose a 0.2-second trigger speed for game trails, where it helps you capture fast-moving wildlife before it leaves the frame. This short detection-to-photo interval reduces missed opportunities, though photo mode usually triggers faster than video or photo-plus-video settings. You can accept a slower trigger at feeders or food plots, but weigh faster settings against their potential battery demand.
Capturing Fast-Moving Wildlife
For animals that move quickly along established trails, prioritize a trail camera with a trigger speed near 0.2 seconds; models in the 0.1 to 0.4-second range usually perform well on active tracks. Trigger speed measures the interval from PIR detection to image capture. If that interval is too long, the animal can pass the imaging zone before exposure, leaving only a tail or no subject.
A quick trigger improves framing, but it doesn’t freeze motion: shutter speed still determines whether a running animal appears sharp. Use photo mode when you need the fastest response, because it commonly fires fractions of a second sooner than video, particularly in hybrid photo-and-video settings. Verify field-test results, not advertised specifications or resolution claims, in comparable field conditions before buying one.
Reducing Missed Photo Opportunities
On active game trails, prioritize a trail camera with a trigger speed near 0.2 seconds to reduce missed shots of fast-moving wildlife. Trigger speed measures the interval between motion detection and image capture. During that interval, a deer, coyote, or turkey can cross the detection zone, leaving you with an empty frame or only a tail.
Look for a rated photo trigger within the 0.1 to 0.4-second range; anything at 0.5 seconds or faster is generally suitable for moving wildlife, but 0.2 seconds gives you more margin. Verify the manufacturer’s specification for still photos, not video. Photo trigger times are often quicker than video times, particularly in hybrid modes. Don’t assume a headline speed applies across every capture setting; confirm the operating mode before you buy.
Matching Speed To Location
Match trigger speed to how quickly animals move through the camera’s detection zone. On game trails, prioritize a model that triggers near 0.2 seconds, inside the recommended 0.1 to 0.4-second range. Deer, predators, and fast-moving animals can cross the frame before a slower unit responds, leaving you with a tail shot or no image at all.
In active travel corridors, select 0.5 seconds or faster and use a short recovery time so the camera can reset before another animal follows. At feeders and food plots, movement is slower and animals stay in view. A 0.5 to 1-second trigger can thus provide coverage there.
You’ll want to evaluate the approach angle and distance: animals moving across a narrow detection zone demand faster response than animals approaching the camera head-on.
Balancing Speed And Battery Life
Prioritize a trigger speed of about 0.2 seconds on active game trails, where animals can clear the detection zone before a slower camera fires. You’ll capture fast-moving animals, but trigger speed doesn’t prevent soft images. Choose a camera with a fast shutter to freeze motion after its sensor activates.
Heavy traffic raises power demand: each motion event, burst sequence, and hybrid photo-video capture drains batteries and uses SD-card space. Set motion sensitivity high enough for target animals, but low enough to avoid false triggers from wind-blown foliage or small wildlife. For demanding locations, use lithium batteries. They generally outlast alkaline cells and perform better in cold weather. Check the camera in deployment, then adjust sensitivity, capture mode, and service intervals to match trail activity.
Confirm SD Card Format
Before you buy an SD card, check your trail camera’s manual for the supported card format and maximum capacity, as compatibility varies by model. A card’s physical format and storage size must match what your specific camera can read. Some models accept only standard SD cards, while others support higher-capacity variants; don’t assume a larger card will work.
Choose enough capacity for your expected capture volume. Frequent photos, long video clips, and burst sequences consume space rapidly, so a compatible high-capacity card reduces how often you’ll need to retrieve files. Once installed, format the card inside the camera using the manufacturer’s specified menu procedure. This creates the file structure the camera expects and helps prevent recording errors. Then test it before leaving it unattended.
Check Warranty Replacement Costs
After confirming card compatibility, evaluate the warranty and the real cost of replacing a failed trail camera. Check the coverage period and exclusions carefully. A useful warranty covers manufacturing defects and clearly states how it handles weather intrusion, battery failure, and flash malfunction. Compare policies from established manufacturers, including Bushnell, Reconyx, and Moultrie, alongside their out-of-warranty replacement prices.
For cameras priced from roughly $50 to $300, a replacement charge can erase the initial savings. Ask whether the company sends a new unit or a refurbished one, and confirm any shipping, inspection, or service fees. Keep your dated receipt, serial number, and purchase records. Register the camera promptly when required. These steps let you submit a claim and calculate the camera’s long-term ownership risk before you buy.
Avoid Cameras Needing Proprietary Batteries
Choose a trail camera that runs on standard AA batteries instead of a proprietary battery pack, because you can find replacements easily in stores or carry spares into remote locations.
Before buying, confirm supported AA chemistries and power inputs. Lithium cells deliver longer service and better cold-weather performance than alkalines. Rechargeable NiMH cells reduce waste, but they can lose performance in high heat and aren’t compatible with every model.
- Check the manual for approved battery types.
- Pack lithium AAs for winter deployments.
- Test NiMH cells before long summer sets.
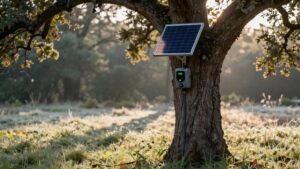
- Use external power or a solar panel when supported.
- Compare field reports: activity can drain a camera within a month.
Don’t trust maximum battery-life claims alone; plan routine checks and replacements.
Verify IP66 Weatherproof Rating
Look for an explicit IP66 rating in the camera’s specifications, not vague claims of “weather resistance.” IP66 indicates that the housing blocks dust and resists powerful water jets, helping protect internal electronics during rain, windblown debris, and humid outdoor conditions. Because protection varies by model, verify the rating in the manufacturer’s technical sheet before you buy. An IP66 enclosure also helps limit water-vapor intrusion, but it doesn’t replace careful placement or maintenance.
- Confirm the IP code appears in published specifications.
- Inspect door gaskets before mounting it outdoors.
- Aim it away from direct, driving rain.
- Seal cable ports and close latches firmly.
- Balance weatherproofing against trigger speed, flash, and power.
You’ll still need to match its weather protection to your expected site and deployment duration.
Conclusion
Choose your trail camera by matching its hardware to your site and target species. Use no-glow flash for wary animals, verify cellular coverage before paying for connectivity, and size detection range for the terrain. Favor a 0.2-second trigger speed, select low-glow or white-flash only when their image advantages fit your needs, confirm SD compatibility, avoid proprietary batteries, demand IP66 protection, and compare warranty replacement costs. You’ll get evidence instead of missed, weak, or expensive-to-maintain captures.