What Type of SIM Card Does a Trail Camera Use? Nano, Micro and Carrier Locks
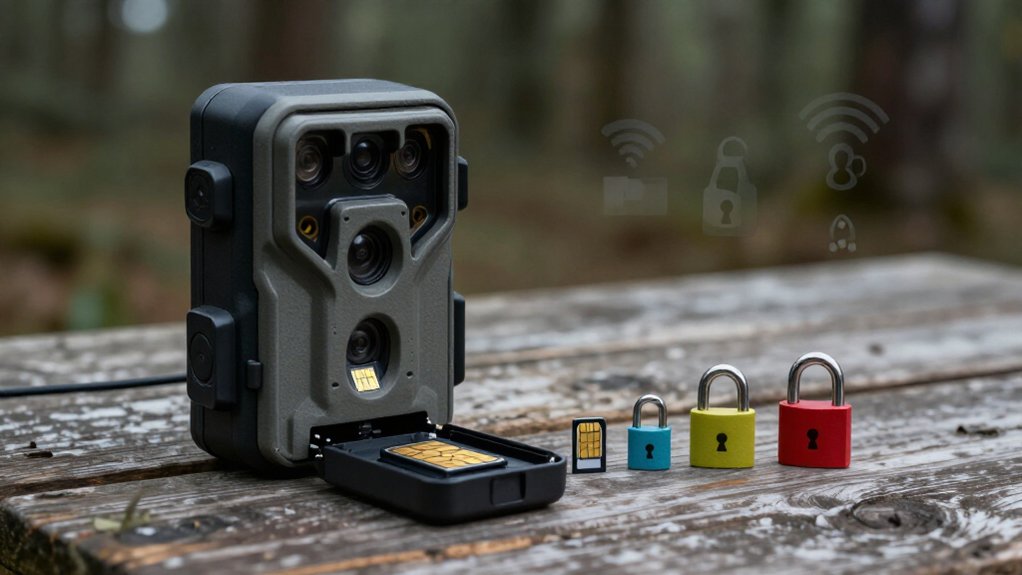
Most modern trail cameras take a carrier-issued nano-SIM, but you should confirm your model’s tray size before buying service. Older cameras may require micro or standard SIMs, while a micro-SIM can’t fit a nano slot.
Don’t cut a SIM; request the correct factory-cut size. Verify the camera isn’t carrier-locked, check its IMEI and supported LTE bands, and confirm local coverage. You need activation and, sometimes, the correct APN settings for reliable uploads, as outlined below.
Most Cameras Use Nano-Sims
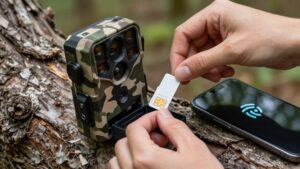
Most modern trail cameras use a nano-SIM, the smallest standard SIM format used by cellular carriers. You’ll usually receive this size in a carrier’s multi-size SIM kit, which may also include micro and standard formats. Before activating service, verify the camera’s specifications or manual so you order the required card and plan.
A nano-SIM identifies your camera on the carrier network; it doesn’t determine whether the camera can access that network. You must also confirm that the SIM’s carrier is supported by your camera and that selected data plan allows the cellular service. Don’t cut down a larger SIM. Trimming can damage the chip or contacts, compromise reliability, and create registration or data-transmission failures. Use a carrier-issued nano-SIM for dependable activation and reliable connectivity.
Check Tray Cutout Size
Before installing the SIM, check your trail camera’s manual or specifications for the exact tray cutout size: nano, micro, or standard. Although nano SIMs dominate current cellular camera designs, your model may use a different format. Match the SIM’s cutout to the tray precisely, ensuring it lies flat, locks into position, and contacts the camera’s terminals without movement. A loose or oversized card can interrupt registration and data transmission.
Choose a carrier-provided multi-size SIM when possible. Remove only the perforated section specified for your camera, leaving remaining adapters intact. Don’t trim a larger SIM with scissors or a blade to force a fit. Uneven edges, damaged contacts, or incorrect thickness can prevent reliable detection and may damage the tray. Confirm size before powering the camera on.
Verify IMEI Carrier Compatibility
Verify your trail camera’s IMEI with the intended carrier before purchasing a SIM, because the carrier must allow that device on its network. Ask support to check network eligibility, blacklist status, and account restrictions tied to the IMEI.
You should also confirm that the camera is carrier-unrestricted; a carrier-locked model can reject another provider’s SIM even when its IMEI appears eligible. IMEI approval doesn’t establish radio compatibility, so verify support for the carrier’s U.S. 4G LTE bands or compatible 5G bands. For a data-only plan, confirm that your camera permits manual APN entry. Current SpectrumSIM cards generally require the APN “puffin,” while certain SIMs with numbers beginning 8946080 use “data641003.” These checks prevent activation failures, registration problems, and avoidable field connectivity loss in operation.
Micro-SIMs Need Adapters
If your trail camera requires a micro-SIM slot, you’ll need a secure nano-to-micro adapter when using a nano SIM. Confirm the required size in the camera manual, then make sure the SIM sits flat and aligned so its contacts register correctly. An adapter only changes physical fit; it won’t resolve carrier locks or network incompatibility.
Why Adapters Are Needed
Many trail cameras use nano-SIM slots, so you’ll need a properly sized adapter to use a micro-SIM in one. Check the specification first: an adapter only frames a smaller SIM for a larger slot; it can’t convert a micro-SIM into nano-SIM dimensions. If your camera truly accepts nano, request a nano replacement from your carrier rather than cutting the micro-SIM.
| Camera slot | SIM you have | Connection action |
|---|---|---|
| Nano | Micro | Obtain a nano-SIM |
| Micro | Nano | Use a micro adapter |
| Standard | Nano | Use a standard adapter |
Confirm the card lies flat and its contacts align with the tray. Proper fit prevents intermittent registration, network attachment, and image-upload failures during each camera startup sequence. If the camera requires micro, use the micro-SIM directly; don’t add an adapter.
Choosing a Secure Adapter
When your trail camera has a micro-SIM slot and you have a nano-SIM, use a micro-SIM adapter that securely frames the card and sits flush in the slot. Confirm the camera’s specifications list a micro-SIM format before you select the adapter, since physical size must match the tray design. Choose a rigid, undamaged model with a precise cutout that retains the nano-SIM without movement.
Align it with the marked orientation, insert gently, and stop rather than force it if resistance occurs. A secure fit protects the slot during field service and lets you remove the SIM without leaving the adapter behind. Keep the adapter with your camera kit, but replace it immediately if its frame bends, cracks, or loses shape during routine SIM swaps.
Preventing Contact Problems
Before fitting a micro-SIM, check your trail camera’s manual to verify the slot size and required card format. If your camera uses a nano-SIM slot, place the micro-SIM in a correctly sized adapter designed for that format. Keep the card fully seated in the adapter, then insert the assembly flat, with its cut corner and contact side matching the camera’s orientation diagram.
Proper alignment lets the SIM pads meet the camera pins reliably, supporting carrier registration and data transmission. Don’t force an adapter into the slot. A raised edge or misaligned frame can snag internal contacts, interrupt network detection, or damage the reader. If the SIM feels loose or your camera reports no SIM, power down, remove the assembly, inspect, and reseat carefully. Confirm detection before deployment.
Older 3G Camera Models
If you use an older 3G trail camera, confirm that its designated carrier still operates 3G service at your deployment location. Match any legacy SIM to the camera’s carrier lock, supported bands, and required SIM size, since a 4G LTE SIM won’t automatically provide compatibility. If 3G has shut down, you’ll need a supported upgrade path, typically a 4G LTE or newer camera.
3G Network Shutdowns
A 3G-only trail camera can’t reconnect on a replacement SIM because major U.S. carriers have retired their 3G networks. If its cellular modem supports only 3G, no activation, data plan, or SIM swap can restore transmission. The carrier has removed the radio access technology the camera needs, not merely changed account provisioning.
Before you order any replacement hardware, review the camera’s specifications for LTE capability. Confirm it supports 4G LTE, then match its listed LTE frequency bands to coverage from a carrier at your camera site. Band support matters as much as signal availability; an LTE camera that lacks the local carrier’s deployed bands won’t establish reliable service. For a 3G-only unit, the practical fix is replacing it with a 4G LTE trail camera.
Legacy SIM Compatibility
Legacy 3G trail cameras don’t use one universal SIM format: depending on the model, yours may require a standard, micro, or nano SIM. Check your camera’s specifications and slot before ordering; don’t assume a current nano SIM fits. A SIM cannot restore connectivity where the carrier has retired 3G, so verify that the network remains active in your camera’s deployment area before selecting service.
Also confirm whether the device is carrier-locked. A locked camera may register only with its designated network, even when another provider’s SIM physically fits. Match the SIM and data plan to the camera’s supported radio bands and the carrier’s approved device requirements. Don’t cut a larger SIM for a smaller tray: damaged contacts or poor alignment can often prevent registration.
Upgrade Options
Upgrading service won’t modernize a 3G trail camera: a 4G LTE SIM can’t add LTE radio hardware. Your camera needs a 3G-compatible SIM and plan only if its manual lists a supported network, and that network still operates at your installation site. Check the manual before ordering: it identifies supported networks, carrier locks, and the required SIM size.
Because most U.S. carriers have retired 3G, verify live coverage rather than assuming a replacement card will connect. For dependable cellular service, upgrade to a 4G LTE camera matched to an available local carrier. You must still use a compatible SIM and data plan, and the camera must support that carrier’s LTE bands. Confirm coverage at the installation site before committing to hardware or service plans.
Elk-Feeder Camera Setup
Before installing a SIM in your elk-feeder camera, verify its specified SIM size, typically nano on modern models, and confirm the camera is carrier-free or compatible with your selected carrier’s US 4G LTE or supported 5G bands.
Never cut a micro or standard SIM; altered contacts can fail registration. Select service using measured feeder-site coverage, not a coverage map alone. When signal is uncertain, a multi-network SIM with AT&T, T-Mobile, and Verizon access can improve attachment options.
| Setup item | Required action |
|---|---|
| Plan | Activate data before installation |
| APN | Enter “puffin”; enable roaming if offered |
After activation, install the card and enter the carrier APN. Current SpectrumSIM cards usually require “puffin.” Enable data roaming when the camera provides that control, then confirm network registration before relying on uploads.
Replace Damaged SIM Door Gaskets
Protect the SIM compartment by replacing any cracked, flattened, or loose door gasket with the exact camera-compatible part. Consult your camera manual or the manufacturer to confirm the gasket’s size and part number; an incorrect seal can admit moisture or dust, risking SIM contacts and cellular reliability.
Before installation, remove debris from the gasket channel and SIM-door mating surface with a clean, dry cloth. Seat the replacement evenly around the channel without twisting, stretching, or leaving sections. Close and latch the door using the manufacturer’s specified procedure. Check that the gasket remains seated and isn’t pinched at corners or displaced by the latch.
Inspect the seal during battery or SIM service. Replace it if it hardens, cracks, flattens, loosens, or no longer maintains compression.
Never Cut Down SIM Cards
Never cut a standard or micro SIM to fit a nano-SIM trail-camera slot, because trimming can damage its contacts, alter its dimensions, or prevent reliable seating in the reader. A hand-trimmed card may sit unevenly, lose contact under vibration, or jam the tray, interrupting cellular uploads when you need them most.
- Check your camera specifications for the required SIM format before ordering service.
- If it uses nano SIM, request a carrier SIM kit with a factory-cut nano card; don’t modify a larger card.
- Verify that the selected SIM also meets the camera’s carrier compatibility requirements, not merely the physical slot specification.
Use the supplied adapter only for storage, never inside the camera tray during field deployment.
Confirm APN Settings Before Activation
| SIM identifier | Required APN |
|---|---|
| Most current SpectrumSIM cards | puffin |
| Starts with 8946080 | data641003 |
Conclusion
Most modern trail cameras use nano-SIMs, but you’ll confirm the tray cutout and camera manual before installation. Check the IMEI with your chosen carrier to verify network compatibility and remove any carrier lock concerns. Use a proper adapter only when an older 3G model requires a micro-SIM; don’t cut cards. Before activation, install an intact SIM-door gasket, enter the correct APN, and test cellular reporting at the feeder location to guarantee reliable image delivery daily.