
How to Set Up a Bird Feeder Camera for Close-Up Shots and Fewer Misses
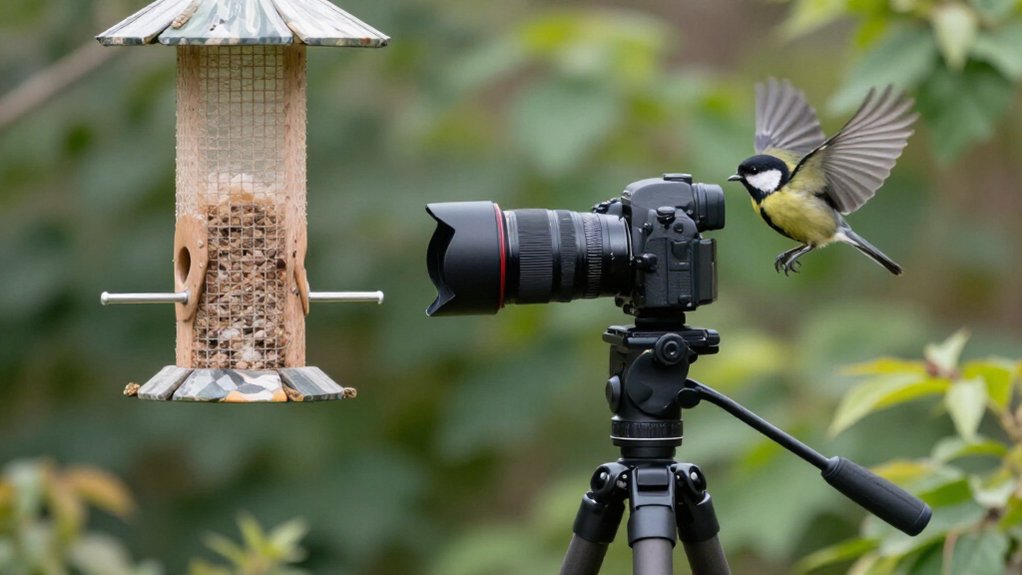
Mount your camera level with the feeder perch, two to four feet away, and tip it slightly downward.
Use 1080p or 4K, high motion sensitivity, and a five to 15-second delay.
Run a 30-minute live test for framing, focus, and alerts.
Keep USB power steady, clean the window, and route the cable tight.
After rain, replace wet seed and retest; north- or south-facing placement cuts glare.
The next steps help you tune every arrival better.
30-Minute Easy Feeder Close-Ups
For easy feeder close-ups, mount your camera 2 to 4 feet from the feeder, roughly level with the perch and angled slightly downward so birds fill the frame. Choose a north or south-facing view when you can; it usually avoids the glare and stray motion common with east or west-facing setups. Set 1080p or 4K, high motion sensitivity, a 5 to 15-second shot delay, and a three-photo burst if available.
Then watch a 30-minute test window. Check live framing, focus, trigger response, and cadence as birds land. Move the camera only a little at a time until arrivals, perching, and departures register reliably. With trail-style cameras, work around three to four feet; their narrower view rewards careful focus before you firmly secure the mount. Repeat checks after each small adjustment.
Charge the Blink Mini
Before you mount the Blink Mini, give it a full power check and make sure its USB power source can run through your planned observation window. A camera that loses power during the morning rush can’t detect or record the quick landings you want.
- Plug it in early and confirm it will stay powered from dawn through early evening, or throughout your chosen watch period.
- Open the Blink app, trigger motion near the camera, and verify that a notification arrives when a clip records.
- Use Live View while it’s ready to test height, focus, and framing. Keep the camera roughly 2 to 4 feet from the feeder, or closer with a feeder-style mount, so small movements trigger promptly.
Take a few patient test passes before relying on it.
Step 1: Clean Window, Fill Feeder
A clear window gives your Blink Mini the cleanest view of every landing. Wash both sides thoroughly, then wipe away fingerprints, haze, and condensation. Those small marks can catch light, create glare, and sometimes trigger motion when the feeder gets busy.
Set the camera close behind glass, ideally one to two feet from the feeder, level with the perch and tipped slightly downward. Test framing with a hand approaching from each side; you want arrivals and departures in view. Use a removable tray or perch setup, so you can refill and clean quickly without nudging the camera or unsettling birds.
Choose food they’ll return for often, such as black-oil sunflower seed in winter. Confirm framing, then use high sensitivity and a five-to-15-second detection delay after visits.
Step 2: Connect Blink Mini to Wi‑Fi
With the feeder framed and filled, move the Blink Mini as close to the window glass as possible to limit reflections, then open the Blink app to pair it. Before you begin, connect your phone to the same 2.4 GHz Wi-Fi network the camera will use. In Blink, choose Add a Device and follow the prompts to link the Mini. Stay nearby until the app confirms the connection; a steady setup now prevents frustrating gaps later.
Then enable motion notifications, so your phone alerts you when recording begins. Watch several test detections while birds visit, checking that activity at roughly two to four feet produces clips. If triggering is inconsistent, shift the Mini slightly, wait for another visit, and check that notifications remain enabled.
Step 3: Aim Lens at Perch
Place the camera two to four feet from the feeder, with the perch centered in its frame.
Set the lens at perch height or a touch above it, then tip it slightly downward. That angle keeps the head and eye area prominent when a bird settles. If your camera has a narrow field of view, favor three to four feet so arrivals stay inside the frame.
Before you commit, hold it in position and inspect live view. Watch the landing spot for cropped beaks or wings. After a few visits, make small adjustments rather than sweeping changes.
Your goal is to record the approach, the pause on the perch, and the departure without clipping wings. Patient testing shows what live view sometimes misses.
Step 4: Mount Blink Mini Beside Feeder
Mount the Blink Mini beside the feeder window, as close as the setup allows, and angle it slightly downward so the perches fill the frame without catching much glass glare.
Set the camera roughly at feeder height, or slightly above it. Before you commit to screws or adhesive, open the live view on your phone and watch the perch. Adjust until a bird landing there looks sharp, leaving several inches between the lens and landing area. That buffer helps the Mini focus cleanly and keeps wingbeats from turning soft.
Check window at times you expect visitors. Don’t point the lens toward direct sun; strong east or west light can turn glass into a mirror. A slight side angle often solves that problem for you.
Step 5: Test Motion Detection Range
Once the framing looks right, test whether the camera notices a bird at the perch, not just movement nearby. Place it 2 to 4 feet from the feeder; closer can tighten the view, while farther distances may miss small, fast birds. Hold it at its intended mounting height, level with the perch or slightly above, and tip it downward. Then walk through the zone to confirm detection at that exact range.
Set sensitivity to high and watch several actual arrivals. Use a 5 to 15-second shot delay, and make sure back-to-back visitors still trigger clips. If results vary, turn the camera north or south, when possible, to limit glare and false motion. Re-test patiently until each clip reliably catches the full bird’s approach, landing, and perch without guessing.
Step 6: Tuck USB Cable Into Clips
Run the USB lead along the nearest frame edge, snapping it into the feeder’s built-in clips or cable channel as you go. Keep the run tight to the housing, so it stays outside the camera’s view and won’t sway in wind. A loose lead can wander across the lens area or register as motion, especially on blustery afternoons.
Before you press the cable fully home, leave a small service loop at the camera connection. That slack protects the port when you make angle adjustments. Then seat the remaining cable in every clip. Keep it clear of perches and seed spill, where pecking, moisture, and debris can interrupt power. Once the cable is secured, open live view and make sure routing hasn’t nudged the camera.
Review Clip for Sharp Eyes
With the cable secured, review a few detected clips frame by frame and judge sharpness at the bird’s eye and near-beak area, not just across its body. Fine feather texture can fool you: a bird may look crisp overall while its eye remains soft.
If it does, shift focus toward the feeder perch and re-aim the camera so visiting birds occupy the frame’s sharpest zone. Compare arrival, perched, and departure frames for motion blur. Try a three-photo burst, then keep the middle image when it delivers the clearest identification marks.
Also check sensitivity and shot delay; a five to fifteen-second delay can leave you with a changed pose. Review clips in early, late, and overcast light. You’ll get sharper eyes in even, clean light.
Fixing Glare and False Alerts
Why is your feeder camera alerting when no bird has landed? Usually, glare or background movement fools it. Mount it north/south, not east/west, and tip it slightly downward. Keep a dedicated feeder camera 1 to 2 feet away; place a trail camera 3 to 4 feet back. Through glass, press it close and tape over front indicator lights.
| Check | What you see | Fix |
|---|---|---|
| Sun | Flashing highlights | Re-aim |
| Background | Swaying wires | Use bushes |
| Timing | Repeated triggers | Set 5 to 15 seconds |
Then test the detection area during morning and afternoon light. Exclude branches that flicker in the wind, and avoid straight poles or wires. A natural, steady bush behind the feeder gives the sensor less to misread. Start with a five-second delay, then lengthen it toward 15 seconds if alerts persist.
Refresh Seed After Rainfall
Once the rain stops, clear out any soaked or clumped seed and refill the feeder with fresh, dry seed. Wet mixes stick in trays, hide food, and can make birds land briefly or bypass the station. Remove saturated leftovers completely; it also prevents raindrop movement and sticky clusters from causing repeated false triggers.
Then raise motion sensitivity and set a short capture delay of five to fifteen seconds. First visits often arrive fast after clearing skies. With your camera two to four feet away, check framing after refilling; birds may approach from new angles. Under lingering clouds, start around ISO 400, increasing toward ISO 1000 if needed to hold 1/500-second or faster shutter speeds. This keeps wing and feather detail crisp when activity resumes.
Conclusion
With a clean window, fresh seed, and a carefully aimed Blink Mini, you’ll catch birds where they pause instead of where they fly past. Check the first clips, then make small adjustments: lower glare, tighten the view, and secure the cable.
You don’t need perfection on day one. Watch how your regular visitors land, feed, and leave. After rain, refresh the seed and lens area, and you’ll keep getting sharper, quieter close-ups through changing weather.
