How to Use a Trail Camera for Home Security: Placement, Alerts and Hiding It
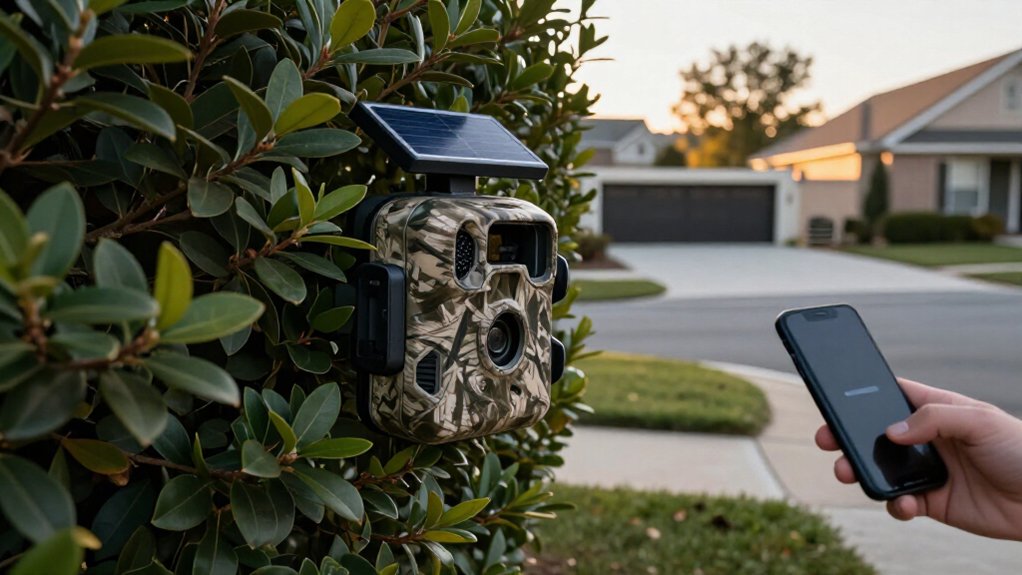
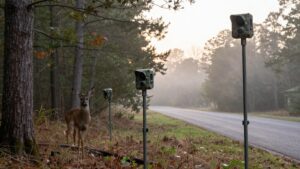
Place your trail camera 3 to 6 feet high, aimed across the driveway so people cross its 60 to 100-foot PIR zone.
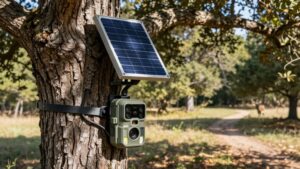
Hide it in a shrub gap or tree cover, but keep the lens and sensor clear of branches.
Test signal strength, motion alerts, uploads, and plate visibility before relying on it.
Format a compatible SD card, padlock the housing, reduce sensitivity if wind triggers it, and replace batteries before winter.
Next, fine-tune for dependable coverage.
Expected Result: Driveway Motion Alerts
For reliable driveway motion alerts, position your trail camera at the approach angle so incoming headlights enter its 60 to 100-foot detection zone before the vehicle reaches your home. Mount it 3 to 5 feet above ground and tilt it slightly downward, giving the PIR sensor a clear chance to trigger while framing drivers’ faces and license plates. Select motion-triggered photos or short clips, since the camera records events rather than continuous footage.
Clear branches, grass, and other moving objects from its view, and avoid direct sunrise or sunset glare to reduce false alerts. Use high sensitivity when needed, then check the SD card promptly after activity to identify vehicles and build a dependable driveway-monitoring routine. Adjust the angle after a test pass to eliminate blind spots quickly.
Verify Cellular Signal Strength
Once your driveway framing works, verify cellular signal at the exact mounting point before you rely on app alerts. Trees, fences, and exterior walls can weaken service sharply, so a reading from the street doesn’t prove performance at the camera.
- Open the camera’s signal meter or app and target a steady three to four bars, or RSSI near −85 dBm or better.
- If it’s weak, retest higher or rotate its antenna; small changes can improve line-of-sight.
- Trigger motion, then confirm the image uploads and the alert reaches your app. If reliability remains poor, use an external-antenna model or record to an SD card and check it manually.
Document results at different times, since carrier performance may shift with weather, network load, or seasonal foliage.
Step 1: Choose a Concealed Mounting Location
Choose a concealed location that watches a likely entry route, such as a driveway, side gate, or front walk, without advertising the camera’s presence. Hide its body behind shrubs, in a tree gap, or along a fence line, while keeping the lens and sensor clear of leaves and wind-blown branches. Aim across the approach, not straight at it, to capture faces at waist-to-chest height.
Mount it 6 to 10 feet high to deter tampering and theft, but angle it downward so the detection zone stays on people. Walk-test your setup: PIR detection commonly works within 60 to 100 feet, depending on the model. Move it closer if you need reliable triggers. Use camouflage-safe straps or bolts and blend the housing into foliage or natural materials. Keep the infrared area unobstructed.
Step 2: Install and Format SD Card
Power off the trail camera if its manual recommends it, then insert a reliable Class 10/U1 or faster SD card that falls within the camera’s supported capacity limit, often 32GB, 64GB, or 128GB. Check the manufacturer’s specification rather than guessing; an oversized card may not work or could fail to record critical evidence.
With the card installed, open the camera’s settings and select Format. Formatting in the camera creates the correct file system and reduces read/write errors that can leave you without usable footage. Before you close the housing, choose photo mode or a practical video length, if available, to balance detail against storage use.
Finally, trigger a brief test recording and inspect its files. Confirm new files clearly appear, then reinstall the card securely.
Step 3: Aim Sensor Across Driveway
Mount the camera 3 to 6 feet above the ground and aim it across the driveway’s approach path, not only at the parked vehicles. A trail camera’s PIR sensor detects warm objects moving through its field, so side-to-side movement usually triggers more reliably than someone walking straight toward it. Tilt the unit slightly downward to place people’s head and torso in the detection zone, rather than capturing only lower legs.
Align the lens and sensor with the driveway’s width and verify its detection angle, often 40 to 60°. Avoid aiming toward headlights, swaying branches, or ground where shifting temperatures and shadows cause false triggers. Then walk the expected route yourself and review the results; adjust the angle until coverage begins before a visitor reaches your vehicles or entry.
Step 4: Enable Instant Photo Notifications
Once the camera reliably detects movement along the driveway, set up instant photo notifications so you can act on an event as it happens. Choose a model with cellular or Wi-Fi connectivity and a companion app sending alerts immediately after its PIR sensor triggers. In the camera menu, enable motion-based Detection Mode and set PIR sensitivity appropriately for your driveway. This limits alerts to movement, reducing nuisance notifications while conserving battery power.
In the app, select event-based push notifications, not scheduled digests, so every capture reaches your phone within seconds. Configure photo-only alerts for faster delivery; you can retrieve video clips later if needed. Finally, walk through the detection zone, often 60 to 100 feet, and verify that the image arrives in real time.
Step 5: Review First 24-Hour Captures
Review your camera’s first 24 hours of captures to confirm it’s protecting the area you intended. Check whether it triggers when people approach the driveway, gate, walkway, or target zone, not when branches sway or insects pass to the lens. Count the day’s photos and videos. A heavy volume of false alerts suggests excessive sensitivity, while missed approaches may mean subjects are outside its 60 to 100-foot detection range.
Inspect image quality in daylight and after dark: you want color by day and clear infrared detail at night. Verify timestamps and the time zone so activity patterns remain trustworthy. Adjust camera height, tilt, or distance as needed. Position subjects through the central effective field of view, typically about 40 to 60 degrees, instead of letting them skim its edges.
Step 6: Padlock Housing, Collect Scraps
Secure the trail camera in a padlock-style housing so a trespasser can’t quickly remove the unit or pull its SD card. Mount the locked enclosure high enough to discourage tampering, then angle it toward the driveway, door path, or other likely approach. Keep leaves, branches, and the housing edge clear of the lens.
Use motion activation to collect useful “scraps”, short photos or clips tied to movement, rather than hours of empty footage. Set brief capture intervals and a dependable trigger range, according to your model’s capabilities. This preserves battery power and storage while concentrating evidence around intrusion events. Camouflage the enclosure with nearby natural materials and align it with surrounding textures. Make sure the lock remains accessible to you, yet inconspicuous from common walking routes.
Confirm License Plates Are Readable
Position the trail camera where vehicles pass within about 20 to 40 feet (6 to 12 m), rather than relying on its maximum motion range, to give license plates a realistic chance of appearing sharp. Mount it 1.5 to 3 feet (0.5 to 1 m) high on a rigid post or tree, then tilt it slightly upward so a stopped or slowing vehicle’s plate sits near the center of the frame.
Choose a narrower view, or move back enough to prevent cropping, and use high-resolution capture. At night, confirm IR illumination covers the plate without glare. Run tests with several vehicle types at typical speeds and lighting, then zoom in: you should be able to read every character. If not, adjust distance, angle, and lighting before you depend on the camera for identification.
Fix Branch-Triggered False Alerts
Wind-blown branches can flood your trail camera with useless alerts, so mount it above nearby vegetation, typically 3 to 6 feet (1 to 2 m) high, and angle it slightly downward. This keeps swaying brush close to the lens from crossing the PIR sensor’s heat-change zone. Trim leaves, twigs, and branches within 3 to 10 feet (1 to 3 m) of the view.
| Check | Security adjustment |
|---|---|
| Brush triggers camera | Raise it, re-aim, or clear growth |
| Wind still causes alerts | Lower motion sensitivity |
Walk through your intended approach route, then deliberately shake nearby brush. If the camera records both events, refine its angle or height and retest. Use your model’s motion-sensitivity setting to filter small, warm movements while preserving reliable captures of people or animals when needed.
Replace Batteries Before Winter
Replace your trail camera’s batteries during a warm spell before the first freeze, because cold weather drains power faster and can leave your security coverage offline.
Fresh batteries give you a starting point for cold-weather monitoring, when low temperatures accelerate drain. After installation, walk through the detection zone at your chosen distance and verify that the motion sensor triggers. Check the SD card, too: leave enough free space for winter events, so a full card doesn’t stop recording when you need evidence.
Keep spare batteries indoors, ready for a quick swap. Don’t carry spares outside repeatedly before use; cold exposure can reduce their available capacity. Add a battery and card check to your pre-winter security routine, then inspect status indicators after the cold snap.
Conclusion
With smart placement, reliable alerts, and discreet concealment, you can turn a trail camera into a practical first line of home security. Test coverage before you rely on it, keep the lens clear, and review images often.
You’ll catch driveway activity, reduce false alerts, and preserve useful evidence when something happens. Lock the housing, protect power and storage, and adjust seasonally. A well-maintained camera won’t replace other security measures, but it’ll give you valuable visibility.