How to Hook Up a Solar Panel to a Trail Camera: Plugs, Voltage and Mounting
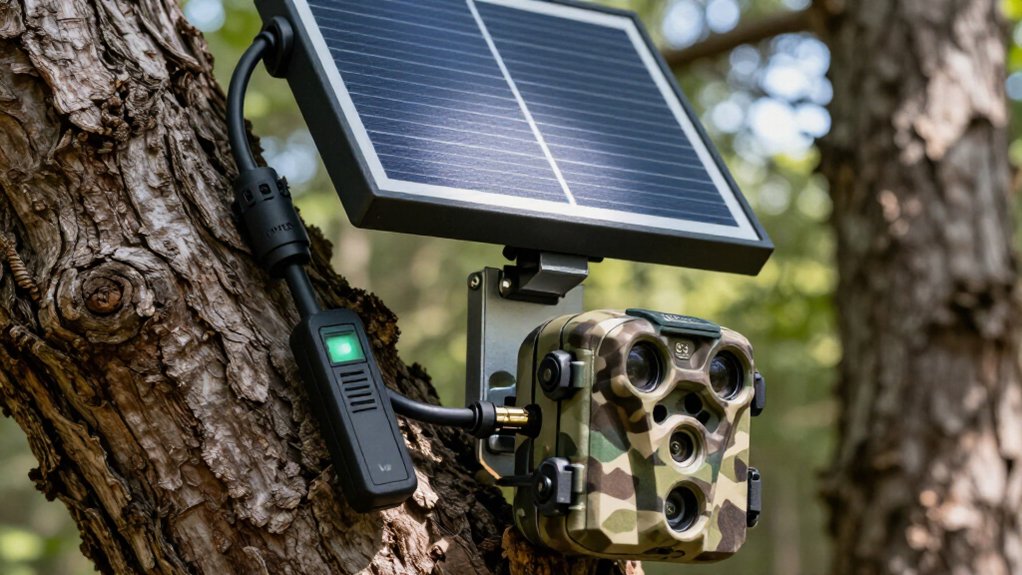
Before mounting, check your trail camera’s manual or label for its input voltage, connector, and polarity; a matching plug alone isn’t enough.
Charge the installed battery fully, then connect only a compatible 5V, 6V, or 12V panel; never feed 12V into a 6V camera.
Mount the panel equatorward at 30 to 45 degrees in direct sun. Seat the plug, secure cable with a downward drip loop, and confirm the battery icon changes.
Further steps cover testing and upkeep.
30-Minute Solar Camera Hookup
You can set up a solar panel for a trail camera in about 30 minutes if you confirm compatibility before mounting anything. Fully charge the camera’s battery pack to 100% and insert it before connecting the panel; it maintains charge but can’t operate the camera without a battery.
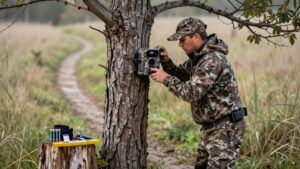
Check the camera’s voltage and socket; match its output (5V USB, 6V, or 12V) and connector. Use adapter for mismatched plugs. Mount included arm and screws with a Phillips screwdriver. For brick, concrete, or stucco, drill 6 mm (¼-inch) holes and fit anchors.
Aim it equatorward: south in the Northern Hemisphere or north in the Southern Hemisphere. Set a 30–45-degree angle in shade-free sun. Connect and secure cable; check both units for several days to confirm charging and alignment.
Verify 6V Output Polarity
Before plugging in a 6V solar panel, confirm that your trail camera accepts a 6V external input by checking its manual, power label, or battery compartment. Then verify that the panel is configured for 6V, not 12V; 12V can damage the camera’s charging circuit. Confirm polarity before making any connection:
- Read the voltage setting on the panel.
- Compare the plus and minus symbols on both devices.
- Don’t treat a matching barrel plug as proof of compatibility.
- Check the panel specifications or measure the plug with a multimeter.
- If polarity differs, use a correctly rated polarity-reversing adapter.
Disconnect power while testing, and connect only after voltage and polarity agree. This prevents reversed current from harming sensitive input components and avoids a costly camera repair later.
Step 1: Identify the Camera Charging Port
Locate the trail camera’s external power or charging port, then confirm its labeled voltage and connector type in the manual or battery compartment. Inspect the camera body for a covered external socket, usually marked “DC IN” or USB. Determine whether it accepts USB-C or a barrel plug; don’t assume similar-looking connectors are compatible.
Cameras using four AA cells commonly require about 6V, while some eight-AA models require 12V; USB-rechargeable units commonly use 5V. Match both the voltage requirement and connector before attaching the solar panel. If the plugs differ, install a compatible USB-C-to-barrel or barrel-to-USB-C adapter designed for the camera’s input. Never connect a 12V panel output directly to a 6V camera: excessive voltage can permanently damage its charging circuit or possibly internal electronics.
Step 2: Charge the Internal Battery First
Fully charge the trail camera’s rechargeable battery pack to 100% before connecting the solar panel or installing the camera in the field. Use the camera’s charging method and confirm the menu reports a full charge. This initial charge provides operating reserve because most trail-camera solar panels only maintain the pack or replenish it gradually; they don’t reliably run the camera by themselves.
Leave the battery installed when you attach the panel. Some solar-compatible cameras require an inserted battery for operation even with adequate sunlight. After installation, check the camera over several days. Review battery percentage, image or video activity, and panel exposure under site conditions. If charge declines quickly, verify panel compatibility, connections, and sunlight before relying on the setup for reliable unattended use.
Step 3: Form a Downward-Facing Drip Loop
Route the solar panel cable downward from the camera’s connection port, then back up to the plug to create a downward-facing drip loop. Shape the cable so its lowest point sits below the connector, with a smooth U-shaped bend rather than a sharp kink. Rainwater will follow gravity to the bottom of this loop and drip away, reducing the chance that moisture tracks along the cable toward the port.
Leave sufficient slack for normal panel or camera movement, but don’t leave loose cable that can snag on branches or wildlife. Fasten the cable to the mounting arm, tree bracket, or nearby stable surface using outdoor-rated cable clips. Position clips above and beside the loop, not across it, so they don’t flatten or block drainage.
Step 4: Seat the Barrel Plug
Before connecting power, verify that the solar panel’s barrel plug matches the trail camera’s external power socket and that the voltage and polarity meet the camera manual’s specifications. Check port markings or the manual if any detail is unclear. If connector types differ, use a compatible adapter rated for the camera input; don’t force a near-fitting plug into the socket.
Align the plug squarely with the port and press it straight in until fully seated. This guarantees stable contact and helps prevent intermittent power loss. Don’t twist, bend, or pull the cable during insertion. If the plug has side screw holes, fit and tighten the camera’s retaining screw as directed. Make sure the connector is secure without placing strain on the port or cable.
Step 5: Test Charging Indicator LED
With the plug seated securely, place the panel in direct sunlight and check the camera manual for the charging indicator LED’s specific meaning. Make sure the camera contains a charged, correctly installed battery before testing; the panel maintains battery charge and cannot operate the camera by itself. Observe the LED after a brief exposure, noting that shade, seasonal sun angle, and panel orientation can change its response.
Some cameras stop near 80 percent capacity to protect battery life. If no charging signal appears, recheck plug fit and compatibility, then adjust panel toward stronger sunlight. Don’t force connectors or assume a different LED pattern indicates failure; follow the manual’s stated status codes before changing equipment or exposing connections to moisture during the test in wet conditions.
Step 6: Zip-Tie Cable to Bracket
Secure the solar-panel cable along the mounting bracket with zip ties, keeping it clear of the camera lens, adjustment points, and any moving bracket parts. Position zip ties at several points along the bracket, especially near bends and where wind or wildlife could pull on the cable. Leave a small, loose service loop beside the camera connection so panel adjustments don’t strain the plug or cable.
Keep the cable off sharp metal edges and away from pivot points. Tighten each tie only enough to hold the cable; overtightening can crush or kink its insulation. Trim the excess tie tails flush after installation, but angle cutters away from the wire to prevent nicks. Recheck the full bracket travel before leaving the camera in the field overnight.
Confirm Battery Icon Changes
Turn on the trail camera and check its battery icon or power-status screen for a solar or charging indicator after you connect the panel. Place the panel in direct sunlight, then wait for the display to refresh; charging status may not appear immediately, and output falls substantially in cloud cover or shade.
Leave the rechargeable battery installed: the panel replenishes that battery and doesn’t independently run the camera. Some Ring Solar Panel setups intentionally stop near 80 percent to protect battery longevity, whereas Outdoor Cam Plus can reach 100 percent. If no symbol appears, reseat the connector, verify the panel faces usable sunlight, and confirm camera-panel compatibility before troubleshooting further. Avoid opening housings or altering wiring while the equipment is energized in wet conditions.
Charging LED Off? Inspect Fuse
If the charging LED remains off, disconnect the solar panel from the camera and inspect the inline fuse for a broken element, corrosion, or a loose fuse-holder connection. Don’t touch exposed metal contacts while the system is connected. Pull the fuse, compare its rating and type with the panel manufacturer’s specification, and replace it only with an identical approved fuse. Never install a higher-rated fuse or bypass the holder.
| Check | What you see | Action |
|---|---|---|
| Fuse | Broken link | Match rating |
| Plug | Not seated | Reseat adapter |
Then verify that the plug is fully seated and that the adapter matches your camera’s connector. Reconnect the panel, consult the applicable camera or panel manual, and confirm whether the charging LED now indicates normal operation under recommended test conditions.
Clean Panel Glass Monthly
Clean the panel glass about once a month to prevent dust, pollen, leaves, and other debris from reducing its sunlight exposure. Before you begin, verify that the panel is firmly secured to its mounting arm and that you can reach it without overextending, climbing unsafely, or stressing the cable. Use a soft, damp microfiber cloth to wipe the glass gently.
Don’t use abrasive pads, dry gritty rags, or harsh tools, because scratches can permanently reduce light transmission. Afterward, inspect the panel’s face and surroundings for branches, vines, or other objects that cast shadows during the day. Trim or reposition obstructions as needed, while preserving safe clearance from the camera and wiring. Finally, keep its angle near 30 to 45 degrees for better debris shedding.
Conclusion
You can complete a reliable solar trail-camera hookup by matching the panel’s regulated 6V output, polarity, and plug to your camera’s charging port. Charge the internal battery first, then mount the panel securely with a downward drip loop and strain-relieved cable. Verify charging at the battery icon or LED, and inspect the fuse if indicators stay off. Keep connections dry, avoid damaged insulation, and clean panel glass monthly to maintain consistent charging and field runtime.