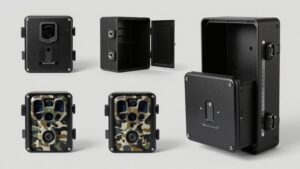
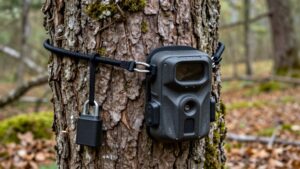
How to Camouflage a Trail Camera With Bark, Paint and Natural Cover
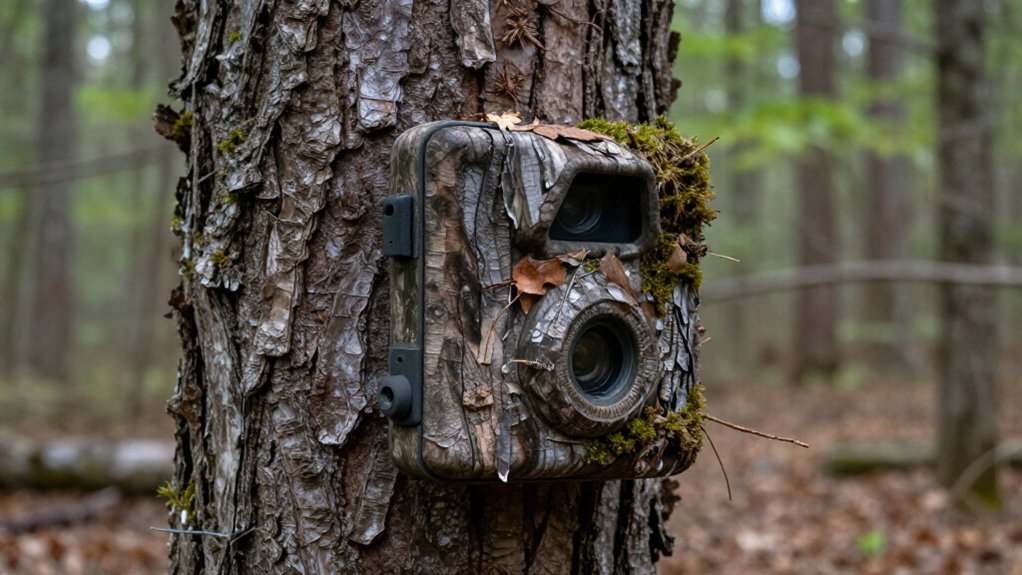
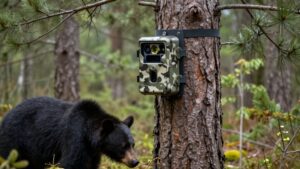
Match camera housing to the exact mount tree: select similarly colored bark and reproduce its ridges with thin, matte acrylic layers.
Remove batteries before painting or attaching dry natural cover, and keep lenses, sensors, vents, and seals clear.
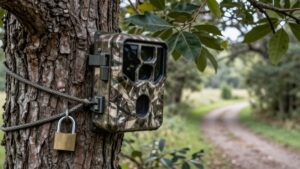
Tighten the strap, flatten loose tails, then use a few local twigs or vine segments to disrupt the side profile.
Test images from downtrail, and dry the unit fully after rain.
The steps below explain moisture protection.
Easy 30-Minute Bark Blending
Match the camera to the specific tree it occupies rather than relying on generic camouflage. During a 30-minute setup, wrap or sleeve the housing with bark-toned material, keeping the front lens and sensor area open. If bark coverage is incomplete, paint exposed housing sections with custom gray from white and black. Deepen brown tones with black, and add a green-black cast to interrupt color patches that can appear artificial.
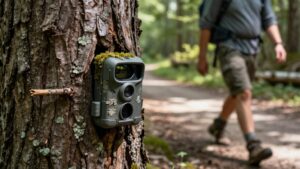
Prioritize the side profile, which reveals a flat outline. Secure twigs, sticks, or close-fitting bark slabs along the body without blocking controls. Then position three or four branches or vine segments, each about 3–4 inches thick, around it to fragment edges. Inspect from ground level and slightly above head height; confirm concealment and an unobstructed detection field.
Match Bark to Mount Tree
Select bark from the same species as the mount tree, matching both its overall color and its light to dark patch pattern. Species-matched bark reproduces the host’s ridges, fissures, and tonal variation, so you avoid a conspicuous panel. Wrap the camera body and strap tightly, following natural grooves rather than spanning them.
- Press bark over the side profile, where a outline is most visible.
- Place the meeting seam at the mount point, using the tree contact area to conceal it.
- Check from ground level and arm’s length, then shift layers until they disrupt the camera’s silhouette.
Keep gaps minimal: loose edges cast shadows and look flat from oblique views. If needed, use gray paint; add brown or dark-green marks sparingly only where host bark has them.
Step 1: Remove Camera Batteries First
Remove the batteries before adding bark, paint, vines, or other cover. This prevents the camera from recording or triggering while you handle it, conserving power during slow, careful work. Remove cells before painting or attaching natural materials, because dust, paint vapors, and moisture can enter an open compartment and contribute to corrosion or unreliable contacts.
Keep the compartment open only as long as needed; close its seal promptly to limit moisture intrusion. Once the paint has cured and bark or foliage is secured, reinstall the batteries with correct polarity and seat the compartment cover firmly. Then confirm the camera powers on and operates normally in its final position. Avoid shifting the mount, which preserves your bark alignment and reduces further disturbance to the tree surface.
Step 2: Set Date, Time, and Detection
Before you leave the site, set the camera’s date and time accurately so each image or clip can be matched to deer movement patterns and local conditions. Check it again whenever you replace batteries or the SD card. During a low-activity period, trigger the unit within minutes of mounting to verify its timestamp and expected detection range.
Select still or video mode and sensitivity to capture animals promptly while limiting wind-, vegetation-, or heat-driven empty recordings. Confirm that no-glow blackout operation and other light settings work as intended; visible illumination can alter animal behavior and expose the setup. Avoid extra visits only to test performance.
Instead, adjust settings during scheduled checks, and retest after every change to keep detection and timestamps consistent over time.
Step 3: Apply Bark-Pattern Acrylic Paint
A bark-matched acrylic finish can reduce the camera’s visual contrast against its mounting tree, especially along the housing edges that create a conspicuous straight-line silhouette. Lightly roughen the plastic, then apply thin acrylic layers so the surface reflects the bark’s matte, irregular texture rather than sunlight. Mix white and black for gray, deepen brown with black, and add only a little green to black for subdued tones.
Prioritize the side profile, where hard edges often reveal the unit against a trunk. Let each coat dry and the finish fully cure before mounting. Check from several viewing angles; if factory camouflage conflicts with local bark, repaint until the pattern blends. Choose colors from the specific tree species and its shaded, weathered bark in situ.
Step 4: Attach Lichen Without Blocking Lens
Place small, locally matched lichen pieces only on the camera’s sides and back, where they break up the housing outline without entering the lens’s field of view. Choose fragments smaller than the viewing area, and avoid vents, infrared windows, and flash openings. Covering these components can impair night detection and trap heat, which may reduce battery life.
Use only a tiny dab of hot glue or non-odorous, outdoor-safe adhesive on each piece. Keep adhesive away from the lens ring. After it cures fully, gently remove loose fibers that rain or wind could dislodge onto the lens. Then aim the camera at a blank target and inspect its view from direct and low positions. Harvest only naturally detached lichen, sparingly, to limit local disturbance in nearby habitat.
Step 5: Break Up Straight Edges
Break the camera’s rectangular or cylindrical outline by adding a few irregular, overlapping bark strips or short twigs around its sides, where profile silhouettes often reveal it. Use three or four feathered attachment points made from thin twigs or vine segments to interrupt the side view without creating a continuous band.
Leave tiny gaps between bark pieces; uninterrupted wraps form predictable lines that contrast with naturally varied tree texture. First, disrupt non-optical flat or glossy seams with small, irregular natural fragments, reducing straight-line reflections. If you’re painting, feather each patch’s boundary outward rather than making crisp borders. Use mostly greys, with restrained brown and green variation, to match mottled bark and preserve the tree’s visual complexity in its local habitat through changing light conditions.
Step 6: Tighten Strap and Pack Brushes
Once the camera is positioned, cinch the strap firmly so it can’t shift, alter its aim, or expose a changing side profile between checks. Press buckles, loose strap tails, and shiny contact points flat against the tree, then cover them completely to prevent daylight glints.
Pack small amounts of locally matching brush around the camera body and mounting point. Fill only the gaps that cast dark, shape-defining shadows, keeping the unit visually flat against surrounding bark and vegetation. Don’t overpack: loose fibers and protruding stems catch wind, producing movement that can reveal the installation. Use masking sparingly and avoid crushing live plants or blocking the lens, sensors, or access door. After heavy rain, wind, or seasonal vegetation changes, reset masking so camera’s outline doesn’t reappear.
Inspect Test Photos From Downtrail
In daylight, walk downtrail and review test photos from both close and wide angles to see whether the camera’s side profile, exposed edges, or IR window contrast with bark and surrounding vegetation. Confirm you’ve kept the expected trail line in the detection zone and movement triggers the camera at close and wider distances.
Check timestamps against observed downtrail activity, including tracks or known passage times, to identify clock errors and missed events. Scan images for reflective paint, glossy adhesive, tape seams, straight branch placements, or other artificial surfaces.
If the unit stands out or leaves gaps, reposition vines and branches to break its outline without obstructing the lens, sensor, or animal travel route. Run another daylight test and compare images carefully before final placement.
Fix Lens Fogging After Rain
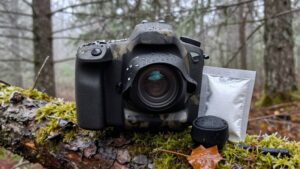
After rain, remove the camera from its camouflage cover and open the lens area so trapped moisture can escape rather than condense on the optics. Gently wipe the glass with a microfiber cloth, then use brief, low-heat airflow or a dry container with desiccant to remove residual humidity. Let the unit dry completely at ambient temperature before remounting; powering it while wet can sustain condensation and leave coating spots. Keep wet bark, leaves, or fabric away from the housing, because saturated camouflage holds water against the device and can alter nearby microhabitats when repeatedly handled. Add a lens hood if fogging persists and store the camera in a dry bag with silica gel between checks.
| Action | Result |
|---|---|
| Wipe | Clarity |
| Air | Drying |
| Desiccant | Prevention |
| Hood | Shielding |
Check Seal Gasket Monthly
Check the trail camera’s seal gasket monthly, ensuring it sits flat and remains free of dust, grit, cracks, or stiffness that could admit water and humid air. Open the housing carefully, keeping leaf litter and soil away from the seal channel. Wipe the gasket with a clean, dry cloth, then seat it correctly before closing the case. Inspect for lens condensation, battery-compartment corrosion, or sluggish buttons; these signs can indicate moisture ingress.
Replace any gasket that’s torn, stiff, cracked, or no longer elastic. Recheck it after heavy storms and after prolonged dry periods followed by hard rain. A dependable seal protects electronics, preserves detection reliability, and prevents unnecessary field visits that can disturb wildlife near your camera site during sensitive breeding and feeding periods.
Conclusion
By matching your camera’s finish to the host tree and using restrained, non-toxic materials, you reduce visual disturbance without altering habitat and protect the tree’s bark, soil, and surrounding understory.
You’ll get more reliable images when you test the angle, keep the lens clear, and maintain seals after wet weather. Don’t strip bark, cut vegetation, or leave loose gear behind. Check placement regularly, then remove the camera promptly when monitoring ends to minimize wildlife disruption.