What to Do If Your Trail Camera Is Stolen: Report, Track and Recover
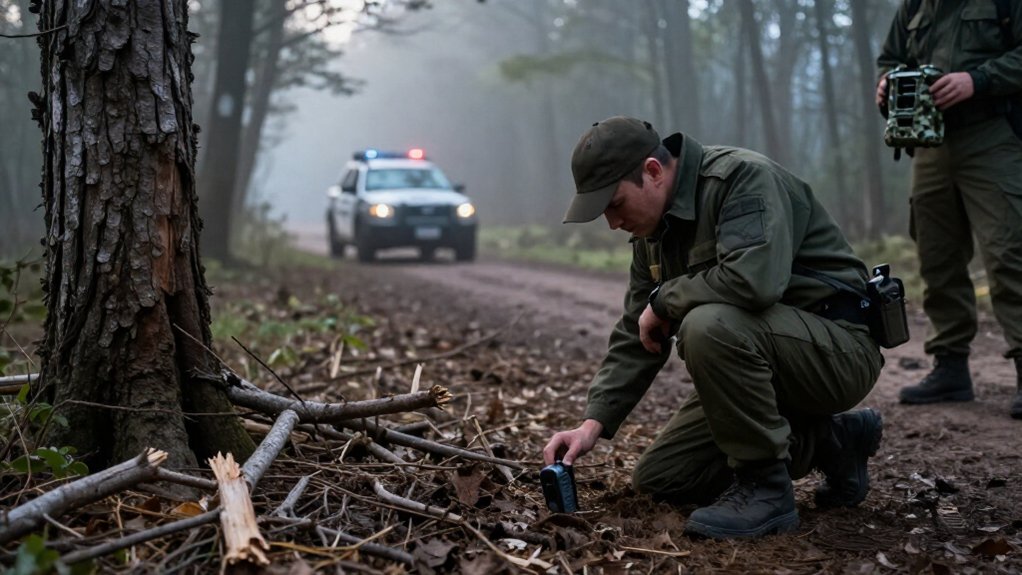
Report your stolen trail camera immediately; recovery is rare, and early reports connect new evidence to your case. Don’t disturb the mounting site: photograph cut straps, hardware, vegetation, tree details, and nearby tire tracks before anyone walks through.
Save the serial number, purchase proof, app screenshots, last cellular or GPS ping, and timestamps.
Change your cellular-account password, obtain the case number, and request nearby doorbell footage.
Next, follow the tracking and replacement steps outlined below.
Recovery Odds Within 48 Hours
Recovery within 48 hours is unlikely: only about 4% of stolen trail cameras are ever recovered, even when owners act quickly. You should report the theft immediately and give police the camera’s serial number, identifying marks, purchase records, and any tracking output.
If you installed cellular, GPS, or electronic layers before the theft, check them at once; they can generate actionable leads, but can’t guarantee recovery. A GPS/cellular camera reports only while powered and inside cellular coverage.
Without preinstalled tracking, prioritize evidence that may appear when the thief opens the SD card on a computer, such as IP, GPS, or browser-fingerprint data. Because only about 15.4% of thefts record the thief before removal, report early so police can connect new evidence directly to your case number.
Preserve the Mounting Site
Treat the mounting site as an evidence scene: don’t move, clean, or repair anything until you’ve documented it. A stolen camera may leave cut marks, strap fragments, disturbed vegetation, or damaged hardware that strengthens your report. If the area is safe, photograph and record the site before anyone walks close to it.
- Identify the exact tree by species, number, or landmark.
- Record mounting height, usually about 10 feet, and camera angle.
- Photograph missing or damaged straps, cable locks, lock boxes, and housings.
- Leave cutting or digging signs visible for police or a game warden.
Restrict foot traffic around the tree, especially on snow or wet mud, until investigators can view the scene. Recovery is uncommon, roughly 4%, so evidence left behind may support your theft report.
Step 1: Document Nearby Tire Tracks
Before police or a game warden arrive, photograph any tire tracks near the camera site from an offset position. Take close-ups of tread and wide images that show the vehicle’s direction of travel. Include landmarks such as the tree line, trail entrance, or stream crossing, and note when you last checked the camera to define the theft window.
Record visible tire width, tread pattern, axle count, impression depth, turn marks, and backing tracks. In fresh snow or wet mud, photograph ruts and any tracks that end near the setup; they may show where someone approached on foot or loaded the camera. Don’t step across or beside the impressions.
Keep others away, minimize foot traffic, and photograph from the side without disturbing the evidence further.
Step 2: Record the Camera Serial Number
Record the exact camera model and serial number, usually printed on the housing or inside the battery or SD-card compartment, and add it to your theft documentation. Photograph the label and store the image with your evidence. This preserves identification after removal.
Add supporting details that connect the device to you: proof of purchase, purchase date, retailer receipt, and any owner markings or engraved identifiers. Ideally, create this record before every field deployment and keep a copy off-site or in secure cloud storage. When you file a police report, provide the model, serial number, and supporting records so officers can enter the specific device into the case. Only about 4 percent of stolen cameras are recovered, so this record supports a documented, rightful return.
Step 3: Check Last Cellular Ping
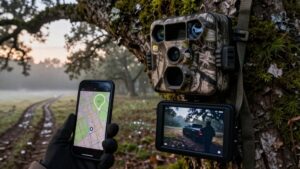
With your serial-number record secured, open the camera manufacturer’s app and check its last cellular or GPS ping immediately. Record the precise timestamp, displayed coordinates, map link, and screenshots. A ping is useful only if the camera was powered on and connected to cellular coverage when it checked in; it doesn’t prove its current location. If thieves removed the batteries or the camera sat in deep forest without signal, the app may show only its final working check-in.
Review alerts for any moved or taken event occurring after that ping. Capture those notices and every identifier shown in the app. Treat the location as an evidence lead, not a recovery guarantee: only about 4% of stolen trail cameras are recovered. Preserve screenshots securely.
Step 4: File a Police Report
File a police report as soon as possible, giving the responding officer the camera’s make and model, serial number, mounting location, approximate installation date, any written name or phone identifier, and relevant photos or alerts from your system. State whether GPS or cellular service was enabled; GPS data is usable only if the camera was powered on and within cellular coverage then.
If you lacked tracking layers, document every available detail: thief images, timestamps, and the defeated lock type. Submit any honeypot-captured IP address, browser fingerprint, and captured GPS coordinates to investigators. Request a case number and attach it to every later submission; recoveries occur in only about 4% of thefts. Preserve originals, note the incident timeline, and don’t alter files or hardware afterward.
Step 5: Request Nearby Doorbell Camera Footage
After you obtain a case number, identify nearby homes and businesses whose doorbell or security cameras may cover access roads, parking areas, trailheads, or the route to your camera site. Request footage from the likely theft window, the period since you last checked the site, and provide your case number. Coordinate with police or game wardens, because privacy policies may prevent owners from sharing files directly. Give them the nearest address, road name, and your camera’s approximate direction so they can confirm coverage. Describe the mounting spot, markings, and lock type. Ask them to preserve clips promptly.
Doorbell footage may capture faces, vehicle plates, and exact timestamps. Share file sources, owner contacts, and matching details with investigators to support a focused evidence review and follow-up efforts.
Step 6: Change the Cellular Account Password
Change your Cellular Trail Camera account password immediately to block a thief from viewing uploads, changing settings, or using an active data-plan session if they obtain your login. In the manufacturer’s app, sign in with the new password and enable moved, relocated, or location alerts when available. These alerts may help, but cellular GPS reports only while the camera has power and coverage.
Review recent account activity for anomalies. Preserve screenshots and timestamps, then report suspicious access to your cellular provider and law enforcement. Don’t share the updated login until you’ve completed these steps. Keep old credentials only long enough to assess a possible breach. A password change limits unauthorized access; it doesn’t ensure recovery, and roughly 4% of stolen trail cameras are recovered.
Verify Police Report Number
Confirm the official police report or case number before you leave or end the call, and record the agency name, officer’s name, and contact details with it. Verify that the number matches the incident date, location, and stolen camera’s identifying details. Keep it in your evidence log and use it on every follow-up submission.
The report number gives investigators a single reference for later evidence, even though only about 4% of stolen trail cameras are recovered. If an SD-card honeypot produces an IP address or browser fingerprint, submit those records under that number. Note when the card was opened and exactly what it captured. If you had no tracking layer, use the number to add serial numbers, distinctive marks, ownership records, or thief images.
Troubleshoot: AirTag Not Updating
When an AirTag stops updating, assume it hasn’t encountered a nearby Apple device, not that it has failed or that the camera has stopped moving. AirTags report locations only after nearby iPhones, iPads, or Macs detect them. Empty terrain and remote routes can consequently produce long gaps.
| Check | Evidence | Action |
|---|---|---|
| Reachability | Few passersby or roads | Retry later |
| Power | Low battery or inactive status | Replace battery; enable tag |
| Behavior | Separation sound can change movement | Document timing |
First, verify battery level and status in Find My. Next, assess whether Apple users pass the site; wait and check again. A separation sound may cause a thief to change course, shifting reports. Treat silence as an AirTag limitation, not continuous GPS tracking. Preserve SD evidence and follow police-report process.
Register Replacement Camera Warranty
Register the replacement camera’s warranty as soon as you receive it, because many manufacturers require registration within a defined period after purchase. Gather the receipt, replacement order, serial number, and contact details before starting. Enter each item as printed, then save the confirmation email or registration screen. Accurate records help the manufacturer authorize a warranty claim without delays.
Register cellular, GPS, and tracking services to the replacement unit before you deploy it. Test that alerts, location reporting, and account ownership work. Photograph the serial-number label and store the image with purchase record, installation location, and police case number from theft. Recovery rates for stolen trail cameras are only 4 percent, so warranty coverage and equipment records provide protection if camera disappears too. Keep copies in separate secure locations.
Conclusion
Act within 48 hours to improve recovery odds. Preserve the mounting site, photograph tire tracks, and record your camera’s serial number. Check the last cellular ping, change the account password, and obtain the police report number.
If an AirTag stops updating, follow troubleshooting steps without disturbing evidence. Give investigators complete records, then register your replacement camera warranty. Fast, documented action protects your account, supports the report, and gives you the strongest chance of recovery possible.