What Angle Should a Trail Camera Be? Get Full-Body Shots, Not Blank Frames
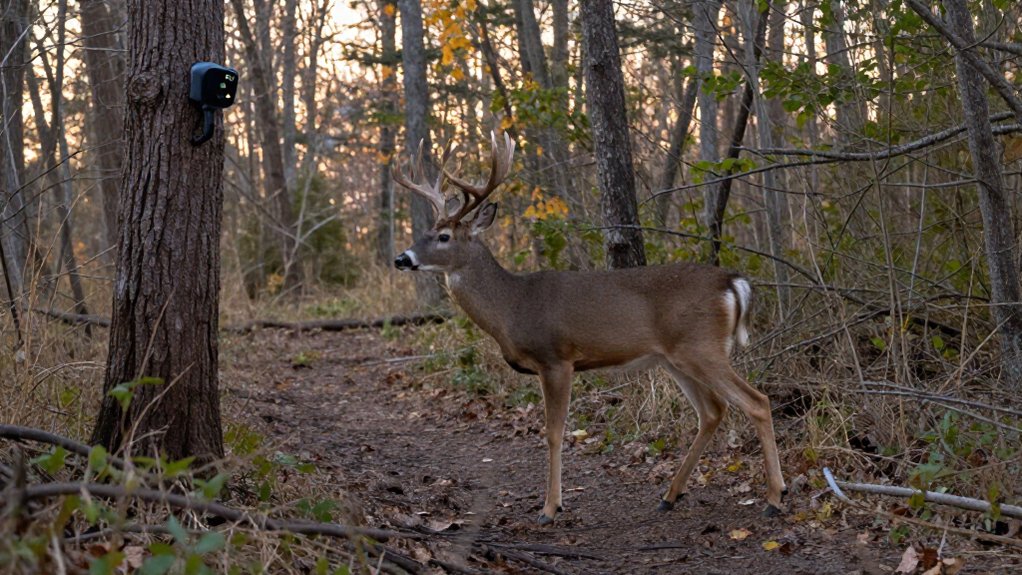
Mount your trail camera 3 to 4 feet high, tilt it 5 to 10° downward, and aim at chest height along the deer’s expected route. Set it 15 to 20 feet from a trail and angle it about 45° across travel, keeping the animal centered from hooves to head.
Clear moving vegetation, avoid sunrise or sunset glare, and test daytime and nighttime walk-bys. Fine-tune framing and trigger coverage with the practical setup details ahead, so you’ll capture dependable deer photos.
Angle 5–10° Downward
For most wildlife setups, tilt your trail camera about 5 to 10° downward from a mounting height of roughly 1 to 1.2 m (3 to 4 ft). This slight angle helps you frame an animal’s full body, keeping its head and legs inside the image. It also points the sensor toward the area animals use, rather than the sky, which supports reliable detection. An upward angle can favor an animal’s back and limit the PIR sensor’s effective range.
Before leaving the site, walk slowly through the detection area and review the test images. Clear nearby branches, tall grass, and loose vegetation; movement in front of the lens can trigger false shots or hide passing animals. Adjust the tilt in tiny increments until each pass looks naturally composed in daylight too.
Aim at Chest Height Downrange
Once you’ve set the downward tilt, aim the lens at the animal’s chest height at the point where you expect it to pass. This reference point keeps the camera’s field of view centered on the body, so you’re less likely to collect close headshots, cropped legs, or empty images. For deer and similar-sized animals, a camera mounted about 3 to 4 feet high usually matches this target well when paired with a gentle 5 to 10° downward tilt. At a food source, center the feeding spot and leave roughly 20 feet between it and the camera for a clearer, more complete image.
Before you leave, walk through the detection area at the expected distance. Check where your chest falls in the frame and adjust the aim.
Trail-Bend Diagonal Setup
At a trail bend, set the camera 15 to 20 feet away and angle it about 45° across the curve rather than straight down the path. That diagonal view keeps animals in the detection zone longer, allowing more time for a trigger and a useful sequence of side-profile, full-body images.
Mount it about 3 feet high and tilt it slightly downward, making sure it’s framing the back, belly, and feet. Clear grass, brush, and branches from the detection zone; moving vegetation can block images or create false triggers. Before leaving, walk through the bend at normal and faster speeds. Note where it activates, then adjust the angle or tilt until coverage remains dependable in both travel directions at each speed you tested before departure.
Wide-Angle Versus Standard Lenses
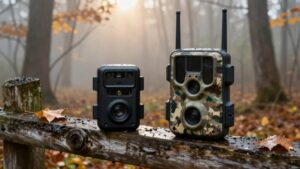
A wide-angle lens shows more of the trail, which helps when animals may enter from several directions, but it can make them appear smaller. You’ll get clearer, larger subjects with a standard lens when you aim it at a specific scrape or trail section. With either lens, angle the camera about 45° across the trail and test full-body coverage at 20 feet or more.
Field Of View Differences
Although both lens types can capture reliable wildlife activity, a wide-angle trail camera covers more ground and suits close trails, funnels, and crossings where animals may pass at different points. Its broader view gives you room to frame the full animal when deer or other wildlife don’t follow one exact line. That extra coverage can reduce cropped subjects when an animal enters near an edge.
A standard lens, by contrast, narrows the scene and makes a chosen target appear larger and more centered. Choose it when you’re monitoring a scrape or feeder and expect animals at a predictable spot. Before leaving either setup, clear brush and branches from the view. Test it at the expected distance; food sources often work best near 20 feet.
Angle Adjustments By Lens
Because a wide-angle lens captures a broad scene, aim the camera about 45° across the trail rather than straight down it. This lets a passing animal remain visible longer. Center the target area and try to keep movement within roughly 20 feet for sharper, full-body photos. Check outer edges: a wide view can pull branches, grass, and brush into the frame.
A standard lens needs a different approach. Point it more directly along the animal’s expected path while leaving room for the entire body than framing only the shoulders or hindquarters. Clear nearby obstructions, since one twig can cover a subject in the narrower view. Then walk through the detection zone at several distances. Review images and adjust placement toward the clearest focal distance.
When Wide-Angle Helps
Lens choice should match how deer use the trail. Choose a wide-angle lens when a broad trail or funnel lets deer pass through different parts of the frame. It gives you more coverage when travel isn’t tightly predictable.
Keep the camera closer to the target area, so deer don’t look too small. Aim it across the route at about 45°, which keeps moving animals in view longer and improves your odds of a full-body shot. Walk the detection zone at several distances, using 10-foot intervals out to 50 to 60 feet, then review the images before you commit.
Use a standard lens when deer follow one dependable path and you want larger, more detailed images. Its narrower view concentrates attention where you expect them to appear.
Adjust for Trigger Range
Match your camera’s position to the distance where its sensor triggers most reliably, not just its listed range. Set it far enough from the trail to frame animals clearly, then test coverage at measured intervals as you walk past. Check again at night, adjust the angle if needed, and confirm the camera catches you before you leave.
Match Camera To Range
A camera’s effective trigger range, not just the distance printed on its specifications, should determine where you aim it. A quick-trigger model suits animals that pass briskly through funnels, along trails, or beside field edges. A slower camera can perform well where deer pause, such as scrapes, feeders, and mineral licks.
Before relying on a rating, test your unit. Mark 10-foot intervals from 10 to 50 or 60 feet, then walk across the detection area at an ordinary pace and again at a faster pace. Study each image for a full-body capture. The farthest point that produces consistent results is the range you can trust. Repeat the test after dark. Infrared illumination, focus, and triggering often change at night, and those results may revise your expectations.
Set Distance From Trail
Start with the camera about 15 to 20 feet from the trail, then aim it roughly 45 degrees across the deer’s travel path. This spacing gives a passing deer room to enter the sensor’s detection zone before it reaches the center of your frame. The diagonal angle also keeps the animal visible longer, rather than letting it move straight past the lens.
Use 20 feet as a practical baseline, not an unchangeable measurement. A camera’s real trigger range can differ from its advertised specification, and its response speed affects where a deer appears in each image. Watch the trail’s width, the deer’s usual line of travel, and nearby cover as you choose the final position. Shift the camera closer or farther only when needed.
Test Trigger Coverage
Once you’ve chosen a distance and angle, verify what the camera actually detects rather than relying on its listed range. Mark 10-foot intervals from the camera to 50 or 60 feet. Then walk across the detection zone at a normal pace, followed by a quicker pass. Leave enough time between passes for the camera to reset; otherwise, a missed image may reflect recovery time instead of poor trigger coverage.
Review every photo carefully. Note the farthest interval where the camera consistently fires, and compare sharpness, framing, and full-body visibility at each mark. Repeat the same test after dark. Night results reveal whether infrared illumination reaches the trail, focus remains usable, and the sensor still catches moving animals. Adjust placement if reliable coverage falls short.
Mock Scrape Camera Setup
For a mock scrape, mount your trail camera 3 to 4 feet above the ground and about 20 to 25 feet away, aiming slightly downward across the scrape rather than directly at it. This angle keeps deer in frame as they approach, pause, and work the licking branch. Place the scrape within the middle of the detection zone, not at its far edge, so the sensor sees movement before the deer reaches the focal point.
Choose photo or video mode, then use a 5 to 10-second trigger delay to document the visit without producing a cluttered sequence. Before leaving, walk the expected approach route and inspect test images. Confirm a deer-sized subject appears centered from hooves to head. If it doesn’t, shift camera, refine tilt, and test again as needed.
Vegetation Triggers False Shots
A well-aimed camera can still waste battery and fill your card with blank shots if grass, brush, or low branches move inside the lens or PIR sensor’s detection zone. Clear anything that sways within that zone, particularly where wind reaches it. Then secure the camera to a solid tree or fixed support; a shifting unit can create its own unwanted images.
| Check | What you do |
|---|---|
| Vegetation | Trim grass and brush |
| Test walk | Confirm clean triggers |
Walk through the detection area after trimming. You should see dependable triggers from your passing body, not flickering stems near the camera. Finally, revisit the site as seasons change. New growth, fallen limbs, and shifted plants can quietly enter the field of view and restart the problem later on.
Avoid East–West Camera Facing
Avoid aiming your trail camera east or west, because low sunrise and sunset light can create glare, washed-out images, and deep shadows that hide an animal. When the site allows, face it north or south while keeping the lens centered on the animals’ usual route. This orientation reduces direct low-angle sunlight and makes details easier to review.
- Clear branches and tall grass near the lens; they can reflect light and distract from the subject.
- Look for bright openings beyond the trail; they can intensify glare in the background.
- Adjust your alignment if sunlight crosses the camera’s field of view.
- Review images at installation time to spot harsh highlights or shadowed areas before you leave.
Small adjustments protect detail in the photos you need later.
Run a Walk-By Test
Run a walk-by test before leaving the site so you can confirm the camera detects and frames animals where you expect. Mark spots every 10 feet, extending from the camera to 50 or 60 feet. Walk across the trigger zone at a normal pace, then repeat at a faster pace. Pause between passes long enough for the unit to reset; otherwise, quick repeat walks may hide its recovery limits.
Review each image closely. Note which marker distance gives you the sharpest, best-framed full-body shot, and adjust the camera’s angle or position if needed. Return after dark and repeat the same passes. This check shows whether the infrared flash reaches your distance and reveals nighttime focus, trigger speed, and brightness problems before wildlife encounters them.
Conclusion
For reliable, full-body trail-camera photos, you’ll get the best results by treating placement as a small field test, not a one-time guess. Tilt the camera 5 to 10 degrees downward, aim it at chest height downrange, and use a diagonal view on bends. Match your distance to the trigger range, clear moving vegetation, and avoid east to west glare. Then walk through the zone yourself. Your test images will show whether you need an adjustment before leaving the camera.