How High to Mount a Trail Camera for Deer, Predators and Security
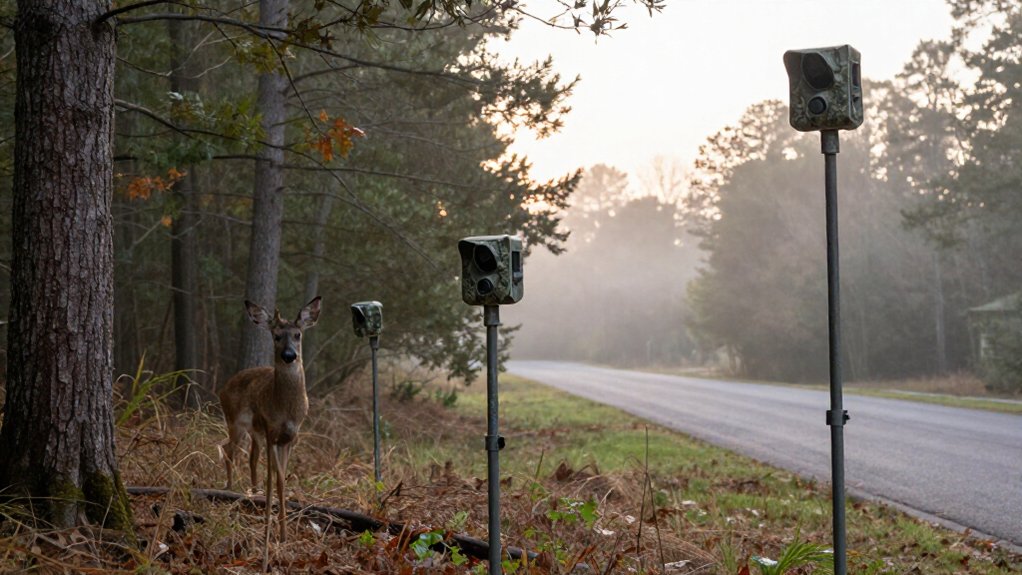
Mount your deer camera 3–4 feet above ground, near chest height, and leave room for antlers. For raccoons and small predators, use 2–3 feet; for elk or bears, use 5–6 feet.
Place fence-line security cameras 6–7 feet high and angle them slightly downward. Aim along travel routes, clear moving vegetation from the PIR zone, and test framing. Face north when practical to reduce glare.
Continue for placement, retrieval, and rule-checking guidance at each site seasonally.
Mount Deer Cameras 3–4 Feet High
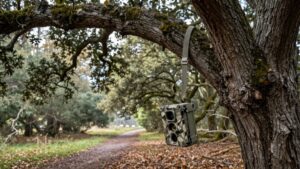
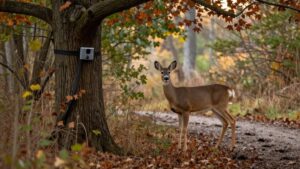
For most deer setups, mount your trail camera 3 to 4 feet above the ground, roughly at deer eye level. This height commonly provides a clear view of passing deer, including bucks whose antlers require adequate upper-frame space. Use about four feet as a practical starting point, then assess the site’s terrain and travel route.
On slopes or uneven ground, adjust mounting height and camera angle to keep the animal’s full body within view. Aim the unit slightly downward and take a test image before leaving it in place. Secure it to a stable tree or post, and remove nearby grass or branches. Moving vegetation can block detection zones or trigger false captures, reducing the quality of your observations and disturbing your sampling effort over time.
Match Lens Height to Chest
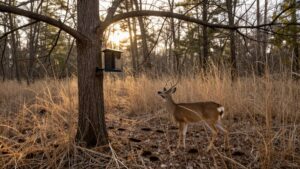
After setting a general mounting height, align the camera lens with the target animal’s chest rather than relying on a fixed measurement alone. You’ll substantially improve framing because body size and trail position vary naturally among species. For deer, place the lens about 3 to 4 feet high, near chest level; four feet often captures the torso and antlers in a balanced image.
Scale placement to the animal’s morphology: set cameras roughly 2 to 3 feet high for raccoons and other small game, or 5 to 6 feet for elk and bears. Where terrain changes the animal’s position relative to the camera, alter mounting height so the lens remains chest-level. Take a test image from the trail and adjust the setup until the chest and full body appear in frame.
Aim Downward on Steep Trails
On steep trails, mount the camera on the uphill side and aim it roughly 5–10° downward so animals remain centered as they move through the detection zone. This orientation compensates for elevation change. Start with that angle, then adjust it for trail grade, mounting height, and the species you expect.
Walk the trail at the animal’s typical path and take a test image; you should see the full body centered. Point unit along rather than directly across trail. That arrangement increases time a moving animal stays within sensor field, improving trigger reliability. Fasten it tightly to a rigid tree or post. Wind, rubbing wildlife, or a loose strap can alter the angle and compromise consistent monitoring. This preserves comparable images across repeated survey intervals.
Choose Cellular or SD Cameras
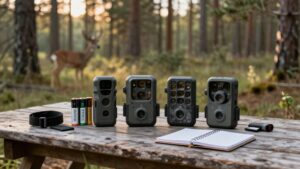
Choose a cellular camera for remote or bedding-area sites, where image transmission lets you reduce visits that can disturb deer. Use an SD-card camera near accessible trails or tree stands, where routine checks make card retrieval practical. Before deployment, format the SD card in the camera and match your setup to site access.
Cellular Camera Advantages
Camera type should match how much human pressure an area can tolerate: cellular models transmit images remotely, while SD-card cameras require a physical visit to retrieve data. Choose a cellular camera for bedding areas, hard-to-access cover, or other sensitive locations where each entry can alter deer movement and increase scent exposure. After you activate its SIM and select a data plan, a unit such as the Tactacam REVEAL can send images in real-time.
Remote delivery lets you monitor activity while reducing retrieval trips, helping limit disturbance in ecologically important cover. Yet cellular access doesn’t remove field discipline: approach only when necessary, plan visits for favorable winds, and avoid times when deer are likely nearby. Fewer intrusions can preserve natural behavior and reduce learned avoidance around bedding.
SD Card Camera Benefits
SD-card cameras store photos and videos locally, making them a practical option for accessible sites such as trails near tree stands. You’ll retrieve records by collecting the card during a planned visit, rather than depending on cellular signal. This approach works well when regular access lets you inspect equipment and limit unnecessary trips, reducing disturbance to deer and other wildlife.
Before deployment, format each card in the camera. This simple step helps prevent file-writing and data-reading errors that can compromise monitoring results. Use still-image mode when you need efficient detection data, because photographs generally consume less storage and battery power than video. Select video only when your study requires behavioral context, such as identifying companions, direction of travel, or events outside the trigger frame.
Choosing the Right Setup
Your camera type should reflect how much human access a site can tolerate. Choose cellular units for remote ground or bedding-area edges; they transmit observations and reduce visits that can alter deer behavior.
| Setup | Best use |
|---|---|
| Cellular | Remote, sensitive bedding cover |
| SD card | Accessible stand locations |
| Checks | At least two weeks apart |
| Timing | Midday, not dawn or dusk |
Before deploying, confirm date and time, format the SD card in the camera, and test framing and trigger. At easy-access sites, retrieve SD cards during planned visits. This approach limits disturbance near bedding areas while preserving reliable detection data. Cellular monitoring is especially useful when terrain, access constraints, or scent exposure make repeated entry ecologically costly. You’ll improve data quality without repeatedly shifting local deer movement.
Account for Sun Glare
Face your trail camera north when possible to limit direct solar glare and preserve animal detections. Avoid east- and west-facing views, since sunrise and sunset can wash out images or trigger false captures. Before leaving, test the framing and account for seasonal shifts in sun angle.
Face North When Possible
Mount the trail camera facing north when site conditions allow, because this orientation typically keeps direct sun out of the lens’s field of view. Northern placement reduces the likelihood that strong solar radiation will strike the lens or illuminate the background more intensely than the animal. This improves contrast, preserves exposure, and helps you identify deer, predators, or people reliably.
East- and west-facing units are more prone to glare and washed-out frames, while south-facing units can receive direct sunlight across much of the day. If terrain, trails, or property boundaries prevent a northern setup, select an angle that keeps the sun’s expected path outside the detection zone and background. Assess canopy, slope, and seasonal vegetation before finalizing placement; these features alter local light conditions.
Avoid Direct Sunrise
Direct sunrise can overwhelm a trail camera’s sensor, producing glare, haze, and underexposed animal subjects. You’ll often lose detail when low-angle sunlight enters the lens directly, especially on east-facing sets where deer or predators move during early activity periods. Position the camera north or south when terrain and target trails allow, rather than aiming east.
Avoid west-facing views as well, because direct sunset creates similar flare and contrast loss. A south-facing camera can still receive strong sunlight across much of the day, so inspect the actual site before fixing the mount. Then take a test image from the planned position under representative light. If glare obscures the trail, shift the camera angle or select another tree. Clear exposure improves species identification and behavioral records.
Check Seasonal Sun Angles
Seasonal solar angles can change when glare reaches a trail camera’s lens, even at the same site. You’ll collect clearer evidence when you assess the seasonal sun path before mounting. Face north whenever possible; it limits direct light and preserves exposure detail. If terrain prevents that orientation, face south rather than east or west, where low sunrise and sunset rays can wash out animal images.
| Season | Check | Action |
|---|---|---|
| Spring | Morning path | Test exposure |
| Summer | High sun | Confirm shade |
| Fall | Evening path | Re-aim lens |
| Winter | Low sun | Avoid glare |
Take a test image during expected deer or predator movement. If glare obscures fur, species marks, or behavior, adjust direction before relying on the camera. Repeat checks as vegetation and solar position shift throughout the year.
Monitor Fence-Line Trespassers
For fence-line security, place your trail camera 6 to 7 feet above ground and angle it slightly downward so it captures faces and full-body movement without losing the travel corridor. This height reduces casual tampering while maintaining a useful identification angle. Aim the sensor along, not directly across, the fence: a walker stays in its detection zone longer, improving trigger opportunities and image coverage.
For a wider view of a gate, barn approach, or crossing, mount it 5 to 6 feet high and direct it toward the likely path. Fasten it tightly to a sturdy post or tree; a lockable steel box and cable lock discourage removal. Clear branches and grass within 5 to 10 feet, as wind-driven vegetation causes false triggers. Walk through it to test framing and detection.
Check Local Camera Regulations
Before you mount a trail camera, check the current rules from your state or local wildlife agency. Regulations can vary across jurisdictions, land designations, and seasons, reflecting wildlife-management goals, visitor safety, and privacy concerns. Confirm that cameras are permitted where you intend to monitor, particularly on public parcels, refuges, and other restricted areas.
Review requirements governing placement locations, authorized dates, and device types; some agencies regulate cellular or wireless cameras differently from standard units because they transmit images remotely. If you use private property, obtain the landowner’s permission before installation. Read trailhead notices, closure orders, and site-specific signs, since they may impose stricter conditions than statewide rules. Remove your camera promptly when regulations, seasonal restrictions, or land-use requirements prohibit continued use. Document them carefully.
Avoid Blocking the PIR Sensor
Keep branches, tall grass, and other moving vegetation out of the PIR sensor’s detection field, as wind-driven foliage can block animal movement or create false triggers. Clear obstructions within 5 to 10 feet, especially leaves that sway across the lens or sensor. In dense cover, mount the unit about 3.5 to 4 feet high on a solid tree or post. A stable mount preserves its intended angle and reduces vegetation-driven disturbance. Aim along the trail with a 5 to 10° downward tilt, so the sensor remains oriented toward approaching wildlife.
- Prune stems that cross the detection field.
- Cut grass within the near foreground.
- Remove loose vines from the mounting tree.
- Favor natural openings over brush-choked trail edges.
- Recheck after storms, when plants may shift into view and affect infrared sensing.
Test Your Camera’s Detection Zone
Test the detection zone after mounting to verify that the camera covers the intended travel route and captures an animal’s full body. Take a test image to confirm the trail, bait site, or corridor sits within the frame. Then walk across the monitored area at the distances and approach angles wildlife is likely to use; confirm that the PIR sensor triggers reliably.
Aim the unit slightly downward, roughly 5–10 degrees, and repeat the test to assess framing and ground coverage. Remove branches, brush, and wind-moved grass within 5–10 feet of the camera, since shifting vegetation can obstruct views and generate false triggers. Retest afterward. If animals are cropped, or motion isn’t detected consistently, change the mounting height or angle and retest for suitable coverage.
Conclusion
Mount most deer cameras 3–4 feet high, matching the lens to chest level for reliable body detection. On steep trails, aim slightly downward to keep animals within the sensor’s field. Avoid direct sunrise and sunset glare, blocked PIR sensors, and vegetation that moves in wind. For predators, security, or fence lines, adjust height to your target species and angle. Test detection zones, choose cellular or SD storage, and follow local wildlife-camera regulations.