How to Fix Dark Trail Camera Night Pictures and Get Brighter Shots
Start by replacing weak batteries, cleaning the lens and infrared windows, and latching the housing fully. Format the SD card in the camera, then test it with a white target at animal height and expected distance.
Set IR flash to High, mount the camera about three feet high, and keep subjects within flash range. Brighten photos with small exposure and shadow increases while protecting highlights.
Next, you’ll find checks for flash faults, seals, and placement.
Easy 10-Minute Night-Photo Brightening
You can improve a dark trail-camera photo in about 10 minutes with a phone editor such as iPhone Photos, Google Photos, or Snapseed. Start by raising Exposure to brighten the entire frame. Then increase Shadows to recover detail in black fur, understory, and tree trunks; on a bright-sky image, try Shadows around +51 while keeping Exposure near +0.10.
Pull Highlights down, −16 is a useful starting point, to restore detail in pale sky, snow, or reflective coats. Add modest Contrast, typically +8 to +16, so the subject doesn’t look flat. Low-light recovery often exposes grain, so apply noise reduction sparingly; aggressive smoothing erases eye, feather, and fur texture. Use Snapseed’s Selective tool or Brush to brighten only an animal. Stop before bright areas look washed out.
Format SD Card Before Testing
Before judging night-image settings, back up any files you want to keep and format the SD card through the trail camera’s menu, not a computer. Formatting erases stored media and lets the camera create its preferred file structure.
- Check that the card meets your camera’s supported capacity and speed specifications.
- Run several test captures after formatting, then review each saved image.
- Confirm the camera records files, displays thumbnails, and opens recent shots.
- Replace a card that still fails to save or show images reliably.
A clean, camera-formatted card removes storage errors from diagnosis. If it performs normally, you can evaluate darkness confidently. If saving remains inconsistent, install a compatible replacement before changing settings; corrupted media can mimic exposure problems and undermine every night-photo adjustment.
Step 1: Position a White Test Target
Place a white sheet of paper or pale board where animals typically pass, matching the expected subject distance from the camera. Aim it squarely toward the lens and keep it at the height of animals. Take a nighttime test image, then inspect whether the target is evenly illuminated and bright enough without losing detail in washed-out highlights.
If it appears dark, confirm the target sits within the camera’s effective infrared range. Clear nearby grass, leaves, or branches that can obstruct illumination. For controlled comparisons, change only one variable between shots, such as night resolution or another exposure-related setting. Record each result so you can identify the useful adjustment. Remove or relocate the target before leaving the camera, since movement or reflections may cause triggers.
Step 2: Set Infrared Flash to High
If your camera offers low-glow 850 nm IR, use it when image clarity matters most. Its stronger visible-to-camera output produces crisper results than no-glow 950 nm IR.
No-glow LEDs are less noticeable to wildlife, yet their weaker output can create grainier images and slower shutter speeds. If the photo remains dark, inspect the LED window for mud, tape, vegetation, or obstructions and select the highest night-resolution setting.
Step 3: Mount Camera Three Feet High
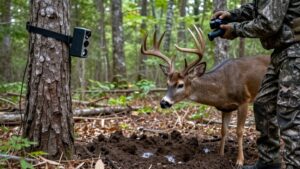
Mount the camera about 3 feet above the ground, then tilt it slightly downward toward the expected travel path. This height places the lens near the body level of deer and similar wildlife, helping the infrared flash illuminate the animal instead of empty ground or sky. Secure the unit firmly to a stable tree or post so it won’t shift in wind.
Aim it across, rather than directly along, a trail when possible; this gives the sensor more time to detect a moving animal. Keep tall grass, branches, and loose leaves outside the detection zone, since wind-driven movement can trigger false images. If you change the mounting height or position, realign the camera to keep the expected animal route centered in its illuminated coverage.
Step 4: Take a Nighttime Test Photo
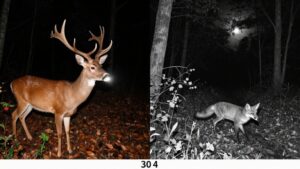
Once the camera is mounted and aimed, take a test photo after dark from its installed position. Review how evenly the infrared flash illuminates the scene and whether key details remain visible. Compare results using each available flash mode: 850-nanometer low-glow IR typically produces brighter, crisper images than 950-nanometer no-glow IR. Inspect the test for motion blur; dimmer IR can force a slower shutter speed, making moving wildlife harder to freeze sharply.
Also check for grain or white noise, which often increases with no-glow illumination. Use these findings to adjust nighttime resolution and detection sensitivity. Then capture another nighttime test image and confirm that the revised settings improve detail, exposure, and overall image quality. Record selected settings so you can repeat the successful configuration.
Step 5: Adjust Camera-to-Target Distance
Position the camera close enough that animals pass well within its effective nighttime flash range, since infrared illumination drops off quickly with distance. Move it nearer to the trail or feeding area when safe and practical; reducing the distance gives the illuminator more usable output on the subject. Keep the expected travel line inside the manufacturer’s stated flash range, but verify it with nighttime test images at the actual crossing point.
Each model’s illumination pattern and exposure response differ. Don’t mount so close that the animal overfills the frame or triggers before it reaches the intended composition. If subjects remain dark or grainy, shift the camera closer instead of depending on flash-power increases or slower shutter settings, which may compromise moving-animal detail at night.
Step 6: Latch Housing, Remove Fingerprints
Carefully latch the housing so the door seats fully without blocking the lens or infrared flash windows. A partially closed door can shift alignment, leave a cover edge in the optical path, or admit moisture and dust. Before closing it, inspect the lens and every flash window under direct light for fingerprints, skin oils, or smudges.
Clean any marks with a clean, soft microfiber cloth using light pressure. Don’t use paper towels, shirt fabric, or abrasive cleaners; they can scratch protective surfaces and worsen flare. Hold the camera by its housing rather than the optical covers. After you mount, aim, or adjust the unit, check the lens and infrared windows again. Fingerprints scatter the flash output, creating haze or bright smears in night images.
Inspect Histogram for Clipped Shadows
After you’ve cleaned and closed the camera, review a representative night image’s histogram to determine whether the scene contains recoverable shadow detail. A large pileup at the far left indicates that the image sits near black. When the graph is pressed against the left border, those tones may be clipped, so editing can’t restore their original texture or subject detail.
Make a small exposure or shadow adjustment, then compare the new histogram with the original. Usable dark tones should shift away from the left edge. Check the opposite end simultaneously: if brightening pushes values into the far right border, pale fur, reflective objects, or snow may lose detail. Work incrementally and reassess after each change. On high-ISO files, aggressive lifting can reveal distracting grain.
Dim Images: Replace Weak Batteries
Weak batteries can limit infrared flash output, leaving nighttime captures underexposed even when your camera settings are correct. Replace partially depleted cells with a fresh, matched set before changing exposure settings. Use only the battery chemistry and size your manufacturer recommends; mixed old and new cells discharge unevenly and can restrict flash current.
| Checkpoint | What you inspect | Action |
|---|---|---|
| Cold night | Battery indicator | Install fresh set |
| Extended deployment | Dim or inconsistent illumination | Replace all cells |
Check status after cold nights and extended use, when voltage drops weaken infrared illumination. If images remain dim after replacement, verify battery contacts are clean, firmly seated, and corrosion-free. Then test whether the infrared flash activates during a nighttime trigger. This sequence clearly separates power loss from a flash fault.
Check Lens Seal Monthly
Inspect the lens seal monthly to keep dust and moisture from degrading nighttime image clarity. Open the camera and examine the gasket under good light. Look for cracks, flattened sections, embedded dirt, or gaps that can admit water or dust.
Wipe the seal and surrounding lens area with a clean, dry, lint-free cloth; don’t use solvents or abrasive material. Confirm the gasket sits evenly in its channel, and close the housing firmly to verify a uniform seal. Replace any damaged or misshapen gasket promptly, since it can allow condensation to fog the lens.
After rain or damp weather, inspect behind lens cover for moisture. If you find droplets or haze, remove the batteries, leave the housing open in a dry, ventilated place before redeploying.
Conclusion
You can correct dark trail-camera night photos quickly by testing with a white target, formatting the SD card, and setting infrared flash to High. Mount the camera about three feet above ground, latch the housing, and clean fingerprints from the lens. Review the histogram after each test; shadows shouldn’t bunch against the left edge. If images stay dim, install fresh batteries and inspect the lens seal monthly to prevent moisture, haze, and reduced infrared output.