Where to Place Trail Cameras for Deer: Scrapes, Trails, Feeders or Food Plots?
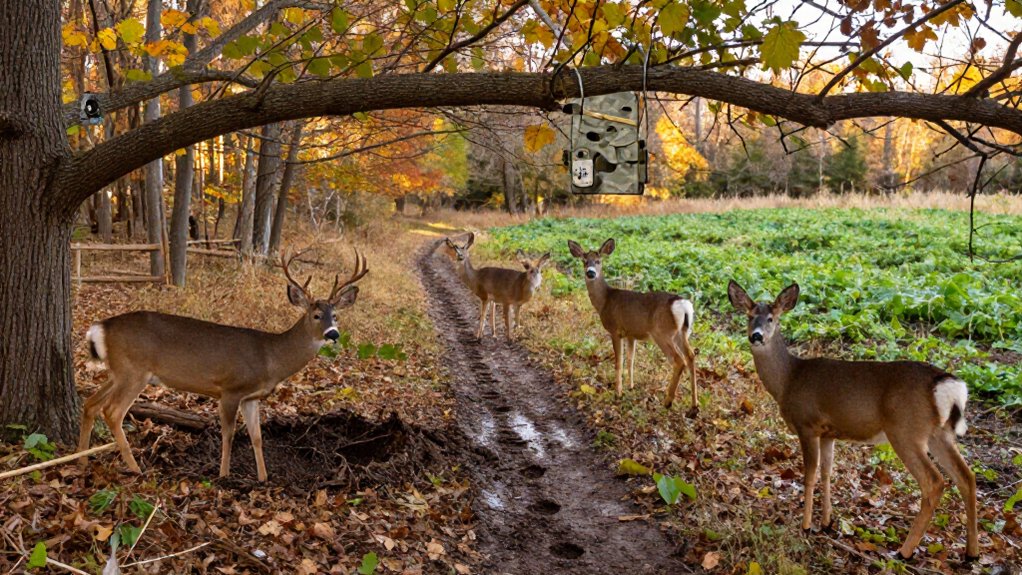
Place cameras where fresh tracks, scat, rubs, and browsed vegetation confirm current deer movement. You’ll get data at trail junctions, ridge saddles, and entry trails 10 to 20 yards inside timber. During pre-rut and rut, monitor community scrapes and aim toward approach corridors.
Where legal, use feeders for repeatable inventory and time-lapse over food plots for field use. Mount cameras 3–4 feet high, manage wind and access, and test signal.
Further guidance tailors placement to local conditions.
Prioritize Active Deer Sign
Start with evidence of current deer activity, not with a feature that merely looks productive. Fresh tracks, scat, rubbed trees, and recently browsed vegetation provide stronger evidence that deer are using a location regularly.
At a scrape, prioritize a large community scrape beneath a licking branch, especially when nearby rubs reinforce repeated use. A random scrape on a field edge may look attractive but doesn’t establish current movement.
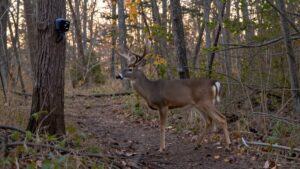
You can also monitor creek crossings, ridge saddles, and fence gaps, but confirm those funnels with fresh sign. Near fields or food plots, follow worn entry trails into cover. Position the camera 10 to 20 yards inside timber when sign indicates daylight travel. Aim it along the approach trail to document arriving deer and scent-checking behavior before feeding.
Check Cellular Signal Before Placement
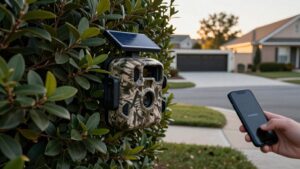
Cellular reliability depends on the signal at the exact tree or post where you’ll mount the camera. Coverage changes across distances because terrain, vegetation, and infrastructure alter radio transmission. Test service at the location that monitors deer use—a trail, scrape, or food-plot edge—rather than relying on reception in a clearing. Send a test image and verify that it reaches your app or email before you leave.
If transmission fails or is intermittent, try a nearby position to find a clearer signal path while preserving coverage of the deer approach. After a move or orientation change, repeat the test-photo check; antenna position and vegetation can affect performance. When no nearby position delivers service, use a non-cellular camera and retrieve its memory card on a schedule.
Wind, Access, Shot Angle
Wind and access routes shape how much a camera site disturbs deer, particularly near bedding cover and during October. Check cameras when wind carries your scent away from deer; never approach bedding cover from downwind. Keep routes tight, using field edges or existing paths, and don’t cross core habitat or fresh beds. Visit high-impact sites only when you’re already traveling to or from a hunting location.
| Site | Camera angle | Why it works |
|---|---|---|
| Scrape | Aim off branch, toward corridor | Captures scent-checking bucks |
| Trail | Aim along travel line | Extends detection time |
At scrapes, mature bucks may scent-check from 10 to 15 yards away. This offset records cautious behavior. On trails, a parallel view keeps deer in the sensor zone longer, reducing tail-only images and improving identification for you.
Feeder Cameras: Reliable Inventory
Where legal, a feeder provides a predictable food source that helps you document repeat visits, deer numbers, and identifiable individuals. Aim your camera at both the feeder and its primary approach to record arrivals, departures, and visit timing. Use daytime-only feeding where permitted, and check cameras with minimal disturbance because feeder data represent local activity, not movement across your entire property.
Consistent Deer Inventory
Legal feeders can provide a reliable deer inventory by concentrating visits at a predictable food source. When regulations allow feeder use, repeated photographs let you identify individual bucks, does, and fawns from antler characteristics, pelage, and body size. A daylight-only feeding schedule can increase daylight images, improving observations of age class, sex ratio, social grouping, and behavior. Compare records across weeks rather than treating a photograph as evidence of abundance.
You can document arrival times, frequency of use, family groups, and seasonal changes in activity. This repeated sampling produces a consistent inventory than encounters along low-use routes. A feeder samples deer attracted to supplemental food, not every animal using the property. Check wildlife regulations before operating one, because feeder and baiting rules vary by jurisdiction.
Camera Placement at Feeders
Position a feeder camera to cover the primary approach route, the feeder entrance, and a short section of adjacent trail so it records arrivals as well as feeding activity. By concentrating deer at a repeatable resource, feeders let you build a reliable inventory of identifiable individuals, estimate group size, and document behavior across repeated observations. Aim the camera along, rather than straight across, the approach route.
This orientation keeps moving deer in frame longer, increasing clear images for recognizing sex, age class, antler characteristics, and distinctive markings. A daylight-opening feeder can provide useful records of daylight activity. Check local regulations before deployment: baiting and feeder use are restricted or prohibited in some areas.
These observations support herd-composition comparisons across sites and defined management periods.
Timing and Visit Patterns
A feeder creates repeatable visit opportunities, allowing you to document which deer use the site, when they arrive, and how often they return. Because concentrated feed is predictable, photographs provide a more consistent inventory than cameras on irregular travel routes. You can identify individual bucks, does, and juveniles, then compare visit frequency, group size, and activity over time.
Timestamps reveal daylight, dusk, or nighttime use. A daylight-only feeder, which dispenses feed during legal shooting hours and closes overnight, helps you assess which deer are available in daylight and how their behavior changes through the season. Compare weekly records; repeated observations distinguish regular from occasional users. Before deploying a feeder, confirm local baiting and feeder regulations, which vary widely by jurisdiction and can change seasonally.
Minimizing Human Pressure
Keep feeder cameras on the edge of bedding cover or along adjacent trails, where you can document deer use without repeatedly entering their sanctuary. This placement reduces the scent, noise, and visual disturbance that can alter behavior, especially near daytime refuge. Where legal, use an established feeder to create a predictable sampling point; recurring visits can improve your inventory of deer.
A feeder that closes at night further concentrates photographs during daylight, when identification and observation are strongest. Aim the camera at approach routes, capturing direction of travel and hesitation behavior. Check cards, batteries, and feed infrequently, preferably under conditions that limit ground scent. Record identities, return intervals, and feeding times across repeated checks, but don’t interpret feeder visits as proof of deer’s movements.
Scrapes for Rut Activity
During the pre-rut and rut, you can identify active community scrapes by finding large timber scrapes beneath licking branches near rubs or converging trails. Position your camera slightly off the branch and downwind along the likely approach corridor, because mature bucks may scent-check from 10 to 15 yards away. You’ll capture more useful rut activity by minimizing checks and avoiding disturbance during peak daylight movement.
Identify Active Community Scrapes
Focus on large community scrapes beneath overhanging licking branches, particularly where converging trails, nearby rubs, fresh tracks, and recently disturbed soil document repeated buck use. These sites function as scent communication hubs: deer deposit urine, glandular secretions, and oral scent on soil and branches, allowing repeated assessment by deer. Confirm current use by comparing hoof edges, fresh moist earth, broken twigs, and fresh rub sign with leaf litter around older scrapes.
Prioritize a scrape in cover at a trail junction, rather than a field-edge scrape with less activity. You’ll set your camera to view the approach corridor, slightly off the licking branch. This captures bucks scent-checking 10 to 15 yards away without entering bare soil. Use favorable wind, low-impact access, and infrequent checks to avoid altering movement.
Target Peak Rut Windows
November turns active hub scrapes into effective rut-monitoring sites because bucks revisit them to assess scent and advertise their presence as breeding activity intensifies. Keep cameras on these sites through the rut, prioritizing large community or primary scrapes beneath licking branches. Select timber hubs where trails converge and nearby rubs confirm repeated use; field-edge scrapes can receive less daylight attention.
Aim the camera along the probable approach corridor, offset slightly from the licking branch. A mature buck may scent-check from 10 to 15 yards away without entering bare soil. Minimize visits when you maintain the unit, because repeated October intrusion can alter the daylight behavior you’re trying to document. Use low-disturbance checks when conditions let you retrieve images efficiently and preserve natural movement patterns throughout rut.
Position Cameras Downwind
Place the camera downwind of a primary scrape so your scent is less likely to reach deer approaching the site. Wind direction shapes how deer assess risk, and minimizing human odor can help preserve natural daytime use during the rut. Choose a large community scrape with nearby rubs rather than an isolated field-edge scrape, because repeated sign indicates concentrated use.
Aim the camera slightly off the scrape and toward the likely travel corridor. Mature bucks often scent-check from 10–15 yards away, remaining outside the open dirt. Install equipment before rut activity intensifies. Check it only when necessary and under favorable winds. Pair this unit with a nearby travel-route camera to document movement patterns through the area without repeatedly disturbing deer at the scrape location.
Monitor Licking Branches
Active scrapes beneath overhanging licking branches provide reliable rut-monitoring sites because deer repeatedly deposit and investigate scent there. Focus on large community scrapes near fresh rubs, particularly primary scrapes in timber where trails converge. Position your camera down the most likely approach corridor and slightly off the licking branch.
Mature bucks may scent-check from 10 to 15 yards away without entering the bare soil. Field-edge scrapes can catalog bucks, but deer may work them less in daylight. To create a mock scrape, suspend a branch 3.5–4 feet high and disturb soil beneath it. Check cameras as infrequently as possible, choosing a favorable wind to limit human scent and preserve daylight behavior. Repeated visits can reveal breeding-season use and help you distinguish transient from resident buck activity.
Match Camera to Mounting Height
Camera height should match the deer’s body level and the site’s behavior pattern. Mount your camera 3 to 4 feet above ground to keep animals within the detection zone and produce identifiable images. At a mock scrape, set the licking branch 3.5 to 4 feet high, then frame both the branch and disturbed soil. Aim slightly down the expected travel corridor rather than directly at the branch, because bucks often scent-check from 10 to 15 yards away.
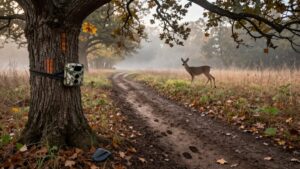
On trails, point the camera along the trail’s length. Deer then remain in view longer as they approach or depart, improving trigger opportunities compared with a perpendicular setup. Near food plots or fields, position the unit 10 to 20 yards inside timber on a staging trail. This placement records movement before deer enter exposed forage.
Annual Battery Replacement Costs
A well-placed trail camera still requires a power budget: annual battery-replacement costs rise with the number of units, their power draw, and how often each site triggers images or video. You’ll spend more when you operate cameras year-round; they need checks than summer or fall units. Battery longevity varies among models and sites: cameras scouting big woods may run without a refresh, whereas high-activity locations demand upkeep.
Track replacement dates, trigger rates, and weather exposure to estimate camera’s annual cost. Solar-powered units can reduce disposable-battery demand; some have maintained charge through a North Country winter. During seasonal maintenance, test or refresh batteries, clean cameras, and redeploy after confirming reliable power. This routine reduces waste, limits disturbance at deer sites, and preserves long-term monitoring data.
Ignoring Local Trail-Camera Regulations
Before deploying a trail camera, check the current state, county, and site-specific rules, because legality can vary by season, land manager, and camera setup. Regulations protect wildlife, limit disease transmission, and preserve fair-chase conditions, so don’t assume last year’s rules still apply.
- Verify whether bait, minerals, or feeders are legal; concentrated feeding can elevate deer contact and disease risk.
- Confirm wireless-camera restrictions, especially during hunting seasons, because real-time transmission may violate local fair-chase standards.
- Recheck rules after moving cameras across boundaries or changing seasons; agencies and land managers can impose different requirements.
Document your review, obtain permission where required, and adapt placement decisions to the most restrictive applicable rule. This diligence reduces legal exposure while supporting responsible deer monitoring and healthier wildlife populations locally.
Use Time-Lapse Over Fields
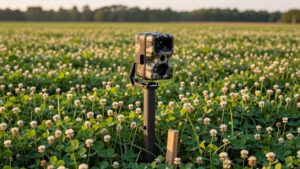
Time-lapse mode gives you a broad, interval-based record of deer use across a field or food plot, including movement beyond a camera’s motion-detection range. Position it for a wide view, preferably at a heavily used entrance or inside corner.
- Aim toward the field edge and adjacent cover; deer often stage there before entering open ground.
- Compare image timestamps to measure entry, exit, and diel shifts in activity, then you’ll map feeding concentrations.
- Interpret sequences cautiously: wind-driven vegetation and non-target wildlife can inflate apparent use.
Service the unit quietly and infrequently; repeated visits can shift daylight behavior. Combine time-lapse results with motion-triggered cameras on trails to distinguish field use from travel routes and improve placement decisions through changing seasons and weather across your property annually.
Conclusion
Place cameras where current deer sign, habitat use, and your access plan intersect. You’ll gain dependable inventory at feeders, capture rut behavior at active scrapes, and monitor travel on trails with favorable wind and shot angles. Test cellular signal first, choose mounting height for the question, and use time-lapse across food plots.
Budget annual batteries, reduce disturbance, and follow local regulations. By matching placement to season and deer ecology, you’ll collect stronger, less biased observations.