How to Swap a SIM Card in a Trail Camera Without Losing Your Plan
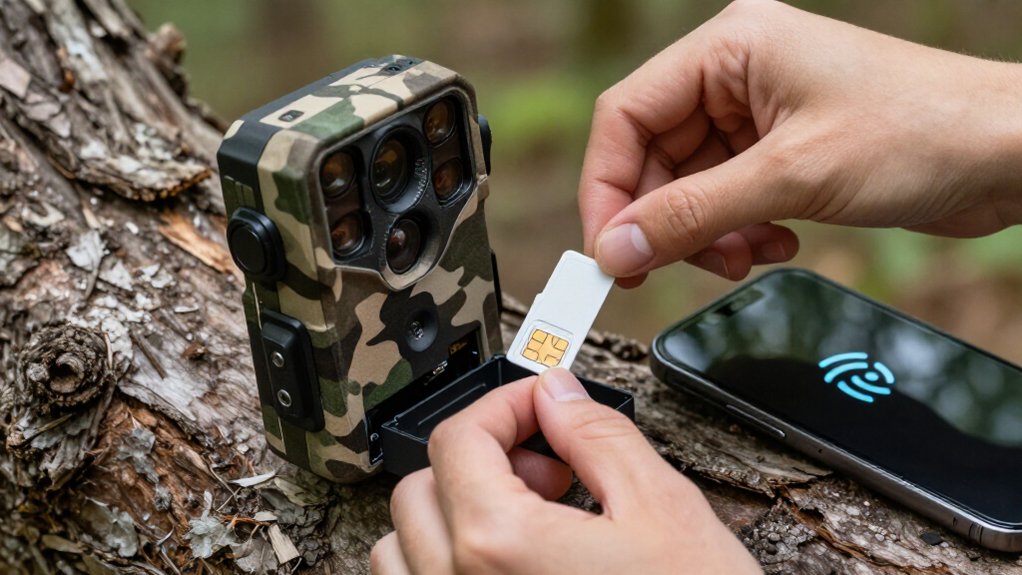
You won’t lose your trail-camera plan if you swap the SIM through your carrier’s app, portal, or support channel rather than activating a new line. Record the replacement SIM’s ICCID, select SIM swap, and confirm the active plan transfers before installation.
Power the camera off, insert the correctly oriented SIM without forcing it, then seal the compartment and allow registration. Send a test photo and verify signal strength; steps below address errors and antenna checks.
Keep Plan During SIM Swap
To keep your existing data plan, reuse the same activated SIM rather than replacing it with a card from another carrier. Power the trail camera off before handling the SIM. Remove and reinsert it gently, aligning the card with the slot’s orientation marks. Before installation, verify that the SIM PIN is disabled; otherwise, the camera may recognize the card yet fail to connect to mobile data.
Leave the camera’s APN and transmission settings unchanged, including any required username and password supplied for that plan. Using a different SIM or carrier won’t preserve your original plan and requires compatible service. After reinserting the card, power on the camera, allow several minutes for network registration, and confirm it shows mobile service and sends or uploads data.
Record SIM ICCID Numbers
Before you swap the SIM, power the trail camera fully off and record the card’s ICCID, the unique identifier printed on the SIM or listed in your provider portal. Add it to your camera notes so you can verify which subscription the device should use.
- Confirm the number belongs to the exact data SIM you plan to install; identical-looking cards can connect to different subscriptions.
- Record provider name and PIN status, including disabled or locked.
- Note managed or multi-network SIMs; ICCID identifies active card during troubleshooting.
- Keep the record with your camera’s service notes.
- After insertion, allow registration, verify detection, and match the camera or service confirmation.
This simple record lets you isolate a subscription or authentication mismatch without guessing or risking the wrong plan.
Step 1: Power Down Before Opening
Switch the trail camera off with its dedicated ON/OFF button, then wait a few seconds before opening the battery or SIM compartment. This pause lets the camera complete any network or data activity and helps prevent connection errors while the SIM is disconnected.
Open the cover carefully after shutdown. Remove the SIM gently and insert the replacement with its contacts and cut corner aligned to the slot’s orientation. Don’t force it; a properly seated card should sit flat.
Close the battery/SIM cover tightly to limit moisture entry. Then power the camera on and give it several minutes to detect the SIM and register on the mobile network. Your existing service remains tied to the SIM’s active plan, so don’t change or reactivate anything unnecessarily.
Step 2: Verify Carrier Portal Access
Confirm that you can access the SIM provider’s online portal and identify the line assigned to your trail camera. Review the line’s plan status, remaining data allowance, ICCID, and associated phone number. Make sure the service is active, not suspended, expired, or awaiting activation; a physical swap can’t restore an inactive plan.
Save the portal username, password, and ICCID somewhere secure before you remove the existing card. If the camera uses a managed or multi-network SIM, verify that the portal controls its required activation and APN profile. Check any PIN, APN, or regional network settings against the country where you deploy the camera. This confirms the line is correctly provisioned and lets you promptly verify its status after the exchange without changing camera configuration.
Step 3: Insert New SIM Contacts Down
With the trail camera fully powered off, open the SIM compartment and remove the old card. Check the slot’s orientation diagram, then align the replacement SIM with its metal contacts facing down. Slide it straight into the guide without forcing it. Press gently until it seats securely; on a spring-loaded slot, you’ll feel or hear a click.
Close the compartment cover tightly to help keep moisture out during outdoor use. Power the camera back on and allow several minutes for it to detect the card and reconnect to the mobile network. If the display reports “no SIM,” turn the camera off again. Recheck that the contacts face down and that the card is fully seated before investigating other settings or connection issues elsewhere.
Step 4: Transfer Plan to New ICCID
Before you install the replacement card, record the old SIM’s ICCID and use your provider’s SIM-swap process to assign the existing trail-camera plan to the new SIM’s ICCID. Confirm the number, then submit the replacement ICCID through the carrier app, portal, or support channel. Select SIM swap or replace SIM; don’t activate a separate line or buy another data plan.
If the camera requires a PIN-free SIM, place the activated replacement SIM in a phone and disable its SIM PIN first. Verify that the card matches the slot’s mini, micro, or nano format. With the camera powered off, install it contacts down, close the compartment, and restart the unit. Allow time for registration. Check its status screen for SIM presence and mobile network availability.
Step 5: Confirm Photo Transmission Interval
After the camera registers on the new SIM, check its photo transmission setting and note the selected interval. Confirm whether the camera sends images for every trigger or batches them on a periodic schedule, because identical interval labels can produce different behavior in each mode. If your plan has a data cap, such as 12 GB over 12 months, select a longer interval or send-on-schedule mode to control usage.
Then create one test trigger at the mounting site. Verify that the photo arrives in your app or email at the expected time, not merely when you test indoors. This confirms both network reception and the upload schedule. Record the active mode and interval with your plan details so you can identify unexpected use later.
Step 6: Tighten the SIM Compartment Seal
Once you’ve confirmed image transmission, close the SIM compartment to protect the new card from moisture. Before fastening it, inspect the cover seal. Remove dust, grit, leaves, or moisture with a clean, dry lint-free cloth. Replace or service a seal that appears cracked, flattened, stretched, or torn, because it can no longer provide weather resistance.
Ensure the SIM and tray sit in their designated positions, with nothing extending into the cover path. Align the cover evenly, then press it closed. Engage each latch or tighten each fastener until secure, but don’t force it; resistance may indicate misalignment or an obstruction. Run a fingertip around the cover’s edge to confirm an even fit. Verify the compartment is firmly closed before remounting the camera outdoors.
Verify 4G Signal Bars
Check 4G signal at the camera’s exact mounting location, not just at home or near the property boundary. Coverage can change sharply between field entrances, woodland tracks, and the final mounting tree. At the planned height and facing direction, use a phone or compatible test device to look for at least two or three bars. Confirm that the device supports local 4G bands your trail camera uses; otherwise, its reading may not represent service.
Where possible, test each network you’re considering. Strong reception from one carrier doesn’t guarantee comparable coverage from another. If bars are weak or unstable, move the camera a distance, adjust its orientation, and test again. Small changes in elevation, obstructions, and the path toward the nearest mast can improve reception.
Fix “No SIM” Errors
If your trail camera displays “No SIM,” power it fully off before touching the card. Remove it carefully, then compare its orientation with the slot diagram. Check that its format matches the slot; mini, micro, and nano SIMs require the correct physical fit. Inspect both contact surfaces for dirt or damage.
| Check | Corrective action |
|---|---|
| Orientation | Reseat the SIM gently until it clicks. |
| Contacts | Clean visible debris without scratching contacts. |
Close the compartment securely, power the camera on, and wait several minutes for detection. If the message persists, recheck alignment and contact condition; a properly seated, undamaged card should register reliably. Don’t force the card, because bending it or the slot pins can prevent reliable recognition and may require replacement by a qualified technician.
30-Day Antenna Inspection
At the 30-day mark, inspect the antenna, its connection, and the surrounding seal for looseness, damage, corrosion, or gaps that could admit moisture. Confirm that the antenna is firmly attached and oriented exactly as the camera manufacturer recommends. Examine the antenna base, gasket, and cover for cracks, compression, or displaced edges. These parts help protect the radio connection from water intrusion.
Next, compare current signal strength and transmission status with the readings or performance you noted during initial setup. A changed camera position, obstructed antenna, or loose fitting can reduce reception even when the SIM plan remains active. If you find antenna damage, corrosion, or lost connectivity, don’t force adjustments or install a replacement immediately. Contact the manufacturer for model-specific guidance, then retest it carefully.
Conclusion
You can swap your trail camera’s SIM without interrupting service when you document both ICCID numbers, confirm carrier portal access, and follow the correct power-down sequence. Seat the replacement SIM with contacts down, reseal the compartment, then verify 4G bars and plan status before leaving the site. If the camera reports “No SIM,” inspect orientation, contamination, and seal pressure. Finish with a 30-day antenna check to confirm stable connectivity and reliable reporting at every location.
Which Trail Camera Do I Need? Use-Case Quiz
Five-question quiz that matches your use, signal, power and visits to a cellular, Wi-Fi or SD-card trail camera, with shelf matches.
Trail Camera Flash Type Selector
Answer three questions to rank no glow, low glow, infrared, white flash and color night vision trail cameras for your use.
Trail Camera Mount Height & Tilt Calculator
Turn your camera's mount height, aim-point height and distance into a tilt angle, line-of-sight distance and a printable setup card.
Trail Camera SD Card Size Calculator
Estimate how many days your trail camera SD card lasts and the smallest card size that covers the time between your camera visits.
Free Browser Trail Camera Photo Viewer
View SD card trail camera photos in your browser, sorted by EXIF capture time and grouped into events. Nothing is uploaded.
Trail Camera App & Firmware Finder
Find the official phone app for your trail camera brand, filter by connection and platform, and see how that brand updates firmware.