Downsides of Cellular Trail Cameras Nobody Mentions Before You Buy
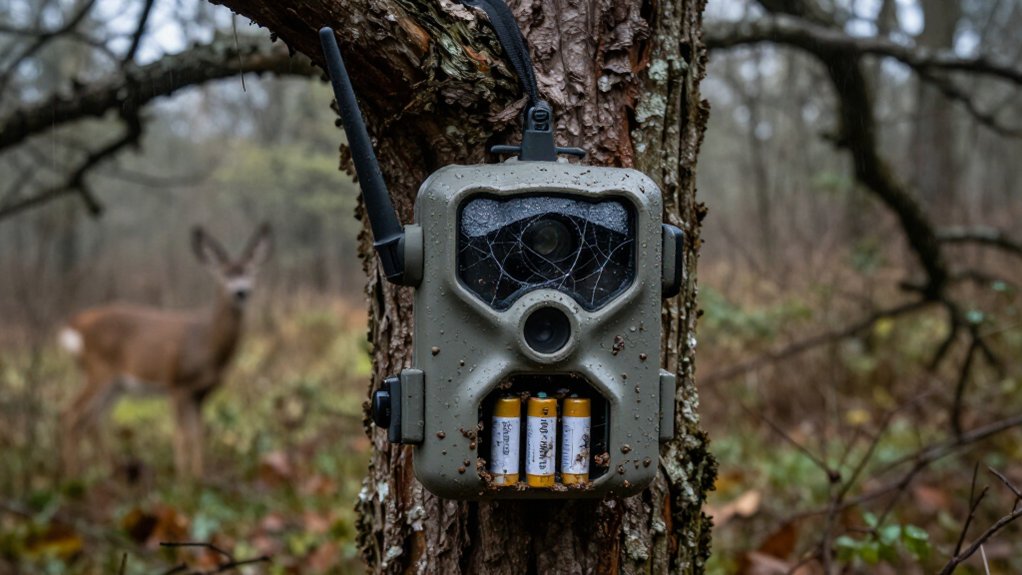
Before you buy a cellular trail camera, budget for monthly data fees, confirm coverage at the exact site, and expect weak signal, cold weather, video, and storms to drain batteries or delay uploads. You’ll still need to inspect SD cards, install firmware updates, and protect the camera from theft or vandalism.
Carrier locks and dual-SIM claims need verification, while state rules may limit use. Gate placement also leaves blind spots. The details below help plan smarter.
Monthly Data Fees Add Up
Cellular trail cameras can create an ongoing expense because they transmit photos to your phone through a mobile network. The camera’s purchase price is only part of the cost; you’ll also pay for a data plan.
Those monthly fees matter most when you run several units or keep them active through a long hunting season. A camera that captures frequent photos or video can use more of its plan’s transmission allowance than one sending occasional images. Before you buy, compare each plan’s monthly price, included allowance, and overage charges. Providers don’t always make those costs obvious at checkout.
If recurring fees don’t fit your budget, choose a standard trail camera. You’ll avoid cellular plan costs, but you’ll retrieve images from an SD card manually.
Weak-Signal Battery Drain
In weak-signal areas, a cellular trail camera works harder to transmit each photo, which can drain its batteries faster and force more maintenance trips. A remote camera may need battery changes sooner than the same model in stronger coverage. The drain rises further when it sends many images, captures frequent nighttime activity, or records video.
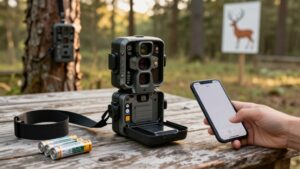
Cold weather further reduces battery performance, making winter deployments in marginal coverage especially demanding. Check the camera more often after installation, especially during high-activity periods, rather than relying on a published runtime estimate; actual life varies by model and conditions. A compatible solar panel or external power supply can reduce visits, but use only equipment the manufacturer approves. Unapproved power accessories can damage the camera or potentially void its warranty.
Delayed Photo Delivery in Storms
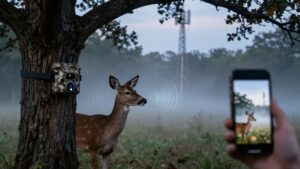
Storms can delay or interrupt photo uploads, even when your cellular trail camera normally sends images within seconds. Heavy rain, wind, and storm conditions can disrupt the connection you depend on, leaving recent photos unavailable when you need them most.
A camera already sees only what crosses directly in front of its lens; delayed uploads make that narrow view less useful. If you’re away from the property, don’t treat app notifications as real-time alerts. Use cellular images as helpful scouting information, then verify conditions and activity when you can reach the property. Keep backup plans for changing weather, access, and hunting decisions in person.
Carrier-Locked Versus Dual-SIM Models
A carrier-locked camera can leave you without service if its network has weak coverage at your setup site, so confirm Verizon coverage before you buy. Switching carriers may require a new camera, SIM, or plan, adding costs beyond the purchase price. Dual-SIM models give you more network options, but you’ll still need to verify Verizon support and configure the correct SIM and plan.
Carrier Coverage Limits
Carrier coverage can make or break a cellular trail camera, because reliable service at home or camp doesn’t prove the camera will connect at a remote hunting site. Check the manufacturer’s coverage information for that exact network, then test service where you’ll mount the camera—not merely near the property. Terrain, timber, and distance can weaken marginal reception.
| Situation | What you verify | What you risk |
|---|---|---|
| Home signal | Site-level connection | False confidence |
| Carrier-locked unit | Built-in network | Silent camera |
| Claimed dual-SIM | Confirmed support | Missed images |
Don’t assume a dual-SIM camera finds another network. Verify the installed carrier and whether it can be changed before you buy. A dead zone leaves you hiking silently, with no photos arriving when movement matters.
Switching Carrier Costs
Coverage at the camera site is only half the decision; you also need to know what happens if that carrier stops serving your needs.
A carrier-locked camera can leave you replacing hardware or losing service when your plan, local signal, or property needs change. Before buying, confirm which carrier it supports and whether it can accept another carrier’s SIM or work on both networks.
Don’t assume a camera transfers with you because your phone does. This matters on hunting land, where coverage differs between carriers. Manufacturer and plan terms may vary, but details don’t establish switching fees, unblocking charges, or savings from flexible models. Read the camera terms and plan fine print before committing. If a change is likely, make flexibility a purchase requirement.
Dual-SIM Setup Complexity
Before you count on dual-SIM flexibility, verify that the camera actually supports two carriers and that both networks cover the camera site.
| Check | Why it matters | What you do |
|---|---|---|
| Carrier compatibility | Lock status varies | Confirm before purchase |
| Site signal | Coverage changes locally | Test or check maps |
Don’t assume the camera switches automatically, lets you choose a preferred network, or avoids separate plan charges. Ask the manufacturer how activation, carrier selection, failures, and billing work before deployment. For Verizon compatibility under $300, confirm it directly; “dual-SIM” isn’t proof. Check local legality, since cellular-camera rules differ by location. Do this homework before field deployment.
Local Theft and Vandalism Rates
Cellular delivery saves SD-card trips, but it won’t stop someone from stealing or damaging your camera. Check local theft reports and ask nearby landowners which access points or sites attract vandalism before you mount one. Use that local feedback to avoid known hotspots, since remote placement alone doesn’t establish a lower theft risk.
Theft Hotspot Risk
Remote uploads help you monitor a cellular trail camera, but they won’t stop theft or vandalism in a high-risk area. You can receive images before a loss, yet remote reporting doesn’t physically secure the unit. Check local crime patterns, land-manager rules, and recent reports before selecting a site.
| Check | What it tells you |
|---|---|
| Local reports | Whether theft concerns appear recurring |
| Access route | How quickly you can inspect a missing camera |
Remote placements reduce your visits and wildlife disturbance, but they can delay discovery of damage or theft. Use a security box where appropriate. Record camera’s serial number, photograph setup, and inspect it regularly when conditions allow.
Vandalism-Prone Locations
In vandalism-prone locations, a cellular trail camera remains exposed despite its ability to transmit photos off-site. You may receive an image before someone removes or damages it, but transmission doesn’t stop the loss. Once the unit is gone, smashed, or its mount is torn down, your monitoring can stop immediately. That creates a gap in records during the period you most need coverage.
Treat placement as a cost-versus-information decision. Don’t put an expensive camera where it is conspicuous, reachable from a road, trail, or gate, or simple to grab without being noticed. Use a less obvious site when practical, while preserving a usable detection angle and cellular signal. For each property, weigh the camera’s replacement cost against the value of the activity documented on-site.
Local Crime Research
Local crime patterns can help you judge whether theft or vandalism is a realistic risk at a specific camera site. Before you mount a cellular trail camera, review local police crime maps and incident reports for theft and vandalism near the property. Focus on reports closest to your access roads, gates, trails, and parking areas.
Check each source’s time period and geographic boundaries. Townwide totals can hide important differences, especially when your hunting property sits in a remote area. Use that research to decide whether a security box or higher placement is justified, rather than assuming either measure is necessary at all sites.
Monitoring a Remote Gate
A cellular trail camera can watch a remote gate without forcing you to make frequent SD-card checks that leave human scent or disturb nearby deer. When the site has a usable cellular signal, alerts can reach your phone within seconds, letting you check activity without driving out. That convenience has limits. The camera sees only the slice of road, trail, or entrance inside its detection zone.
Someone can approach from the side, stop beyond its range, or use another route without triggering an image. You may also find yourself checking your phone repeatedly, especially when updates are sparse or the animals you expect never appear. Mount it to cover the gate’s likely approach, test its angle, and verify local rules; regulations differ by state.
SD Card Corruption Risk
Cellular alerts don’t eliminate the risk of lost footage, because the camera still stores images on an SD card that can fail or become unreadable. A bad card can leave you with missing files, corrupted images, or a camera that stops recording locally while notifications continue. Use a card the manufacturer lists as compatible, and don’t assume a fast DSLR-oriented model will work better; trail cameras write data differently and may behave oddly with some high-speed cards. Check the maximum supported capacity before buying.
When you service the camera, reformat the card in that camera instead of deleting files on a computer or point-and-shoot camera. Outside devices can alter the file structure your trail camera expects. Inspect stored images, not only app alerts, periodically.
Ignoring Firmware Update Requirements
SD card checks aren’t the only hands-on maintenance cellular trail cameras require; firmware can affect settings, connectivity, and overall performance. Even if your camera sends photos to your phone, it may need a manual update to work reliably.
- Before installation, read the manufacturer’s update instructions and note any required files, cards, or power levels.
- Confirm the firmware matches your exact camera model; don’t load a version meant for another unit.
- Mount the camera where you can reach it, because updates may require physical access.
- During routine servicing, check for releases and update as directed.
Ignoring this task can leave you troubleshooting missed settings, unstable connectivity, or performance problems that a simple update might correct. Don’t assume cellular service will automatically keep its software current.
Check State Trail-Camera Regulations
Before you buy or deploy a cellular trail camera, check the current rules in the state where you’ll use it. Cellular cameras aren’t legal everywhere, and regulations vary by state. A camera setup that seems routine on private land or at a hunting site may still face restrictions you didn’t expect.
Don’t rely on old forum posts, retailer claims, or rules from a neighboring state. Visit the relevant state wildlife agency’s website or contact it directly before you buy equipment, activate a data plan, or place a camera. Ask about current requirements for cellular transmission, use during hunting seasons, placement, and permits or landowner conditions. Rules can change, so recheck them before each season. This helps avoid wasted costs, potential citations, and interrupted hunts.
Conclusion
Cellular trail cameras can save trips, but they aren’t maintenance-free. You’ll pay ongoing data fees, manage batteries in weak coverage, and accept occasional delivery delays. Choose a carrier-compatible model, protect it from theft, and keep a reliable SD card inside.
Update firmware before the season starts, especially if you monitor gates or remote property. Finally, check your state’s trail-camera rules. When you plan for these limits, you’ll get more dependable results and fewer expensive surprises.