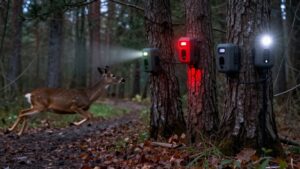
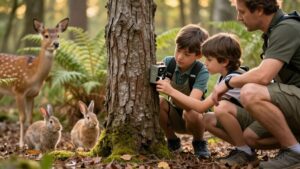
How to Attract Animals to a Trail Camera: Baits, Scents and Water
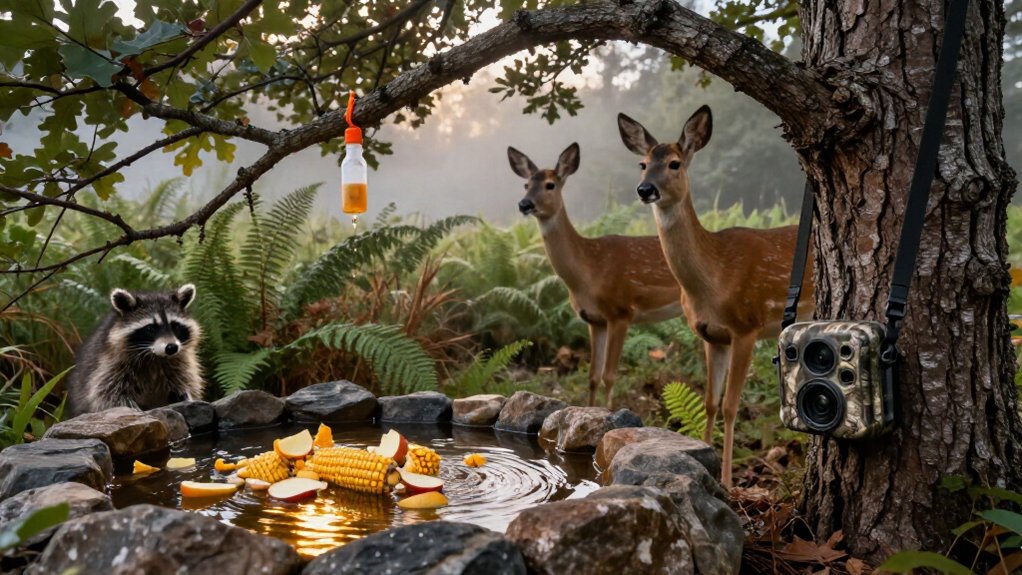
First, check local rules: food, mineral, scent, and water attractants may be restricted by land type, season, or species. Set any legal attractant beside an existing game trail, not in a broad clearing, and keep the approach natural.
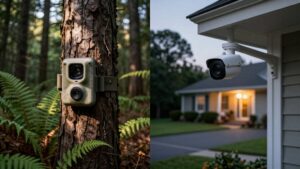
Mount your camera about three feet high and 10 feet off the path; test framing. Deer often trigger easily, but visits vary.
Lock it, pack out materials, and assess usable events after 48 hours.
Further guidance follows.
Expected Deer Captures, Difficulty, Time
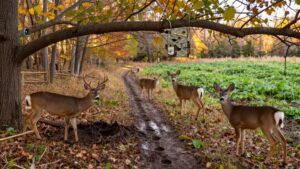
Deer are usually the easiest animals to photograph on a trail camera, but a buck feeding on shelled corn may remain in view for only about three minutes. You can use that visit to set realistic expectations: corn alone may yield quick, inconsistent images rather than a long observation window.
A formulated cover attractant, applied along the animal’s approach path, at the camera-tree base, and on vegetation and ground within view, can extend reported buck presence to roughly eight to 10 minutes. Treat these figures as field observations, not guarantees; season, individual behavior, and local forage alter responses. Position the camera so deer pass through the scent-treated corridor immediately before entering the frame. This produced images of roughly twice the duration and greater consistency.
Verify Local Baiting Regulations
Before you place food, scent, or any other attractant, check your state, provincial, and local wildlife regulations. Rules can differ between public and private land, seasons, and species. A legal bird feeder doesn’t necessarily authorize open bait or odor lures. Record the agency source and date you checked; rules can change.
- Protect wildlife by confirming food-bait limits before you deploy.
- Avoid the regret of accidentally violating bear or furbearer rules.
- Prevent fear and injury: don’t create a pitfall hazard.
- Gain confidence by asking wildlife staff when requirements seem unclear.
Your camera study should observe natural behavior without conditioning animals or creating avoidable risk. If uncertainty remains, contact the local wildlife agency before setting out anything. Their guidance protects animals, you, and public trust too.
Step 1: Clear a Natural Camera Lane
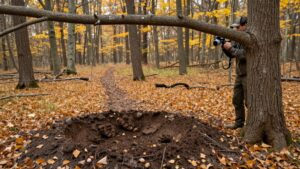
Use an existing game trail or worn track to define a narrow camera lane, then remove only small sticks and low branches that interrupt a natural, side-on approach. This focused clearing lets animals walk without jumping logs or pushing through brush, improving the likelihood of an unobstructed lateral image.
Trim vegetation sparingly near the camera tree and along the approach, so an investigating animal’s head and shoulders remain visible to the sensor for longer. Don’t turn the site into a broad opening: retain nearby cover, because excessive exposure may make wildlife hesitate or skirt the lane.
As you work, inspect the ground for pits, loose soil, and waterlogged holes. Remove or avoid conditions that could catch feet or alter normal movement. Your goal is to observe ordinary travel behavior, not engineer a passage that creates risk or changes it. Keep disturbance limited, revisiting the lane only when new growth blocks your view.
Step 2: Mount Camera Three Feet High
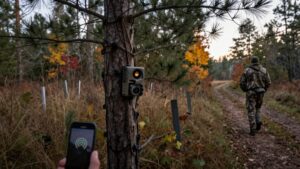
With the lane cleared, mount the camera about 3 feet (0.9 m) above the ground to frame medium-sized animals such as deer, raccoons, and coyotes near eye or chest height. Test the field of view before you finalize the mount: moving it only 6 to 12 inches can shift an animal’s head out of the lens’s sharp sweet spot. Tilt the lens slightly downward, which helps preserve a clear view when an animal stops close and its body might otherwise obscure its face.
Keep any ground-level water or other permitted attractants directly below the framing area, so investigating animals naturally present their heads. Before leaving, inspect the composition at the expected approach distance, then tighten the straps and confirm the tree and camera don’t move independently.
Step 3: Place a Mineral Lick
Place a mineral lick on a decaying hardwood stump near the camera’s field of view, positioning it on the camera-facing side so animals must pass close to the lens while investigating it. Score or drill shallow holes, then add a mineral soak, which holds odor and nutrients in the wood and can encourage repeat visits.
For a treatment, combine equal parts loose trace-mineral salt, rock salt, and dicalcium phosphate; soak the mix with two gallons of water. In cold conditions, you can pour livestock molasses blended with brown sugar and strawberry gelatin into cracks. For curiosity, apply peanut butter, oil, and corn paste to the bark.
Observe visits without assuming nutritional need, check baiting regulations, and avoid spills that form unsafe surface traps.
Step 4: Hang a Scent Wick Nearby
A scent wick can draw an animal along the camera’s approach path without creating the visual clutter or repeated scavenger traffic of a large food pile.
Hang a small cloth or tissue saturated with an appropriate lure beside the camera tree or just beyond the edge of the approach. Keep it elevated and firmly secured, so it can’t fall into the animal’s path or obstruct the lens. Place it where prevailing wind carries odor across a travel corridor, allowing the animal to detect a lingering plume before reaching the camera. This setup encourages investigation while keeping frames clearer than a concentrated food source might.
Check the wick routinely and re-soak or replace it after rain, heavy humidity, or prolonged exposure. Observe local regulations and use scents responsibly.
Step 5: Shift Camera Ten Feet
Shift the camera about 10 feet off the main path to bring animals into the sensor’s effective range instead of recording quick, distant pass-bys. Use your bait, scent wick, or water source as a reference, then aim the camera where an animal’s likely approach line crosses coverage at that distance. This positioning can replace a brief edge-of-frame trail shot with a centered, full-body image.
Deer and other wildlife often pause to investigate an attractant patch, giving the sensor more time to trigger and document natural behavior. After the adjustment, review one day of images or video. Check whether the trigger fires before the subject becomes too close and whether its whole body remains visible. If animals remain peripheral, move it 10 feet and observe.
Step 6: Lock Camera Case, Pack Out
Once the camera captures animals at the intended distance, secure it in a locking case to protect the unit, footage, and mounting hardware from tampering or accidental dislodging. Use a lockable enclosure and route cables and mounting hardware inside it; this limits interference, prevents animals from shifting the unit, and reduces gaps that collect odor or debris.
Before placing or handling bait and scent materials, check local regulations, especially in public-access areas. At each visit, pack out wrappers, ties, empty containers, excess bait, and wipes. Take batteries, memory cards, tools, and unused supplies with you; don’t stage them nearby. This leaves a clean observation site and reduces non-target human attention while preserving the site’s ecological condition and minimizing avoidable evidence of human activity.
Review 48-Hour Photo Count
Review the camera log after two complete 24-hour periods and count usable trigger events, not merely individual images. This 48-hour total gives you a measure of short-term attraction and placement while reducing influence of conditions during one day.
Before interpreting results, confirm delay and trigger-mode settings allow repeat passes to register rather than being suppressed by a lockout. Keep bait or scent application unchanged throughout the test: don’t move, refresh, or add material midway.
If your log permits, compare first- and second-day counts, since food and odors can produce an early spike as intensity changes. Higher counts generally indicate your camera monitors a travel line or natural cue area that animals visit repeatedly. Record species, timing, and behavior to guide ethical, minimally disruptive adjustments.
Blank Photos: Avoid Sunrise Glare
At sunrise, low-angle light can overexpose a functioning trail-camera trigger and leave you with apparently blank photos. Aim away from east, keeping rising sun, sky openings, water, bare ground, and pale rocks outside frame. Before leaving, use LCD playback and take a short burst during comparable first-light conditions; glare changes with season and minute.
| Observation | Likely cause | Adjustment |
|---|---|---|
| White dawn frames | Sun enters scene | Turn camera |
| Edge captures | Sunlit motion | Narrow sensor zone |
For IR glow, avoid nearby objects that reflect illumination back along a trail. Sunrise doesn’t create IR reflection, but adjacent dim light can wash out detail. Adjust height or angle until the target zone, not bright edges, fills the sensor view. These tests support ethical interpretation; don’t mistake exposure failure for animal absence.
Clean Lens With Microfiber
After correcting for sunrise glare, inspect and clean the lens before each camera check. You’ll preserve sharper daytime detail and clearer nighttime images by removing dust, pollen, and handling residue.
First, lightly blow loose grit away; particles dragged across glass commonly cause permanent micro-scratches. Then use a clean microfiber cloth in gentle, straight strokes rather than circular rubbing.
Examine the lens after wind-driven dust or any nearby setup work, since a thin film can lower contrast when the infrared flash fires. For fingerprints or oily haze, apply lens-safe cleaner to the cloth, never directly to the lens, and wipe carefully to prevent streaks. Keep your cloths sealed in a clean bag between visits. This simple routine protects image quality without disturbing animals or adding anything.
Conclusion
You’ll improve trail-camera observations by pairing a clear lane and three-foot mount with legal, limited attractants such as water, scent, or a mineral lick. Check regulations before baiting, protect the site with a lock, and remove all materials afterward.
Then evaluate your 48-hour photo count, adjust glare-prone angles, and clean the lens with microfiber. These repeatable steps reduce blank images while letting you document animal behavior without unnecessarily changing it across changing conditions and habitats.