How to Set Up a Solar Trail Camera for Months of Hands-Off Running
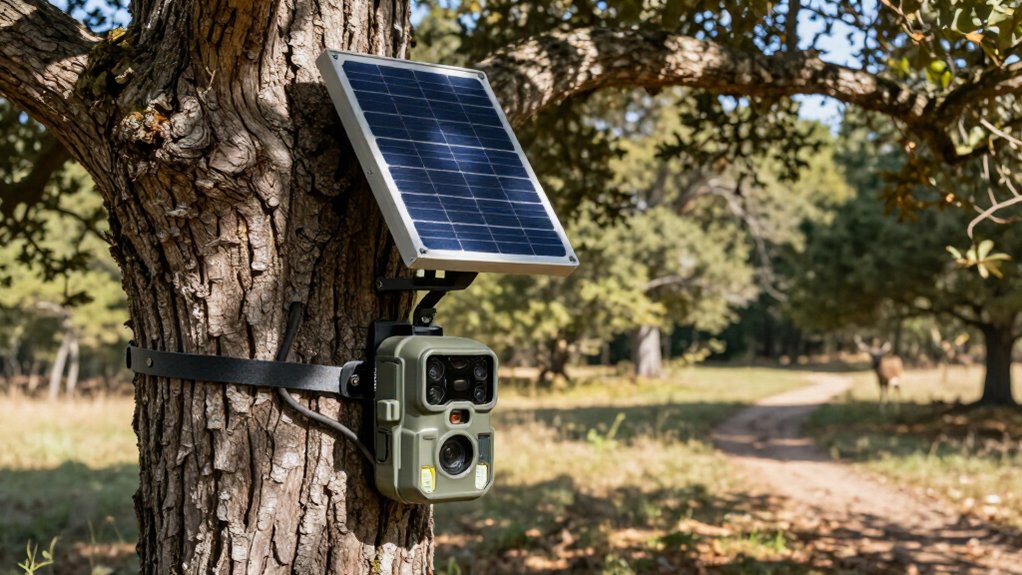
Mount your solar trail camera 7 to 8 feet high, aimed downward at the driveway or gate, while its panel faces unobstructed southern sun.
Trim grass, brush, and reflective surfaces from the detection zone, then install a high-endurance SD card and seat weatherproof connections.
Start with medium sensitivity, photo mode, and a 30 to 60 second delay.
Test cellular signal and day-night captures for days.
Further placement and IR-glare fixes below help keep it running unattended for months reliably.
Easy 30-Minute 24/7 Coverage
You can usually set up reliable 24/7 solar camera coverage in about 30 minutes by mounting the unit 7 to 8 feet high, aimed at the driveway, front door, or gate and tilted slightly downward. This height keeps lens above casual tampering while capturing approach paths before a person reaches entry. Set motion sensitivity to medium as your baseline.
Use photo mode whenever identification stills meet your needs; it consumes far less power than video. If video is necessary, limit clips to 15 to 30 seconds. Enable night vision, and set trigger delay between 30 seconds and one minute to avoid duplicate captures. Run a few-day field test: review alerts and compare day and night images. Tighten activity zones or reduce sensitivity if moving vegetation causes false triggers.
Verify Unobstructed Southern Sun Exposure
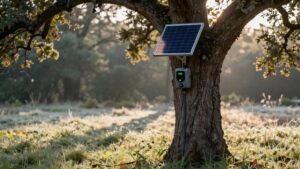
In the Northern Hemisphere, position a built-in solar camera so its panel faces south, where it can capture the strongest daily sunlight. Check the site before final mounting, not just at noon. Track sunlight across the expected operating window, and account for spring and summer foliage, when new leaves can turn a workable location into a low-charge site. Keep the panel clear of shade from overhangs, nearby trees, fences, and bushes; even brief shadows cut charging output.
- For separate panels, aim the panel south while you orient the camera for coverage.
- Set a 30 to 45° tilt to improve collection and shed leaves.
- Test for moving branch shadows and verify near-direct sun most of day.
Recheck the exposure before a long unattended deployment at the site.
Step 1: Clear Brush Around Mounting Tree
Clear brush, tall grass, and low branches around the mounting tree before installing the camera. Cut vegetation from the camera’s field of view, especially stems that can sway in wind. Moving leaves and grass can trigger the PIR sensor, creating false photos and draining power. Trim growth at the base of the mount so it can’t reflect sunlight into the lens or interfere with detection.
Remove leaves, vines, and debris that may cast intermittent shade across the solar panel or obstruct the sensor. Then stand at the intended mounting position and check the view at the camera’s final, slightly downward angle. You want a stable background, not a nearby patch of brush that shifts with every breeze. Return seasonally, particularly after spring growth, to repeat this clearing. Summer vegetation can quickly reduce charging and increase unwanted triggers.
Step 2: Install a High-Endurance SD Card
With the mounting area cleared, install a high-endurance SD card rated for dashcam or security use. These cards tolerate repeated write cycles from photo bursts and extended deployments better than standard media. Check your camera’s manual before purchase: confirm its supported card format, maximum capacity, and whether it accepts SDHC or SDXC.
Choose a card with suitable Class, Speed Class, or UHS write ratings; faster writing shortens shutter-to-storage delays and can preserve triggers during busy periods. Match capacity to your capture plan: 15 to 30-second video clips consume far more space than stills. Insert the card, run the camera locally for several days, and verify reliable file saving. Once verified, leave it installed through the season to avoid midseason formatting, handling, or write interruptions in service.
Step 3: Set Detection Zone Distance
Aim the camera’s detection zone at the approach path you want to monitor, such as a driveway or entry gate, rather than extending it into distant woods, roads, or open ground. Start medium motion sensitivity and test it at proper site distance. Walk route and confirm a deer-sized target triggers where you need coverage.
If animals travel farther out, increase range to capture them. If wind-blown grass, distant wildlife, or roadside movement creates false alerts, shorten detection distance. Long ranges invite unintended motion events, fill the card, and consume power.
Trim grass, bushes, and branches from the zone’s edge, because moving vegetation can trigger the sensor. Let the camera run for days, review captures, and tune distance for target detection with fewer unnecessary triggers.
Step 4: Mount Camera Facing North
Mount the camera facing north in the Northern Hemisphere to keep direct sun out of the lens and reduce washed-out images, flare, and glare-triggered captures. This orientation prevents long periods of sunlight from striking the sensor and triggering exposure swings or false motion events. If the panel is integrated or mounted nearby, aim the camera north and the panel south when site conditions allow. That arrangement preserves useful charging exposure while keeping the viewing angle stable.
At the mounting height and angle, use the app to check the field of view. Tilt the camera slightly downward so bright sky occupies less of the frame. Review images after the first sunny day. If you see repeated glare or blown highlights, rotate it a few degrees.
Step 5: Test Cellular Signal Strength
Test cellular signal at the exact planned camera position before you install it. Stand where the camera will sit, open its app or use your phone, and record the reading. Don’t trust outdoor coverage: timber, valleys, and structures can sharply reduce service. Weak reception makes the camera search repeatedly, increasing power draw despite a healthy battery.
If readings are marginal, test the unit powered on for one to two days. Confirm it reconnects and uploads consistently after check-ins. Move to higher ground or a spot with clearer tower view if needed. Field results vary: one camera ran about six weeks in weak service but five months in stronger coverage.
If service remains unreliable, expect intermittent uploads and rely on solar charging to offset consumption.
Step 6: Lock Cable and Weatherproof Connections
Secure the camera body with a quality lock cable around a fixed tree or post before leaving it unattended. Add a small tether or eyebolt when your model supports one. Route the cable inconspicuously and leave slight slack at mounting points, so wind or wildlife won’t strain the housing or loosen connections.
Seat every weatherproof plug fully. Protect entries with rubber grommets and an outdoor-rated junction cover to block rain, dust, and insects. For external solar panels or battery boxes, run leads behind the mount and secure them with UV-resistant ties or clips.
During service visits, inspect cables and housings for cracked seals, corrosion, or loose plugs; these small faults often create long-term dead cameras. Replace damaged parts promptly before moisture causes complete failure.
Confirm Daily Photo Delivery
Once the camera is mounted, run a 2 to 5 day onsite verification and check the app for at least one actual photo captured each day, or at your chosen interval. Confirm it is set to photo mode for daily capture; photos use far less power than video. Turn video off unless you truly need it. Set activity zones or the trigger area carefully, then use medium sensitivity so wind-blown vegetation doesn’t create wasteful triggers.
Inspect the panel: in the Northern Hemisphere, face it south and keep leaves and debris off its surface. For cellular or cloud models, schedule uploads once or twice daily. Verify that each batch contains the day’s image; don’t mistake a “last seen” status or delayed connection for confirmed delivery to you.
Fix Nighttime IR Glare
Nighttime IR glare usually comes from light reflecting off nearby surfaces or debris in front of the lens, so start by cleaning the lens and removing spider webs, dust, and moisture. Smudges turn crisp subjects into hazy hotspots, so inspect the housing with a flashlight after dark. Trim brush across the detection zone and remove white walls, metal fencing, or shiny trunks. Tilt the camera slightly downward rather than aiming at the horizon. If a halo persists, move it several feet from the reflective target and retest. Reduce night sensitivity or select no-glow IR when available, especially in humid air or close-range scenes.
| Symptom | Likely cause | Field correction |
|---|---|---|
| Hazy hotspots | Dirty lens or webs | Clean and clear |
| Bright halo | Reflective object nearby | Relocate camera farther |
| Washed frame | Excess IR output | Lower sensitivity night |
Wipe Solar Panel Monthly
Reliable solar charging starts with a clean panel, so wipe it at least monthly to remove dust, pollen, bird droppings, and surface film that reduce power output. Angle helps: a panel set near 30 to 45 degrees sheds rain and debris, but it won’t stay clean enough for maximum intake. Use a soft microfiber cloth dampened with water; add mild soap only for stubborn film. Don’t use abrasive pads, gritty cleaners, or dry scrubbing, since surface scratches permanently reduce efficiency.
When you finish, inspect the panel’s view of the sky. Trim foliage or relocate the panel to avoid new shade, because even a shadow can slow recharging during cloudy winter weather. Make checks routine in dusty locations and low-sun months when your camera depends on watt.
Conclusion
With the panel aimed at clear southern sun, the detection zone tuned, and every connection sealed, you’ve built a camera station that can run for months without routine visits. Use a high-endurance card, secure the housing with a cable lock, and verify daily image delivery before leaving the site.
If night images flare, adjust the angle and clear nearby reflective surfaces. Finally, wipe the panel monthly to preserve charging performance and maintain dependable 24/7 coverage.