Trail Camera Strap vs Screw-In Mount: Stability, Angle and Theft Risk
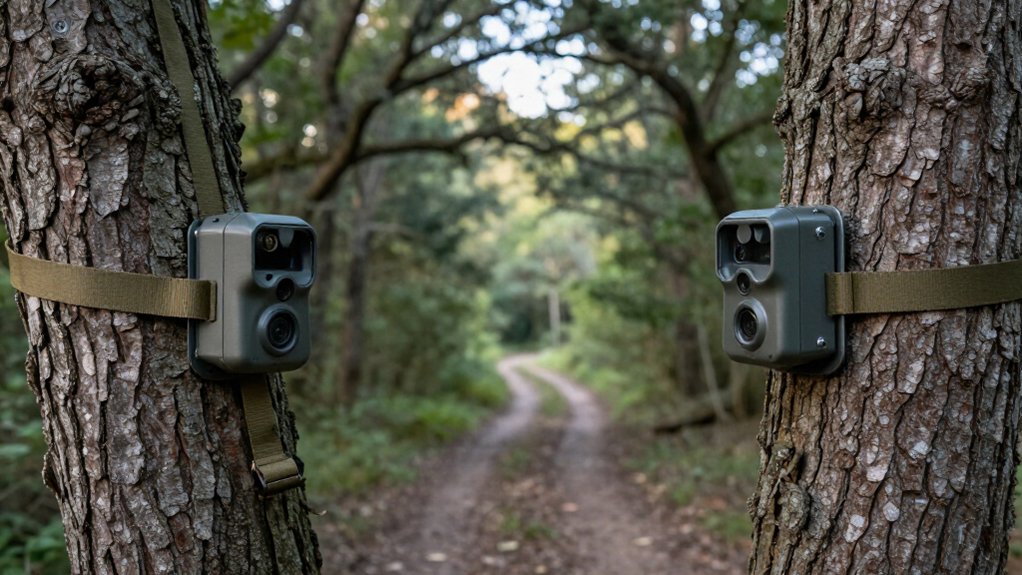
Choose a strap when you need fast, tool-free relocation and must avoid bark damage. Tighten it on solid, even bark, then recheck after rain or freezes; loose webbing can shift aim and blur captures.
Use a permitted screw-in 1/4-20 mount for a firmer, wind-resistant hold and precise angles, but confirm tree-owner and public-land rules first.
Either mount benefits from concealment, height, and a lock box. The details below help you secure coverage more effectively today.
Straps vs Threaded Anchors
Strap mounts give you the fastest, least invasive setup: you can secure a camera to trees of varying diameters without tools and relocate it easily as animal patterns change. They suit temporary sets, but you should inspect tension and alignment after rain, freeze-thaw cycles, bark compression, or growth. A shifted housing can miss a trail or expose its position.
| Field condition | Mount choice |
|---|---|
| Moving corridor | Strap: rapid relocation |
| Fixed surveillance | Threaded anchor: firmer hold |
| Precise angle | Anchor with articulated head |
Threaded screw-in mounts resist drift and let you refine framing, yet you must confirm land rules before drilling. Check the camera’s back or bottom for a compatible threaded socket; standards aren’t universal. For theft resistance, choose concealment and regularly verify the mount remains tight.
Buckle Straps and 1/4-20 Studs
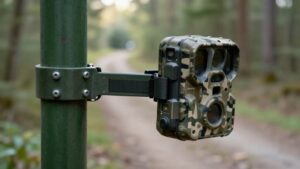
Buckle straps give you a tool-free, fast way to secure a trail camera to a tree, making them well suited to temporary sets and frequently changing travel corridors. Cinching the strap against stable bark helps prevent opportunistic tampering, but you should inspect it after temperature swings, rain, and seasonal growth. Irregular or leaning trunks can compromise your aim; use a wedge or adjustable backing plate to square the camera. For threaded mounts, confirm your camera’s back or bottom has a 1/4-20 socket: nominal 1/4-inch diameter, 20 threads per inch. Verify the stud and mount carry the camera and accessories securely together.
- You avoid a rushed, exposed setup.
- You protect expensive gear from drops.
- You gain confidence at each check.
- You deny thieves an easy grab.
Wind Stability and Image Blur
A secure attachment must also hold its aim when wind loads the camera and its support. Loose straps can rotate or sag as bark compresses and changes with rain, heat, and cold, shifting your detection zone. Thin trees, posts, tripods, and under-tensioned straps amplify that movement. The result isn’t blur: wind-driven motion or swinging branches can trigger wasted captures, while a moving camera may leave an animal partially framed or entirely missed.
A screw-in mount with a rigid base and tightened joints resists wind better. However, an articulated mount is only as stable as its tightest joint; any looseness can alter aim. After mounting, press lightly on the housing, then inspect a test image. On long deployments, revisit to confirm framing and support stability.
Tool-Free Setup Versus Drilling
For temporary, seasonal, or frequently moved cameras, a strap mount delivers the fastest tool-free setup. You can secure it around trees of varying diameters, reposition it quickly, and avoid drill gear. On leaning or irregular trunks, however, the strap may restrict your aiming angle.
- Feel confident when quick relocation doesn’t leave hardware behind.
- Stay alert: tighten the strap firmly, because slack can shift coverage.
- Protect your plan by confirming drilling is permitted before using a screw-in mount.
- Gain precise control with an articulated screw-in mount, but inspect its joints regularly.
Screw-in hardware demands solid wood and manufacturer-approved installation. Once mounted, you can fine-tune position and aim precisely. Revisit either setup after weather or activity; looseness can turn your camera into a serious blind spot.
Bark Thickness, Stud Depth
Tree bark directly affects how securely your trail camera mounts. With a strap, thick, rough, or uneven bark can prevent full contact, letting the housing lean or shift under pressure. Set the strap over the most stable bark available, tighten it firmly, and inspect alignment again after weather swings or seasonal growth.
For a screw-in mount, select a stud that reaches beyond the bark and anchors in solid wood. A short stud may hold initially but can loosen or pull free, compromising both aim and security. Don’t force the mount deeper or overtighten it beyond the manufacturer’s guidance. Before final aiming, test the tree interface and mount for movement. No universal bark-thickness or stud-depth measurement applies; assess every tree individually before deployment in daylight.
Buckle Replacement and Corrosion Costs
Replacement and corrosion costs can shift the long-term value of either mounting method. Strap buckles face rain, humidity, and thermal cycling; they can crack, corrode, or lose clamping force, letting your camera sag or become easier to grab. Inspect buckle bodies and strap tension during every check.
- A fresh replacement strap restores tension quickly when a tired buckle makes you doubt the setup.
- Corroded screw-in hardware can lock in place, turning a simple adjustment into a frustrating field repair.
- Outdoor-grade compatible hardware and corrosion-resistant finishes protect your budget and keep security hardware serviceable.
- Price straps and buckles against screw-in hardware, plus the tools and labor required for installation or removal.
If corrosion compromises a mount, replace it before wind vibration exposes camera to loss.
Tree Scarring, Landowner Consent
Although screw-in mounts can steady a trail camera, they pierce bark and can leave lasting scars, so use them only with clear landowner or land-manager approval. Before installation, confirm who controls the tree, fence, or structure and get permission in writing. On public land, check agency rules first; many areas prohibit hardware that damages trees or attaches equipment without authorization.
A strap mount avoids drilling and is usually the lowest-impact option when bark protection matters. If screws aren’t permitted, use a site-approved clamp, post, or freestanding mount instead. For security, document approval, photograph the setup, and place the camera where it doesn’t create access disputes or violate property conditions. Remove the mount promptly when permission expires and inspect the site for damage afterward.
Cold-Weather Strap Slippage
Cold can alter strap tension, so a camera that feels locked down at setup may loosen or rotate after freeze-thaw swings. You should recheck the strap against stable bark, replace any brittle or damaged webbing, and verify the camera’s aim with a test image. For long-term cold-weather security where permitted, a screw-in mount offers a more stable hold.
Why Straps Loosen
Temperature swings can reduce strap tension, especially when a camera sits outdoors through freezing nights and warmer daytime conditions. As materials contract and relax, the strap’s grip can change, while uneven bark and tapered trunks create pressure points that don’t hold uniformly. Your camera may slowly shift even if it looked secure at installation. Wind and rain then exploit that movement, rotating or tilting the housing and altering its framing and detection coverage.
- A once-hidden camera now stares at empty ground.
- A missed angle can leave a trail unrecorded.
- A swinging housing signals vulnerability to anyone nearby.
- A loosened strap turns harsh weather into a security gap.
For long-term deployments, trunk surfaces and exposure make strap-mounted positioning less stable than permitted screw-in mounts.
Preventing Freeze-Thaw Slippage
Freeze–thaw cycles can turn a secure strap mount into a shifting security risk as bark contracts, sheds moisture, and changes its grip. Before deployment, cinch the strap firmly against stable, solid bark rather than loose flakes or moss. Lock the camera in position, verify it is level, and try to twist it by hand; it shouldn’t rotate or sag under controlled pressure.
Inspect the installation after every hard freeze, rapid thaw, or major weather swing. Retighten the strap, restore the aim, and capture a test image to confirm the detection zone remains covered. A camera that tilts even slightly can miss trails, trigger on background movement, or expose its location. If a tree permits slippage, move camera or use a permitted screw-in mount.
Public-Land Rules and Mount Choice
Check local land-management rules before you use a screw-in mount, since many public areas prohibit hardware that damages trees. When rules are unclear or screws aren’t allowed, use a strap or tree-free mount to reduce damage and move the camera quickly. You should also assess theft risk: conceal the unit, use a lockable housing, and avoid leaving high-value gear in obvious locations.
Check Local Regulations
Before mounting a trail camera, verify the rules for the exact public area, because many parks and managed forests prohibit screws or hardware that wounds trees.
Regulations can change between wildlife areas, national forests, and leased tracts, so don’t rely on a rule from the next county. Confirm requirements with the managing office and record the approval before deployment. Your mount choice should follow the authorization, not convenience:
- Use a strap when tool-free attachment is required; it keeps your setup compliant there.
- Choose a clamp, post, or freestanding mount if rules limit tree hardware locally.
- Get written owner permission before installing screws on private ground or structures there first.
- Recheck managed-forest and lease terms; a prohibited mount can end surveillance abruptly and expensively.
Minimize Tree Damage
Treat the tree as part of the site, not as disposable hardware: on public land, screws and bolts can qualify as prohibited tree damage. Check the managing agency’s rules before selecting a mount; restrictions vary by unit and season. When punctures aren’t allowed, use a strap mount: it secures the camera without drilling and lets you relocate the setup cleanly.
On private land, get the owner’s permission and verify that the tree and property rules permit a screw-in mount. If you need zero tree contact, place the camera on a tripod, ground stake, post, or suitable clamp. Recheck strap tension after rain, freezes, heat, and bark changes; growth and weather can loosen it or shift your aim over time and quietly degrade trigger-zone coverage.
Consider Theft Risk
Theft Risk
Theft risk should shape both your placement and mount choice, especially on public land. Check local regulations before installing a screw-in mount; many areas ban hardware that punctures trees. A strap complies more often and removes quickly, but its horizontal profile can advertise your camera. Screw-in mounts hide that line and sharpen your angle, yet legality and theft remain concerns.
- Push deeper into cover, away from tempting field edges.
- Mount at least 10 feet high to frustrate a grab-and-go thief.
- Use a compatible steel lock box and cable for uneasy peace of mind.
- Accept that determined thieves can still take it.
Locks can restrict elevated or concealed setups. Prioritize legal placement, reduced visibility, and retrieval access; no mount makes a public-land camera fully theft-proof.
Screw-Ins for Private Timber
For longer-term setups in private timber, a screw-in mount gives you a rigid, security-conscious platform when the owner allows hardware in the tree. Before installation, confirm that your camera accepts the mount’s threaded connection; a 1/4-20 insert is common, but you can’t assume every model has one. Drive the base into solid, healthy wood exactly as the manufacturer directs, without overtightening or crushing bark.
Then lock each articulated arm or ball-head joint hard enough to prevent sag, vibration, or angle drift. The adjustable head lets you tune detection lanes more precisely than a strap, while the fixed base makes casual removal harder. Get explicit permission for every tree, and inspect the setup periodically. Tighten any joint or base that has loosened or shifted seasonally.
Conclusion
Choose a strap when you need fast, tool-free deployment, frequent angle changes, or compliance on public land. You’ll reduce bark damage, but you must cinch quality webbing tightly and recheck it after cold snaps; loose straps amplify wind shake and invite theft. Use a 1/4-20 threaded anchor on permitted private timber when you want a rigid, repeatable angle and better tamper resistance. Match stud depth to bark thickness, predrill carefully, and get landowner approval first.