Do Solar Trail Cameras Work in Winter? Short Days, Snow and Cold
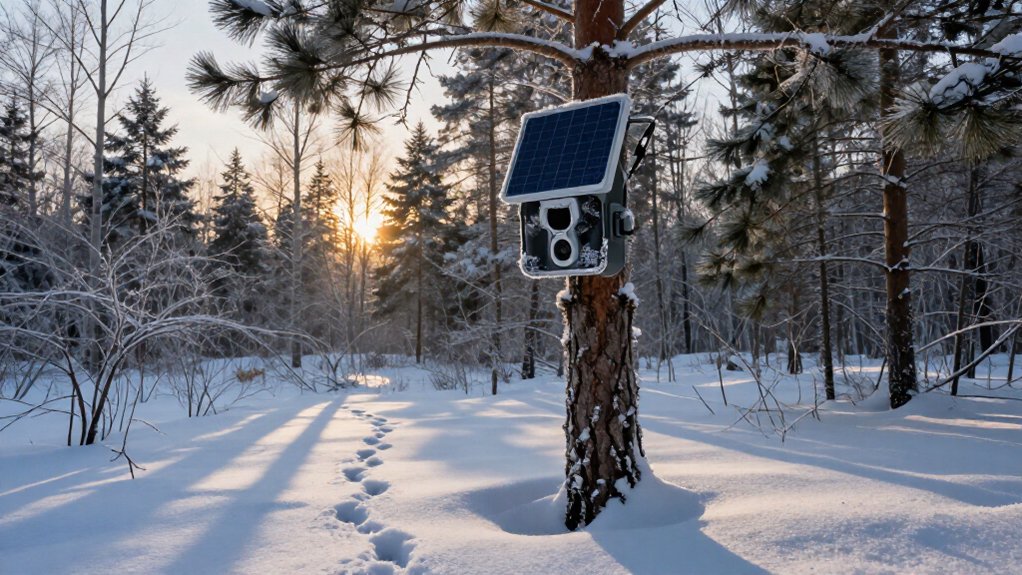
Solar trail cameras can work in winter if you keep the panel snow-free, aim it toward southern sky, and plan for low-light days. Cold air doesn’t stop charging, but short days, low sun, clouds, and canopy reduce output.
Freezing temperatures cut usable battery energy and cause voltage sag during uploads. Use lithium AA backups, reduce cellular and video transmissions, and check after storms. Those choices reveal why panel type, placement, and settings determine winter reliability.
Yes, With Snow-Free Southern Exposure
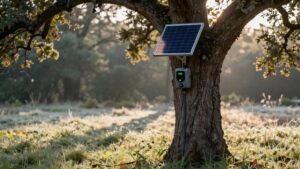
Yes, solar trail cameras can operate through winter if you give the panel a clear, snow-free southern exposure in the Northern Hemisphere. Cold air itself doesn’t prevent solar charging; winter’s primary constraint is reduced irradiance from shorter days and the lower sun angle. Mount the panel where trees, rooflines, and other obstructions won’t shade it during daytime.
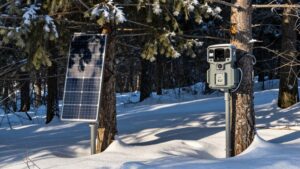
In snowy locations, tilt it steeply, up to about 60 degrees, so snow slides off rather than accumulating across the cells. Check the panel after storms, because snow or ice coverage can halt useful charging until you clear it. Plan for energy over several days, not one afternoon: cloudy or snowy periods reduce production, while clear winter days restore reserve. A sited panel can sustain camera operation across winter cycles.
Below-Freezing Battery Chemistry
Below freezing, battery chemistry, not the solar panel, often becomes the limiting factor for a trail camera. Cold slows internal chemical reactions, so your battery stores less usable energy and delivers less power during freezing nights. It also raises internal resistance and thickens electrolytes, causing voltage to sag when the camera draws current.
Alkaline AA cells commonly lose noticeable performance near freezing; rechargeable lithium batteries usually remain stronger until temperatures approach 0°F or lower. A healthy-looking battery gauge can thus mislead you: night imaging and cellular uploads create high-demand loads that may trigger early check-in failures. These losses are largely temporary. When temperatures rise, chemical activity and available power recover. For winter reliability, use lithium reserves and expect reduced overnight voltage under load in severe cold.
December Low-Angle Sunlight Performance
Cold batteries need every available watt-hour, but December’s low sun can sharply limit how much energy a solar panel replaces. You’ll get charging when the panel faces the wrong direction or sits too flat for the lower southern sky.
Short days compress the charging window, leaving the battery to run the camera overnight and through cloudy spells. Mount the camera where low-angle sunlight has a clear path; avoid overhangs, dense evergreens, and large trunks that cast winter shadows. Aim the panel toward the southern exposure and use a steeper tilt, often up to 60 degrees, to improve light capture. Snow near the ground doesn’t matter, but snow or ice covering the panel blocks light and stops charging until you clear it or it slides away.
Integrated vs. External Solar Panels
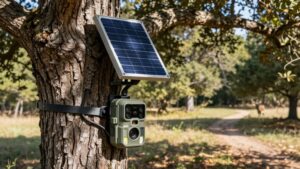
Built-in panels keep your setup compact and can still charge in cold weather, but winter’s low sun and snow cover reduce their output.
You gain more winter control with an external panel, which you can mount higher, tilt up to about 60°, and aim toward clear southern exposure. The tradeoff is added cable and mounting work, but better placement can preserve battery power through short, snowy days.
Built-In Panel Benefits
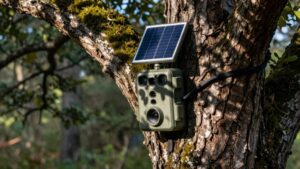
An integrated solar panel simplifies winter deployments by charging the camera’s onboard rechargeable battery whenever light is available, with no external cable or dedicated solar port to manage. You reduce failures while the camera stores energy during brighter periods. That reserve can run the unit overnight and bridge storms and cloudy stretches.
Start fully charged before deployment: winter solar input must cover average consumption, not every day. Integrated panels still depend on exposure. Short days and a low sun angle reduce output, and tree cover or roof overhangs can prevent useful charging. Give the camera an unobstructed view toward the southern sky in the Northern Hemisphere. Clear accumulated snow or ice; if the panel angle adjusts, set it steeper so snow sheds more quickly.
External Panel Placement
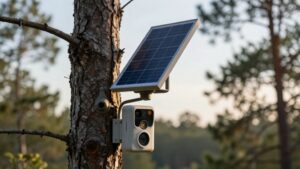
Placement determines whether an external solar panel delivers meaningful winter charging or leaves the camera dependent on its battery reserve. You can mount the panel separately through its dedicated solar-port cable, placing it where it sees the clearest southern sky while the camera stays on its required trail.
| Site factor | Integrated panel | External panel action |
|---|---|---|
| Camera under trees | Charging falls sharply | Move panel beyond shade |
| Low winter sun | Fixed orientation limits exposure | Aim toward open southern sky |
| Snow accumulation | Surface may remain covered | Tilt panel up to 60° |
| Trunks or overhangs | Camera position controls panel | Keep cells fully unobstructed |
Check the panel throughout winter. Dense evergreens, branches, and overhangs can block limited seasonal light; relocate the panel, not necessarily the camera, when shading appears.
Winter Power Tradeoffs
Winter solar performance comes down to energy balance: an integrated panel offers a compact setup but relies on its rechargeable battery reserve when short days, low sun angles, clouds, or snow limit charging. That reserve keeps your camera running but can’t indefinitely offset deficits. Cold air doesn’t prevent electricity generation; reduced irradiance and panel coverage do.
An external panel gives you control: aim it south in the Northern Hemisphere and tilt it to 60 degrees to shed snow and limit debris. This placement improves charging consistency versus a flatter integrated panel. However, snow or ice blocks either design’s cells, so your camera draws from stored power. For cloudy periods, reduce power demand or plan battery capacity around triggers, image transmission, and winter maintenance access.
Cellular Upload Frequency
You can extend winter runtime by limiting how often your camera transmits, since each upload wakes the modem, connects to the network, and consumes stored battery power. Video uploads cost more than still images, and cold further reduces the battery reserve available for those connection cycles.
Set a modest upload schedule that solar charging can replace over several days, especially when snow or ice may block the panel.
How Often Cameras Transmit
Cellular upload frequency is often the biggest controllable power load in a winter trail-camera setup, because waking the modem and sending data uses far more energy than capturing a still image. In cold snaps, batteries supply less usable energy, so a fall schedule can fail after a frigid night despite an indicator. Frequent event checks, instant notifications, video, and live viewing increase modem activity and shorten runtime.
Set transmission intervals around motion, then test them during cloudy periods. Solar can offset demand, but short days, panel snow or ice, and heavy activity reduce the margin. Plan your setup as an energy balance: uploads, video, alerts, cold-weather battery delivery, and realistic daily solar input. If conditions change, reduce upload frequency before the camera misses coverage.
Battery Cost Per Upload
Each cellular upload draws a distinct burst of power: the camera wakes its modem, connects to the network, and sends the file. Cold batteries provide less usable capacity, so that burst consumes a larger share of your available reserve. Still images use comparatively little transmission time; video, live viewing, and remote commands keep the modem active longer. Solar replenishes the buffer only when panel output exceeds these repeated loads.
| Activity | Relative battery cost | Why |
|---|---|---|
| Still photo upload | Lower | Small file, brief modem session |
| Video upload | High | Larger file, longer transmission |
| Live view | High | Continuous modem-on data flow |
| Remote command | Added | Extra network session |
Track uploads against decline in cold, cloudy periods. If consumption exceeds harvested energy for days, your camera runs down in winter.
Winter Upload Schedule
In winter, schedule fewer or staggered cellular uploads, especially after prolonged below-freezing nights, because cold reduces usable battery capacity and short, low-angle daylight limits solar recovery. Set routine check-ins near midday, when the panel has had its best chance to recharge and your power reserve is highest. During snowy weeks, reduce the cadence further: snow or ice can halt charging, so leave several days of battery buffer before requesting image batches or video. Don’t use a fixed every-X-hours rule. Cellular operation also powers motion sensing, modem wake-ups, and uploads; night-vision video increases the load. Start with a modest winter frequency, then review battery reports and upload completion after the coldest nights. If capacity declines or transfers fail, lengthen intervals; if reserves recover reliably, increase them.
Monitoring Remote Food Plots
Monitoring remote food plots with a solar trail camera can reduce winter trips, provided the panel receives enough direct sunlight to rebuild its battery reserve between cloudy periods. Mount it with a clear southern exposure in the Northern Hemisphere, because the lower winter sun angle and shorter days limit energy harvest. Set the panel at a steep angle, up to about 60°, to shed snow and prevent water or debris from covering the cells.
Cold alone doesn’t stop generation; instead, storms and temporary snow cover force the camera to draw from stored power. For surveillance, choose photo-first capture and limited transmission windows. Those settings reduce power demand while preserving a reliable record of feeding activity. Check status after overcast weather; schedule service before reserve depletion.
Heavy Canopy Blocks Winter Charging
Heavy canopy can make a solar trail camera unreliable in winter because low-angle sunlight may never reach the panel long enough to restore its battery. Cold isn’t usually the primary charging constraint; available light is. Branches that caused little trouble in September can cast recurring shadows across the panel in December, converting what looked like daily charging into brief, intermittent input. During several shaded days, the panel may not replenish the camera’s energy reserve, so performance can decline despite having solar hardware.
For reliable winter output, place the panel where it has an unobstructed view of the southern sky in the Northern Hemisphere. Check it after snowfall: snow, ice, or persistent droplets can remain on a shaded surface and effectively stop charging until cleared.
Assuming Solar Replaces Backup Batteries
Solar doesn’t eliminate the need for backup batteries in winter; it only extends runtime when the panel produces more energy than the camera consumes. Short days and a low sun angle can leave the panel below your camera’s daily energy demand. Snow or ice can cut output sharply, forcing the camera to draw from stored charge until the panel clears.
- Start with a fully charged battery reserve.
- Aim the panel toward unobstructed southern sky in the Northern Hemisphere.
- Mount it steeply, up to about 60°, to shed snow.
- Size the system to exceed consumption across cloudy, multi-day stretches.
Your stored charge carries the camera through cold nights, storms, and weak production. Treat solar as a supplement: verify panel output and consumption before relying on operation.
Install Lithium AA Backup Batteries
Install fresh lithium AA batteries as the camera’s winter reserve, even when a solar panel handles routine charging. Replace alkaline cells before winter: lithium chemistry holds voltage steadier in freezing conditions, while alkaline performance declines as temperatures approach freezing. Lithium cells generally avoid the pronounced battery dip until temperatures near 0°F, giving your camera more reliable overnight power.
They also support operation through cloudy periods, snow-covered panels, shading, and short daylight when charging can’t restore the reserve. Check battery status more often during subfreezing weather; cold can reduce usable power delivery even if the indicator appears acceptable. Pair fresh lithium AAs with your solar plan, and replace them before extended winter deployment. This setup keeps recording functions operating when solar input remains temporarily insufficient.
Conclusion
Solar trail cameras can work through winter if you give the panel a snow-free, south-facing view and manage power demand. Cold reduces battery output, while short days and low sun limit charging, especially under canopy. You’ll get better reliability with lithium AA backup batteries, modest cellular upload schedules, and external panels where placement matters. Don’t assume solar replaces batteries. Test voltage and image transmission at your site, then adjust camera settings before peak winter monitoring.