How to Attach a Trail Camera to a T-Post Solidly and Fast
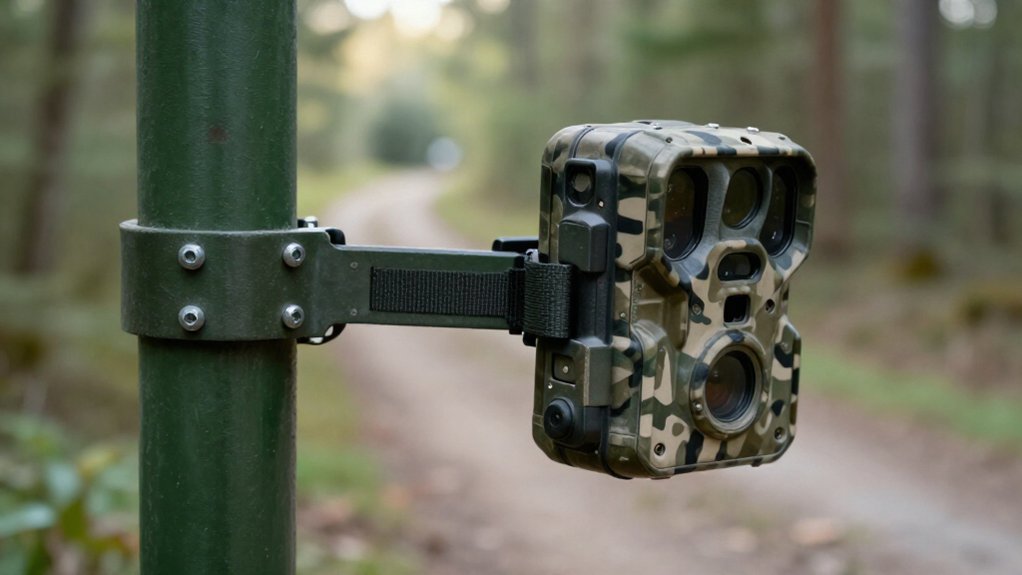
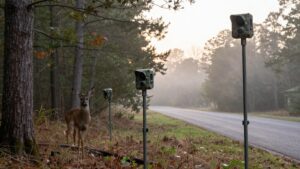
Wear close-fitting gloves, clear grass, and drive the T-post 18 to 24 in into firm soil. Mount the camera 3 to 4 ft high, seating its clamp directly below a raised post stud.
Tighten bolts evenly with a socket wrench, then shake-test the mount. Aim across the trail at roughly 45° and confirm coverage with live view or a walk-test.
Recheck clamp torque after rain; the next steps cover signal, glare, and cleanup for a reliably secure setup.
Easy 10-Minute Deer-Height Mount
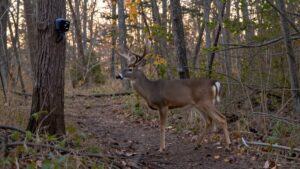
For a fast deer-height setup, place the camera lens 3 to 4 feet above the ground to capture broadside deer images that support reliable identification. Drive the T-post 18 to 24 inches into firm soil with a weighted driver, checking plumb after several strikes. A vertical post keeps your framing predictable and reduces mount stress.
Loosely secure the camera mount at the selected height, install the camera, and activate live view. Aim it across the trail at approximately 45 degrees, where approaching deer remain in frame longer. Level the horizon, then tighten each mounting bolt with a socket wrench until fully secure. Test the installation by shaking the post firmly. If you detect significant movement, drive it deeper and retest. This sequence produces stable deer-height camera position quickly.
Wear Gloves Around T-Posts
Wear sturdy, secure-fitting work gloves whenever you handle a T-post. The exposed studs, cut edges, and occasional burrs can scrape or puncture bare skin. Dry gloves with a close fit give you grip without slipping, bunching, or snagging.
- Inspect the post and mount before installation. Identify sharp edges or burrs, and don’t slide your hand along the steel.
- Keep gloves on while you position the camera bracket and make adjustments. Raised studs can catch unprotected fingers unexpectedly.
- If you drive the post, use a weighted T-post driver with a firm, controlled grip. Keep both gloved hands outside the driver’s impact path at all times.
Replace gloves if they become wet, torn, or loose. Proper hand protection lets you tighten bolts and align the mount without avoidable cuts.
Step 1: Clear Grass Around the Post
Clear grass and weeds from the T-post base before mounting the camera. Use hand shears, a string trimmer, or a hoe to expose the ground around the post and create working room. Remove stems that could conceal movement, snag clothing, or block access while you position a weighted T-post driver.
Trim vegetation within the camera’s field of view, especially along the trail or target area. Wind-blown grass can cross the sensor zone, causing false motion alerts and wasting battery power and storage. Cut it low enough that it won’t quickly grow into the frame. Leave a clear perimeter wide enough for safe footing and full driver movement. If vegetation remains nearby, secure it away from the camera body, mounting hardware, and solar-panel cables. This reduces tangles and limits animal damage.
Step 2: Check Cellular Signal First
With the area cleared, test cellular coverage at the exact T-post location before mounting the camera. Check your smartphone’s signal bars while standing where the camera will operate, not several yards away. You want at least two or three stable bars. One bar can appear usable during a quick test yet fail to transmit high-resolution photos or video reliably after installation.
Next, power on the cellular trail camera and verify its own signal-strength indicator. Your phone may use a different carrier or connect differently, so the camera’s reading is the deciding measurement. If you’re using an EagleCam 5, let SignalSync complete its automatic search for the strongest available network signal. Record the result, then proceed only when the camera maintains a dependable connection at that post.
Step 3: Clamp Mount Below T-Post Studs
Set the clamp mount just below a raised T-post stud so the stud acts as a physical stop if the mount tries to slide downward. First, inspect the post for plumb and stability. If it moves substantially during a shake test, drive it deeper before mounting anything. Place a strip of rubber gasket material or heavy-duty grip tape between the clamp and steel. This interface increases friction and limits rotation. Align the clamp at your planned viewing height, keeping it directly beneath the stud. Tighten every clamp bolt firmly with a socket wrench or adjustable wrench. Don’t rely on hand pressure; wind or contact can shift a loosely tightened mount. Finally, gently push the installed assembly in several directions. Confirm the mount remains fixed.
Step 4: Secure Camera With Locking Screw
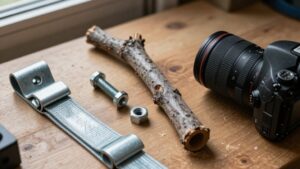
Once the clamp mount is stable beneath the T-post stud, attach the camera and insert its locking screw. Test-fit all hardware at home first to confirm matching threads. Set the camera at your chosen height, then tighten the locking screw with a compact socket wrench or adjustable wrench; don’t hand-tighten. Apply firm, controlled torque so wind and wildlife contact can’t back the screw out, but stop before you strain the threads or crack the housing.
Recheck the camera’s position after tightening. It should remain level and point precisely at the target area; use a magnetic torpedo level to confirm the horizon. For added theft resistance, use a model-specific steel lockbox and Python cable lock around the T-post to secure both camera and mount firmly in place.
Step 5: Walk-Test at 20 Feet
Before leaving the post, tighten the mount bolts with a wrench and walk through the target area at about 20 feet. Cross the camera’s view at roughly a 45-degree angle to the trail, rather than walking straight toward it. This path gives the motion sensor a lateral movement signal and time to trigger.
Use live view if available or review a test capture. Confirm that your body appears within the frame and that your route passes through the camera’s detection zone. Check that the camera remains fixed on the trail section. If it misses you, triggers late, or records only part of your body, adjust the camera’s aim or mounting height. Retighten bolts then repeat the angled walk until detection and framing are reliable.
Step 6: Pack Out Zip-Tie Trimmings
Make a final sweep around the T-post and your work area for every cut zip-tie tail, including pieces hidden in grass or leaf litter. After securing the camera and solar-panel cables, inspect the post base and nearby ground systematically. Use a finger or boot toe to separate grass, leaves, and soil where small plastic tails can disappear. Collect each trimming immediately; don’t leave any behind for wildlife to chew, carry, or ingest.
Put scraps in a sealed pocket, zippered pouch, or gear bag rather than another field compartment. Before you leave, confirm ground is clear and account for ties you trimmed. Packing out these pieces completes installation cleanly and keeps nondegradable plastic out of the site. Make this your final T-post setup step always.
Review Test Images at Dusk
At dusk, review the camera’s test images to catch framing and exposure problems that daylight can hide. Changing light shows whether you’ve aimed the unit too high, too low, or toward a distracting bright area. Confirm that the target trail or scrape sits centered in the frame, the horizon is level, and the intended motion-detection zone is visible. Check each image for glare or lens flare; if the sun enters the lens, change the camera’s direction.
Verify that subjects remain recognizable at your selected height. For deer, set the camera about 3 to 4 feet above ground as a useful starting point. If you reposition it, tighten the mount bolts fully before testing again. Walk through the zone, take another test image, and verify the framing.
Troubleshoot Metal-Post IR Reflection
Night test images can reveal a problem that dusk checks may miss: infrared light reflecting off the exposed T-post and back into the camera lens. If you see flare or a washed-out edge, inspect the post’s position.
| Symptom | Cause | Correction |
|---|---|---|
| Bright flare | Post reflects IR | Re-aim camera |
| Post remains visible | Metal stays framed | Add matte cover |
| False triggers | Loose fabric moves | Secure cover |
Use live view to keep the trail inside the motion-detection zone while shifting the post outside the nighttime frame. Test again to confirm glare is gone. If metal must remain visible, cover the exposed section with matte camouflage tape or fabric. Don’t obstruct the lens or IR emitters. Fasten it tightly so wind can’t flap and trigger false motion events.
Retorque Clamp After First Rain
After the first rain, recheck every clamp bolt with a socket wrench or adjustable wrench, as moisture and initial settling can loosen the connection. Hold the camera mount steady while you tighten each bolt so the clamp doesn’t rotate around the T-post. Verify that the clamp remains seated firmly against a raised T-post stud; this contact helps prevent downward sliding.
If the assembly has shifted or rotates during testing, install a strip of rubber gasket material or heavy-duty grip tape between the clamp and post. Then perform a controlled shake test. If the mount moves, retighten the bolts evenly, hold the camera in position, and confirm its aim still covers the intended trail. Inspect for fresh water channels around the bracket before leaving the site.
Conclusion
Mount your trail camera at deer height, wear gloves, and clear grass before you work. Verify cellular signal, then clamp the bracket below the T-post studs so it can’t creep or twist. Aim the camera, capture test images at dusk, and inspect them for metal-post infrared flare. If glare appears, offset the camera or add a spacer.
Pack out zip-tie ends, then retorque the clamp after the first rain. You’ll get a secure, repeatable setup.